SONY TC-150
| Student(s) | Luca Ferrari, Zheng Chen |
|---|---|
| Academic Year | A.A. 2024-2025 |
| Course | Digitally Designed Objects for Fast Prototyping |
| Delivery Date | |
| Output type | Physical |
| License | CC BY-NC-SA |
Abstract
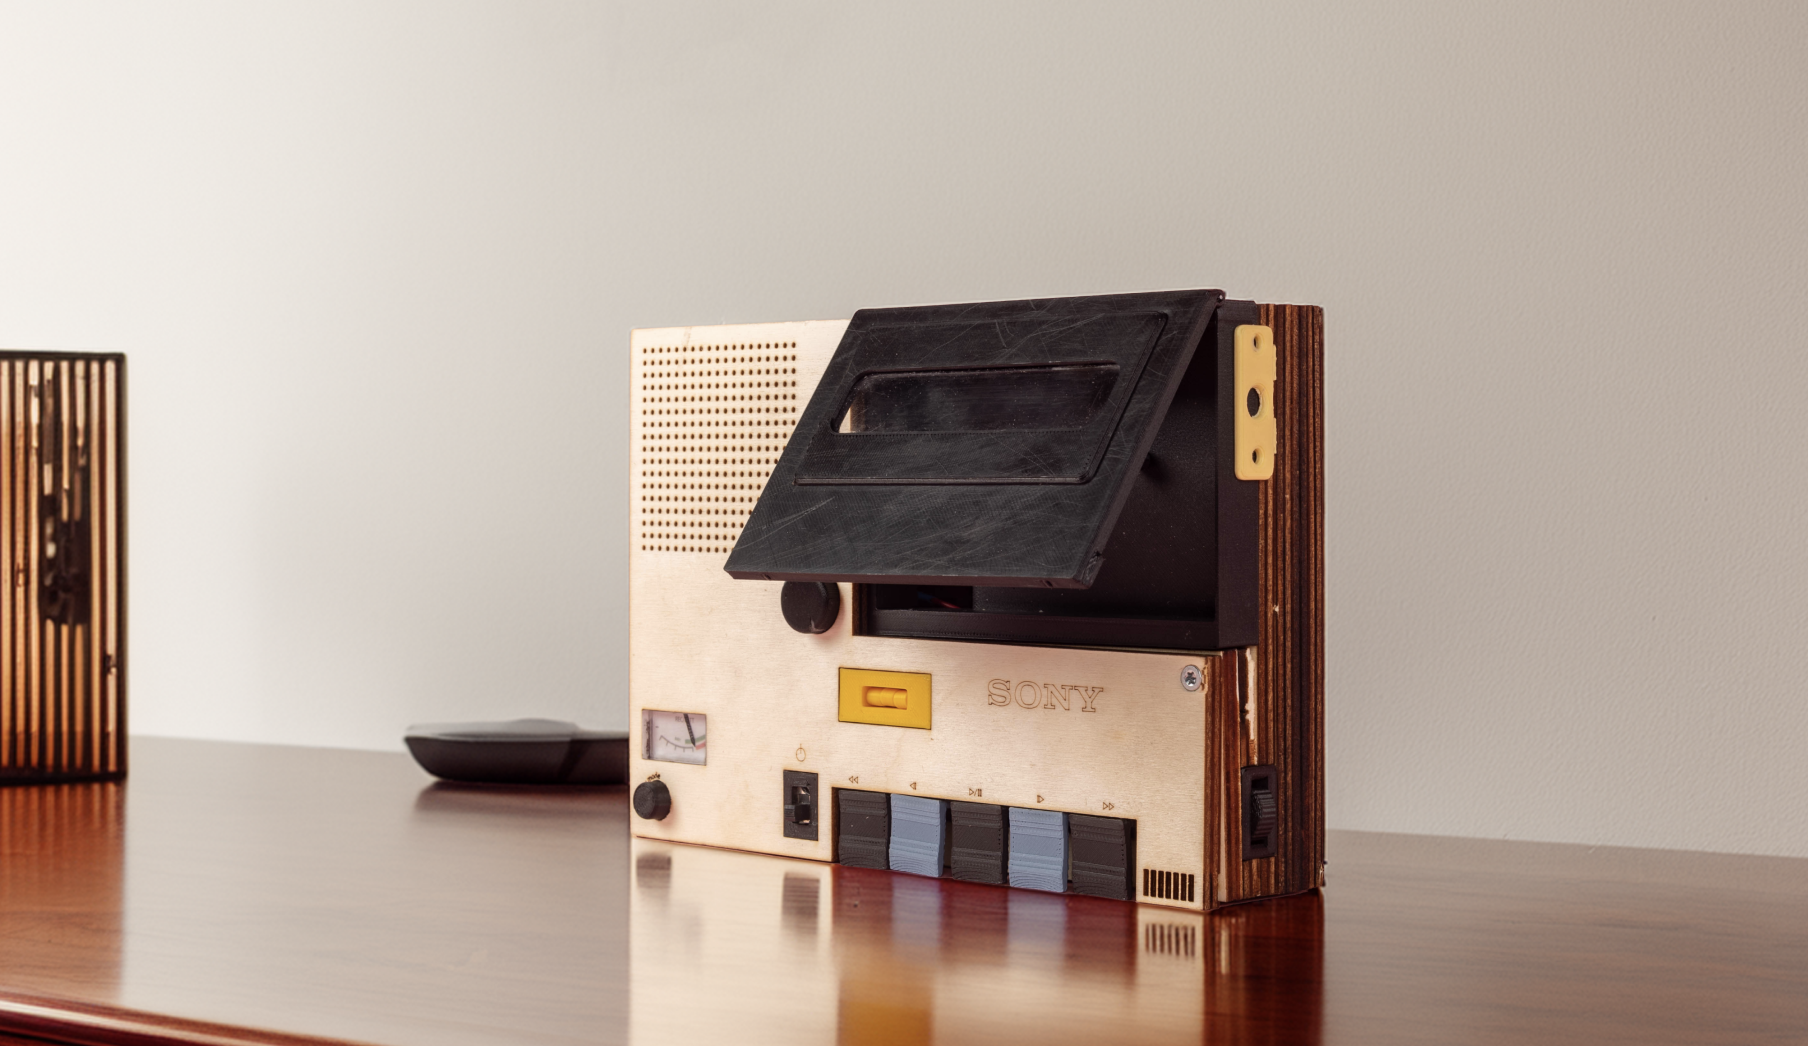
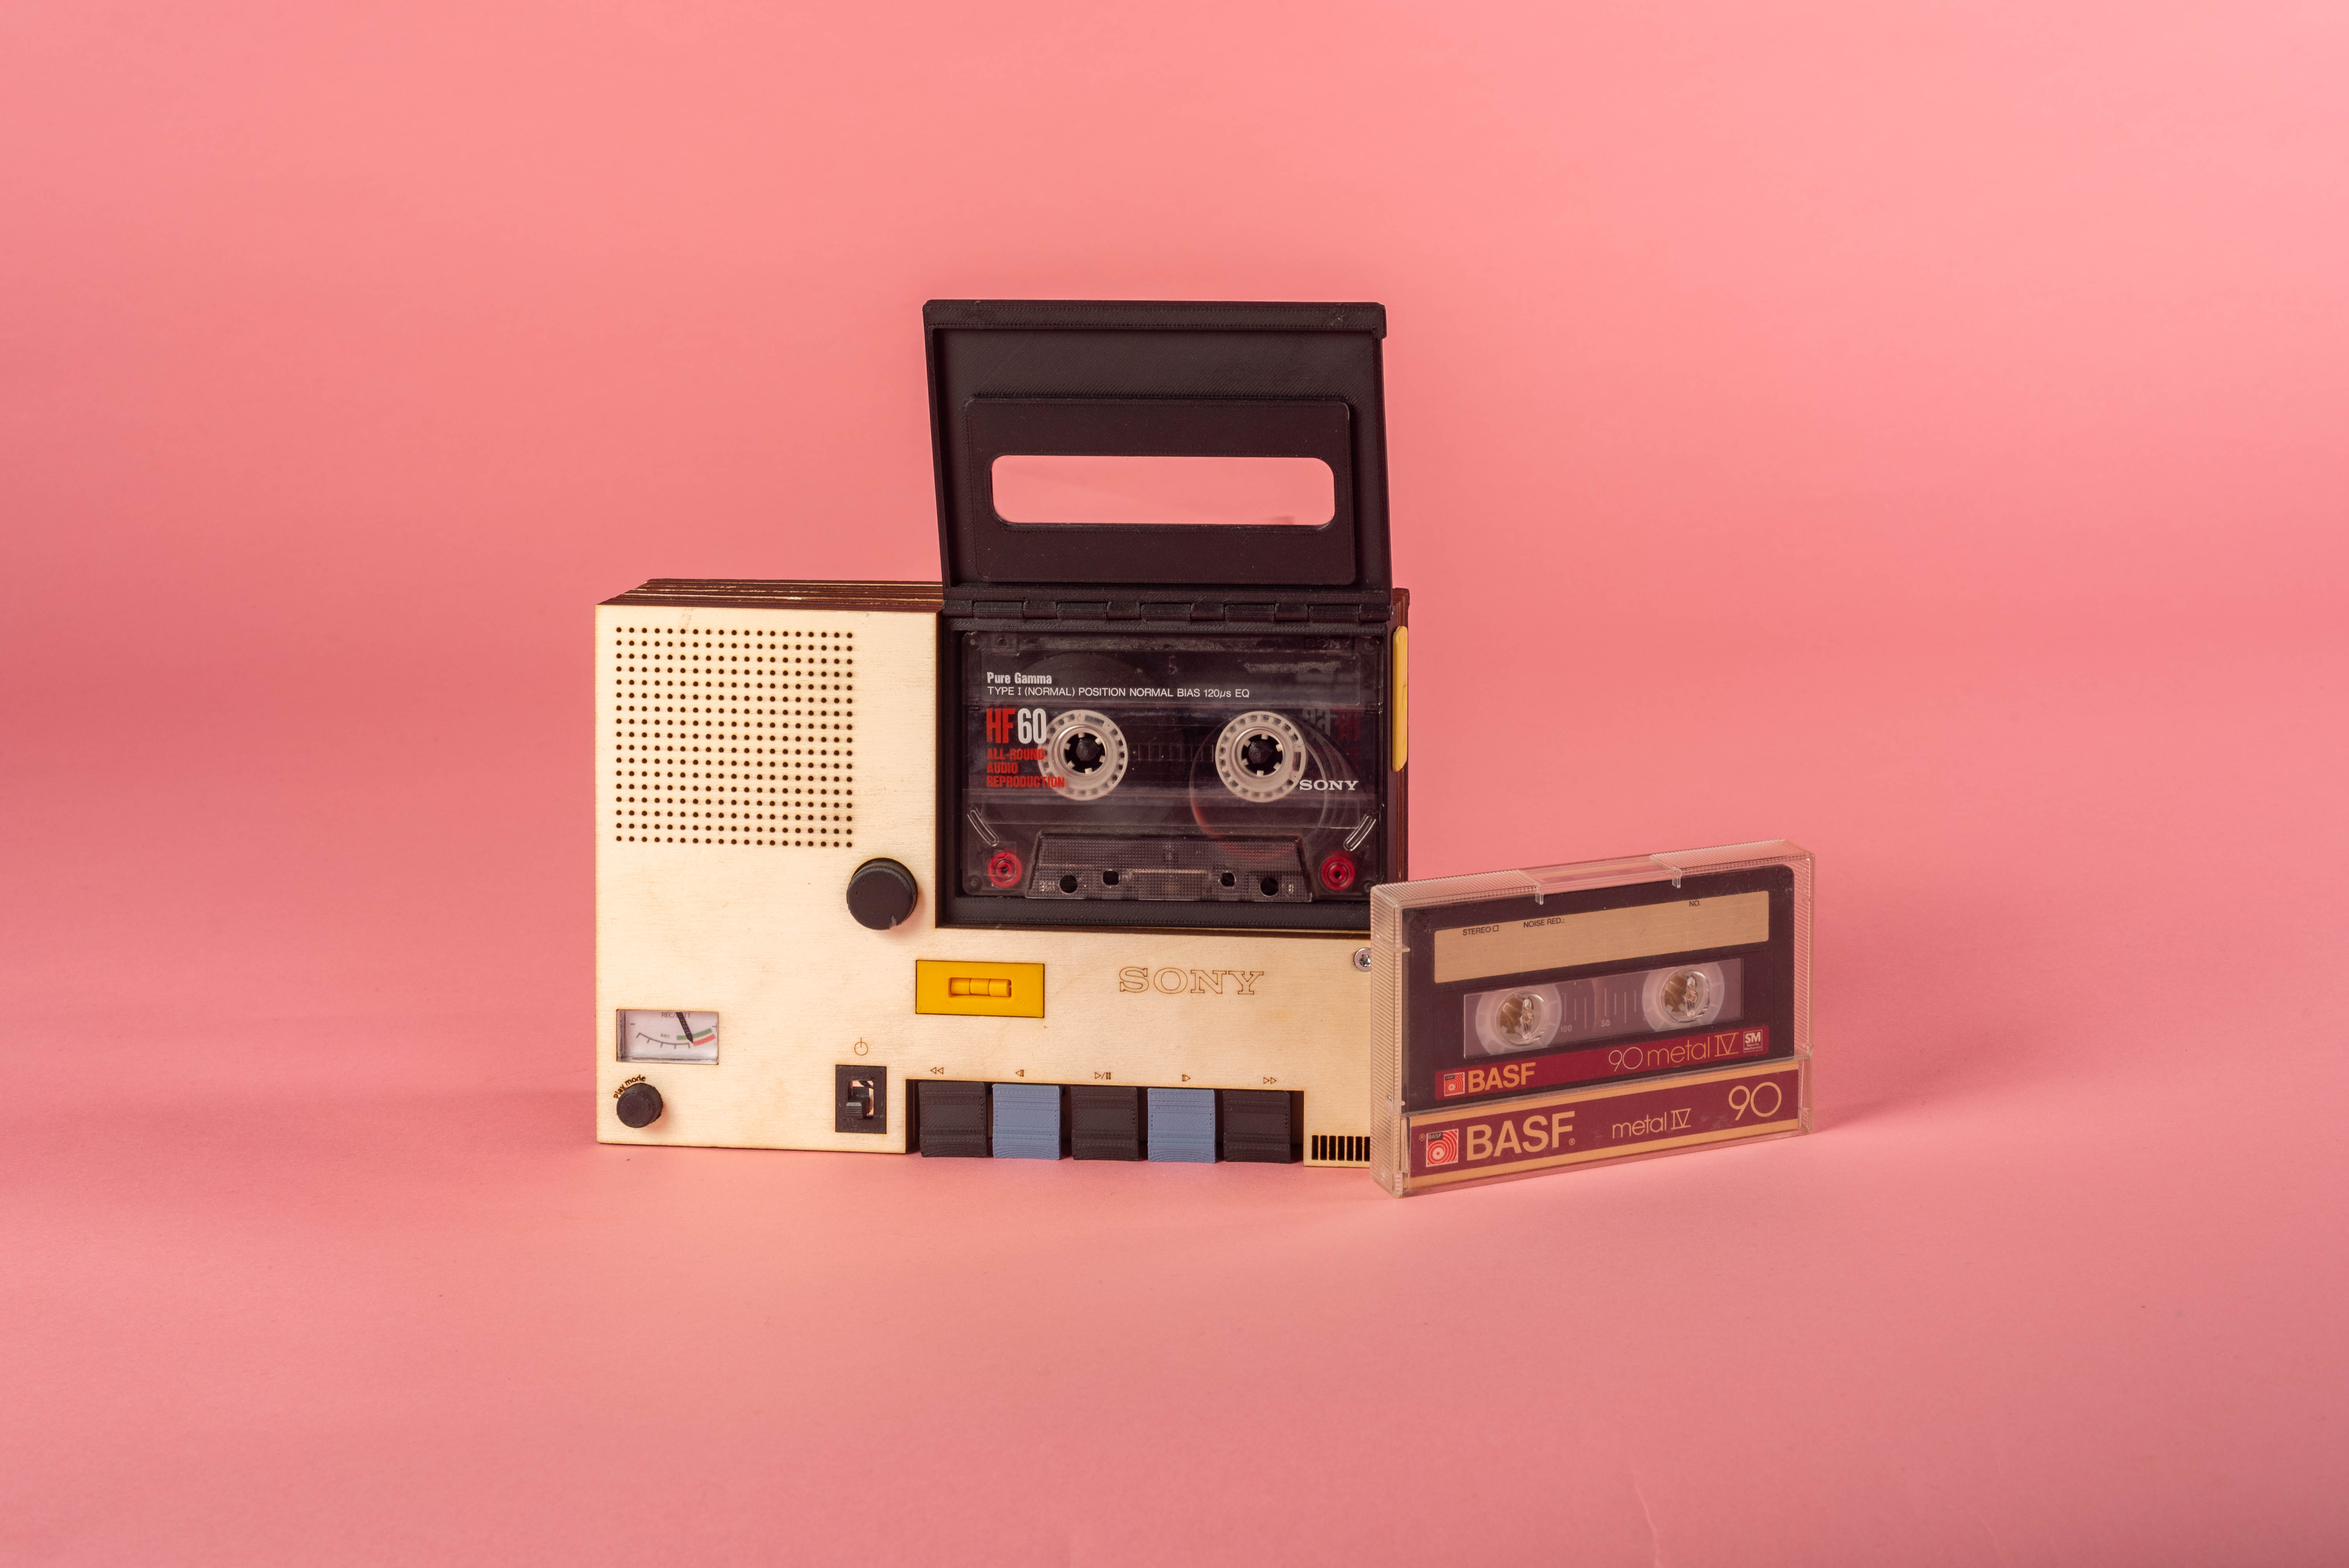
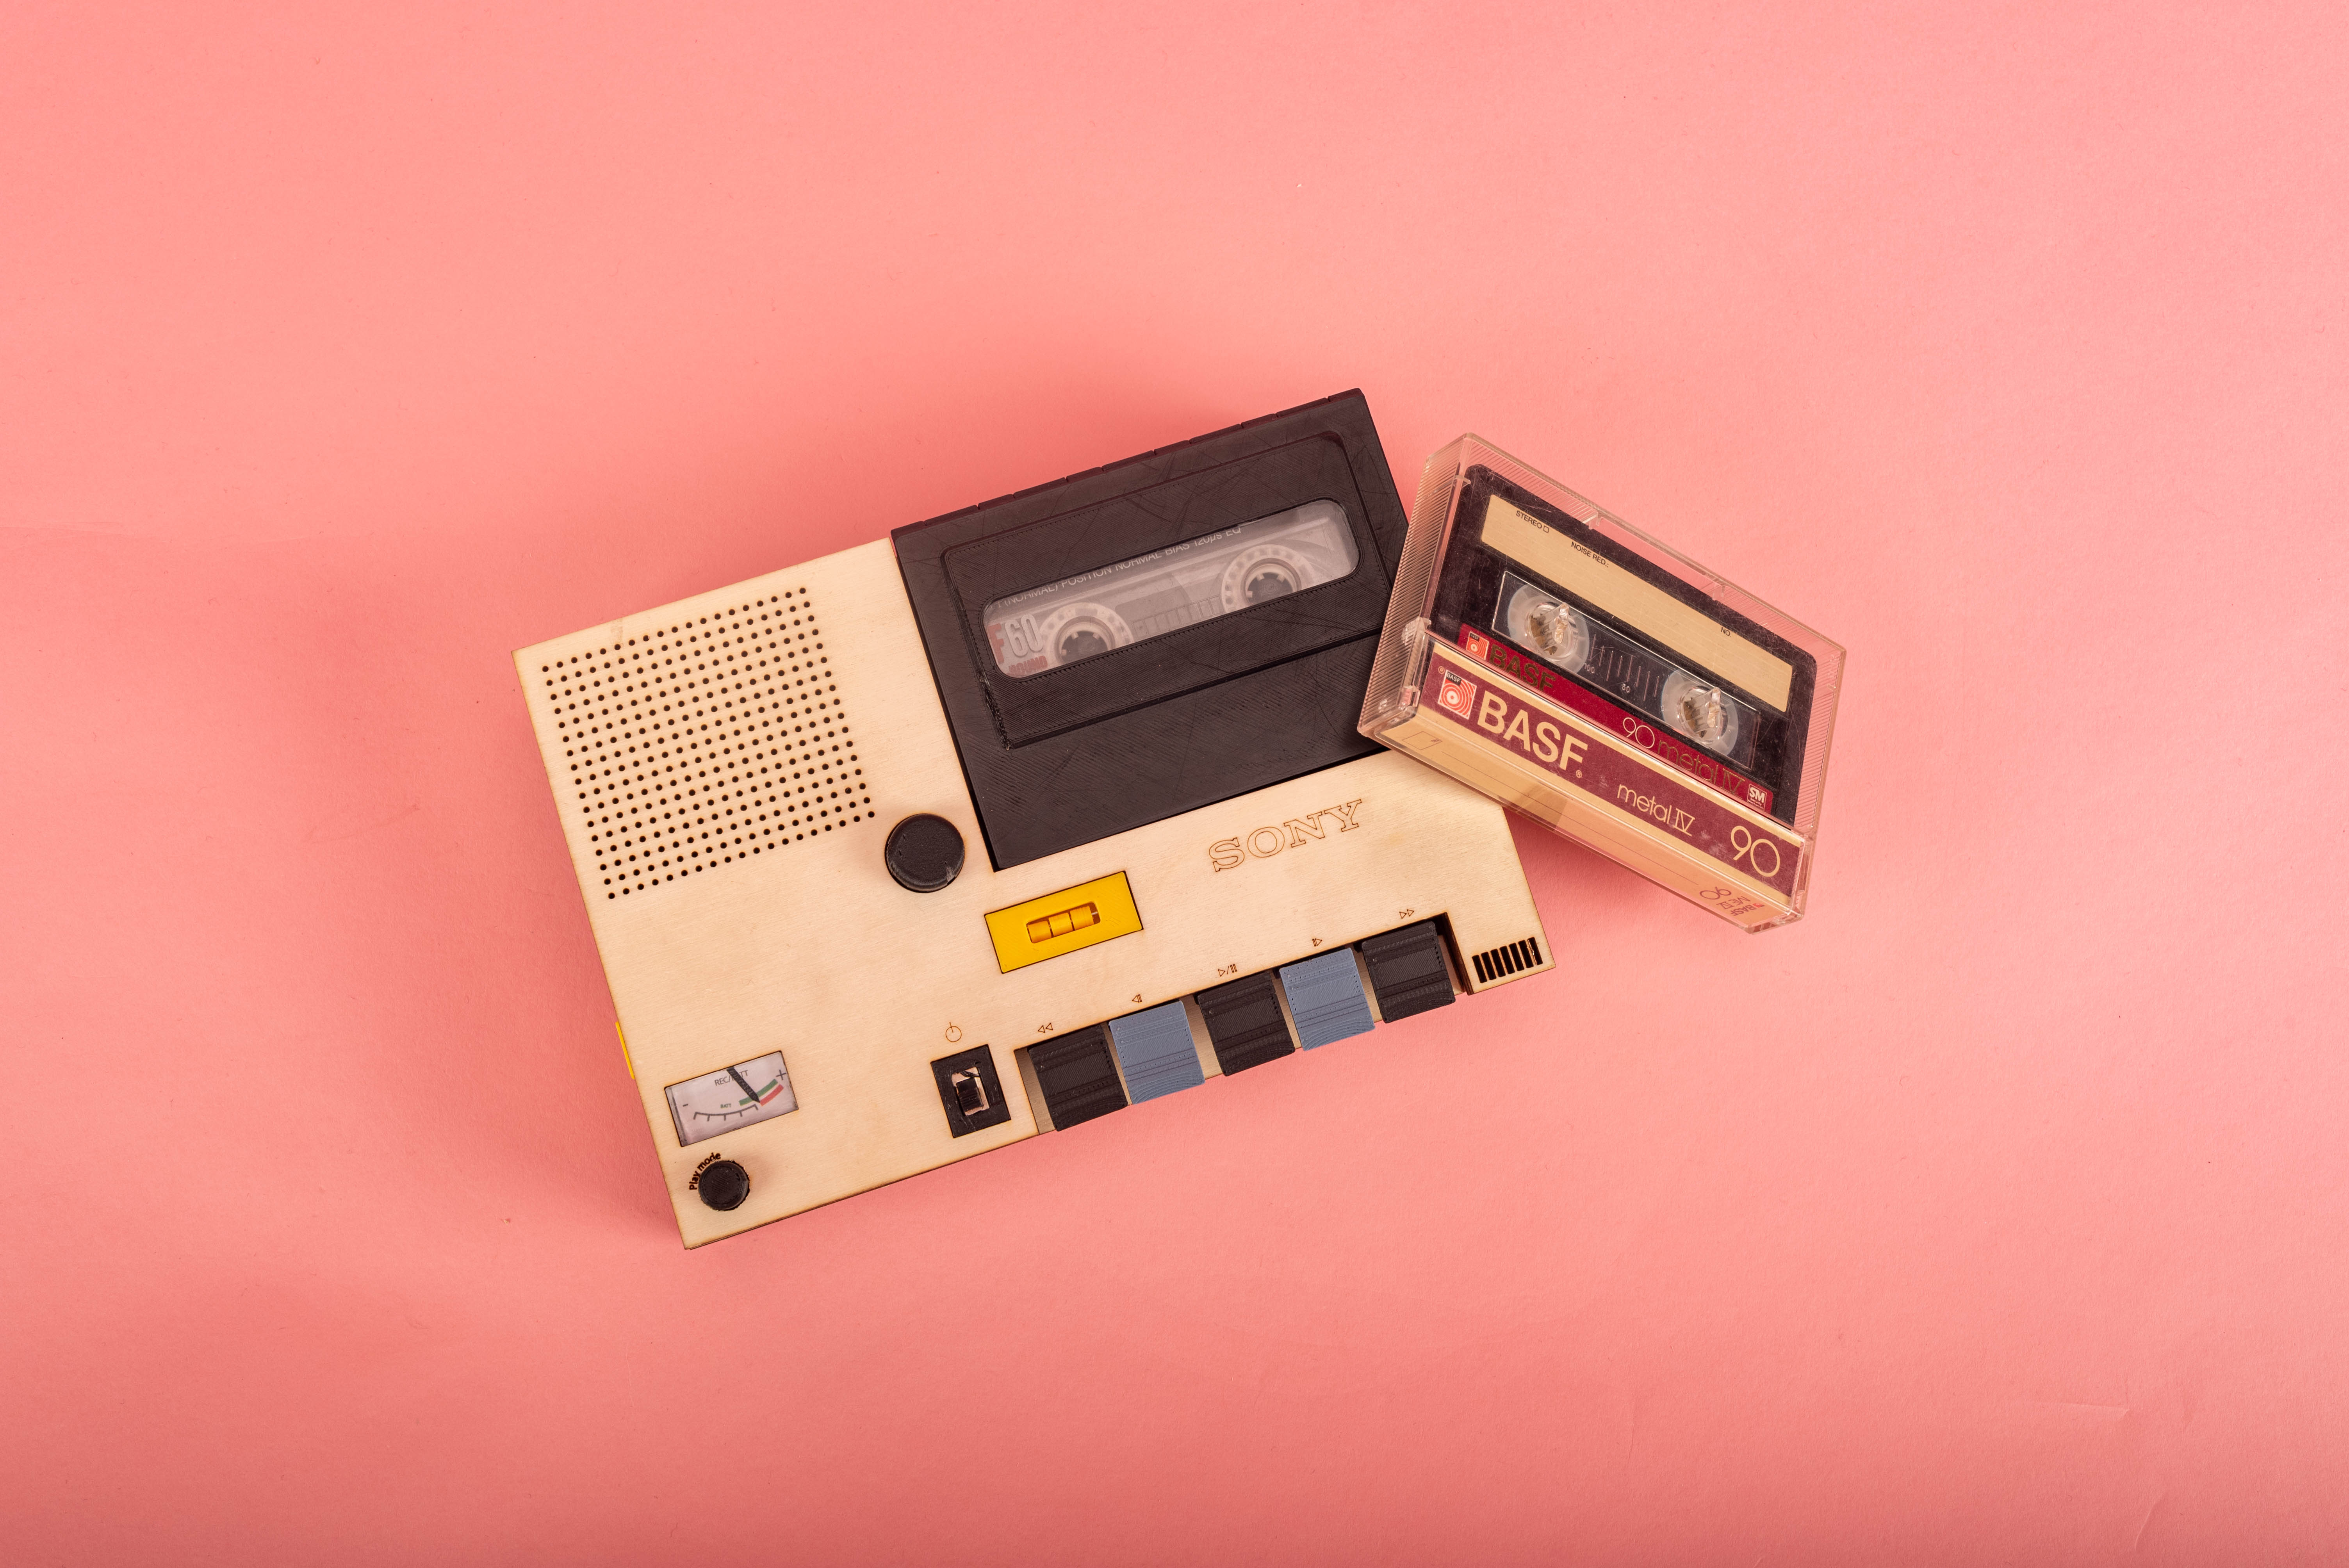
The Sony TC-150 is a classic portable reel-to-reel tape recorder, launched in the 1970s. It was highly regarded for its compact and sturdy design as well as its versatile functionality. It supports 3-inch tape reels, features mono recording, and includes a built-in speaker and microphone, with the option to connect an external microphone. It also offers two recording speed settings and can be powered by both batteries and an AC adapter. Ideal for interviews, field recordings, and home use, the TC-150 stands as a significant milestone in the history of Sony's portable recording devices.
Video
Selected Images

Concept
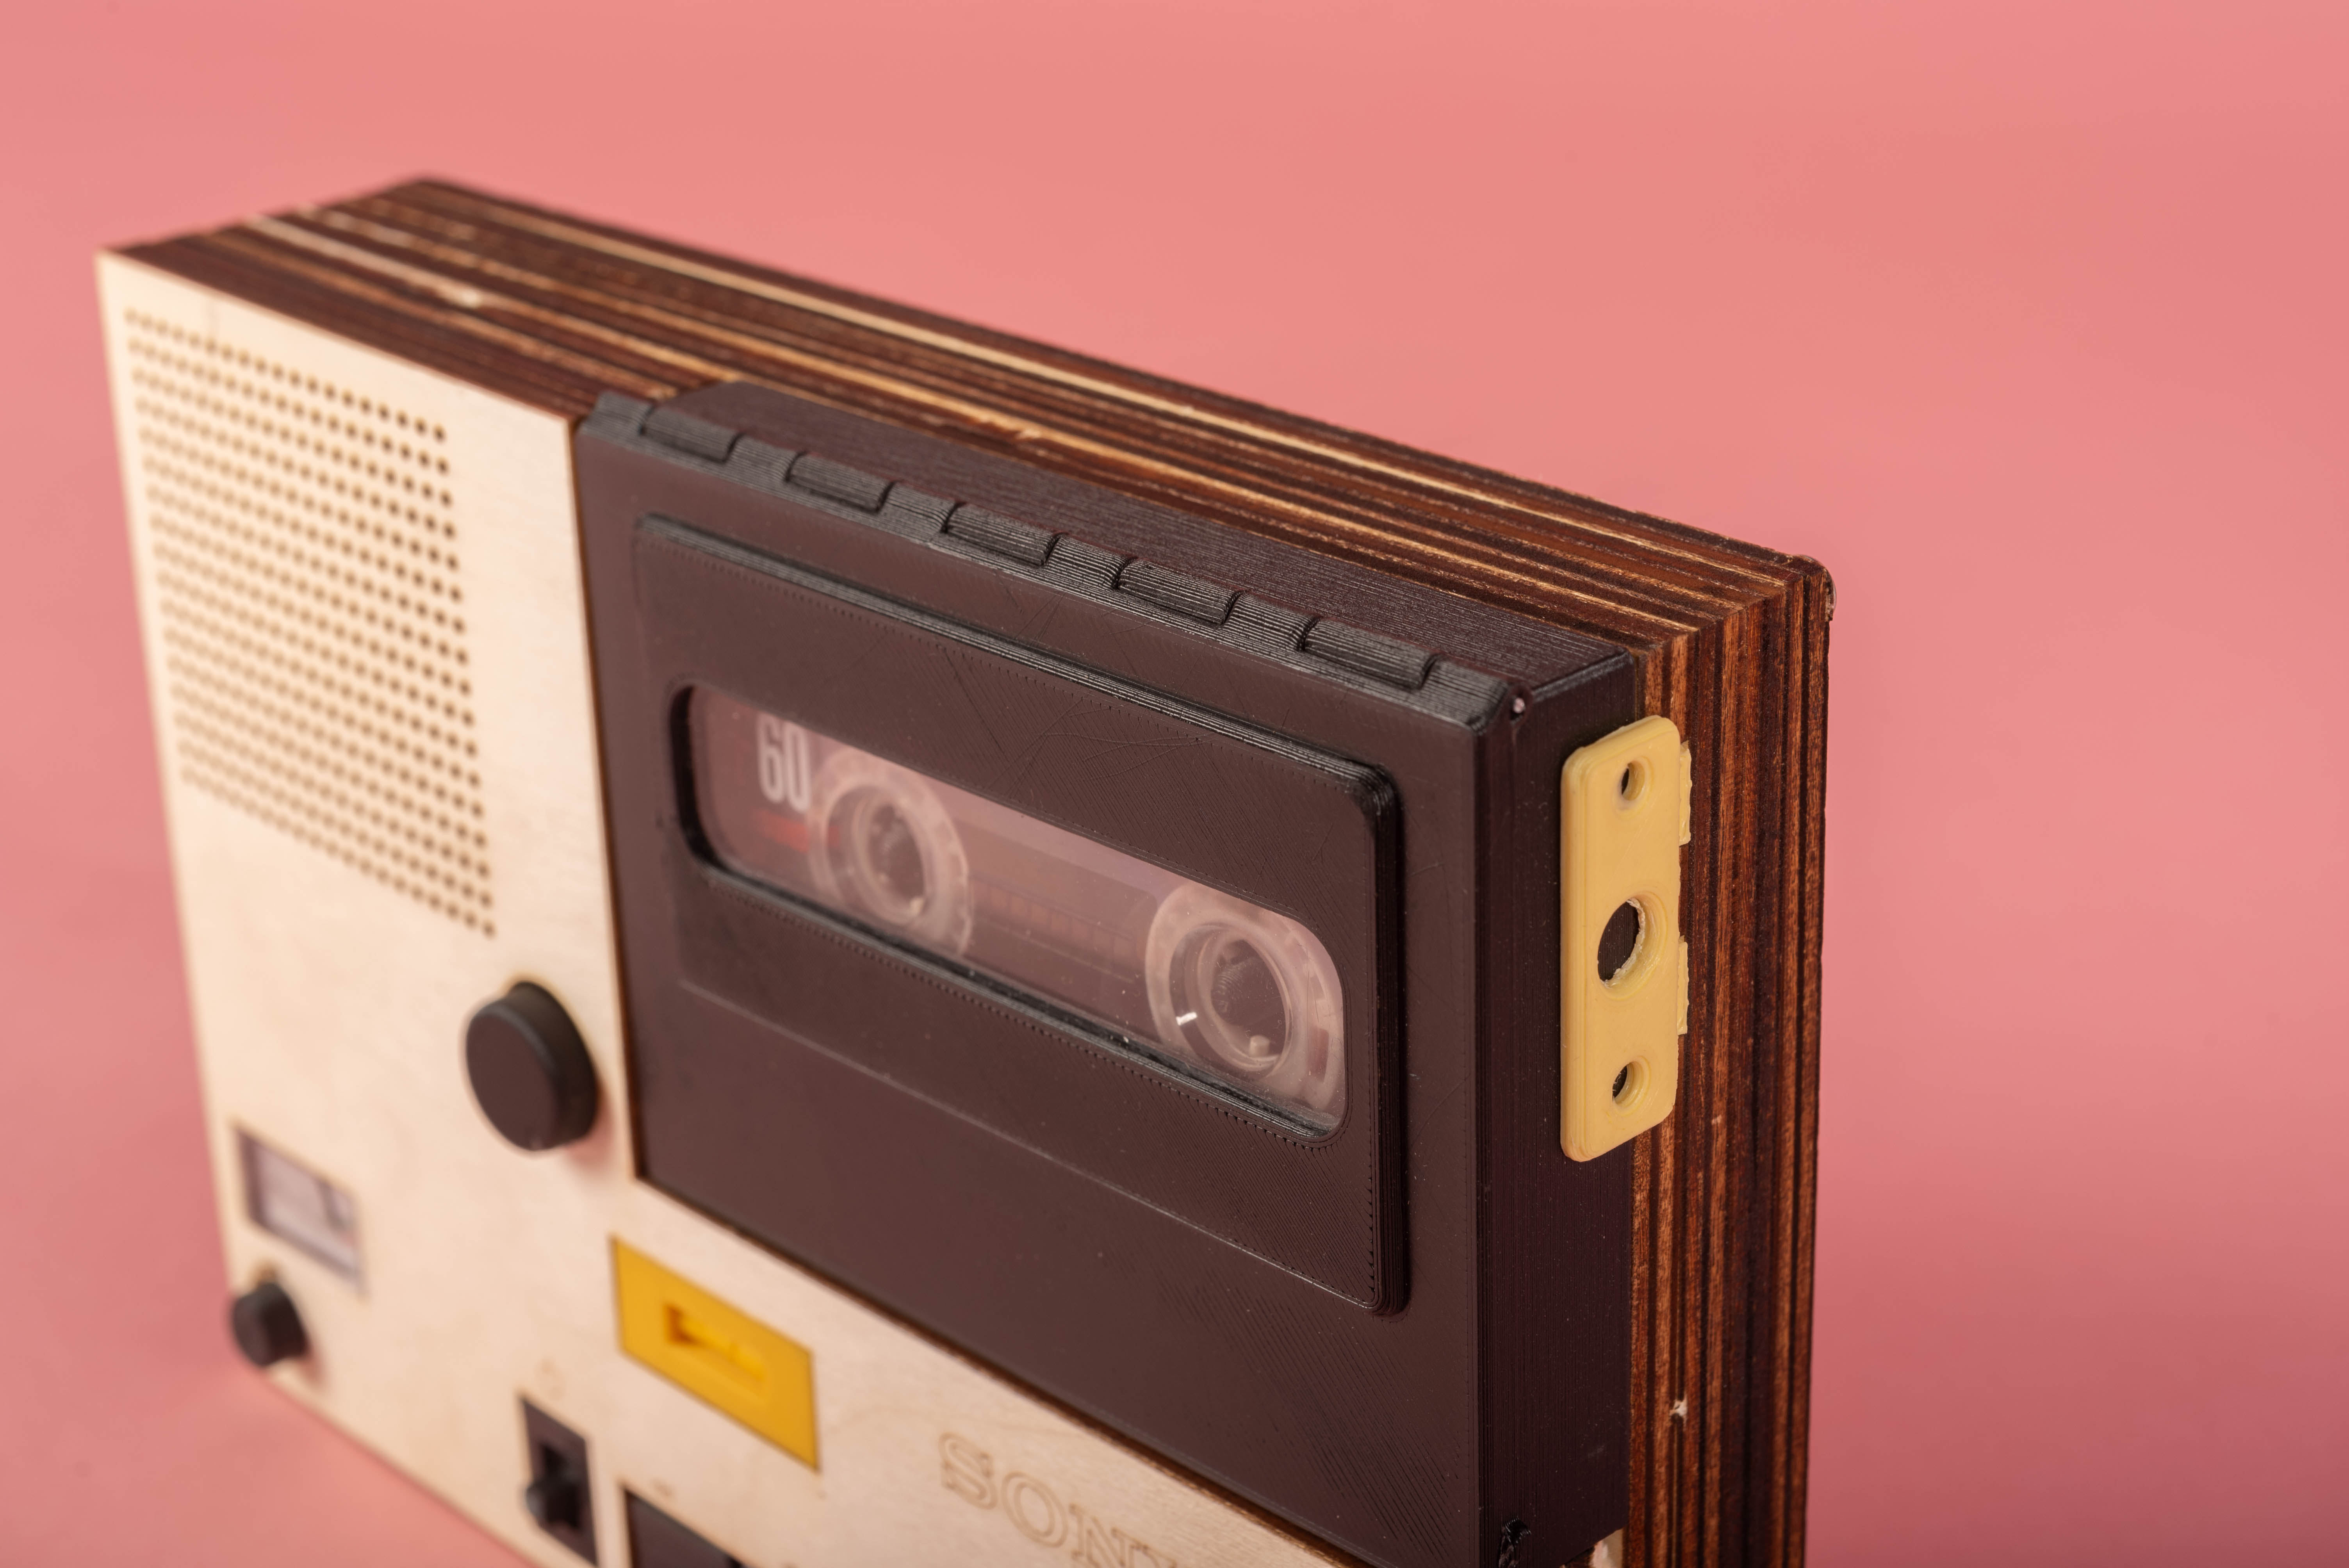
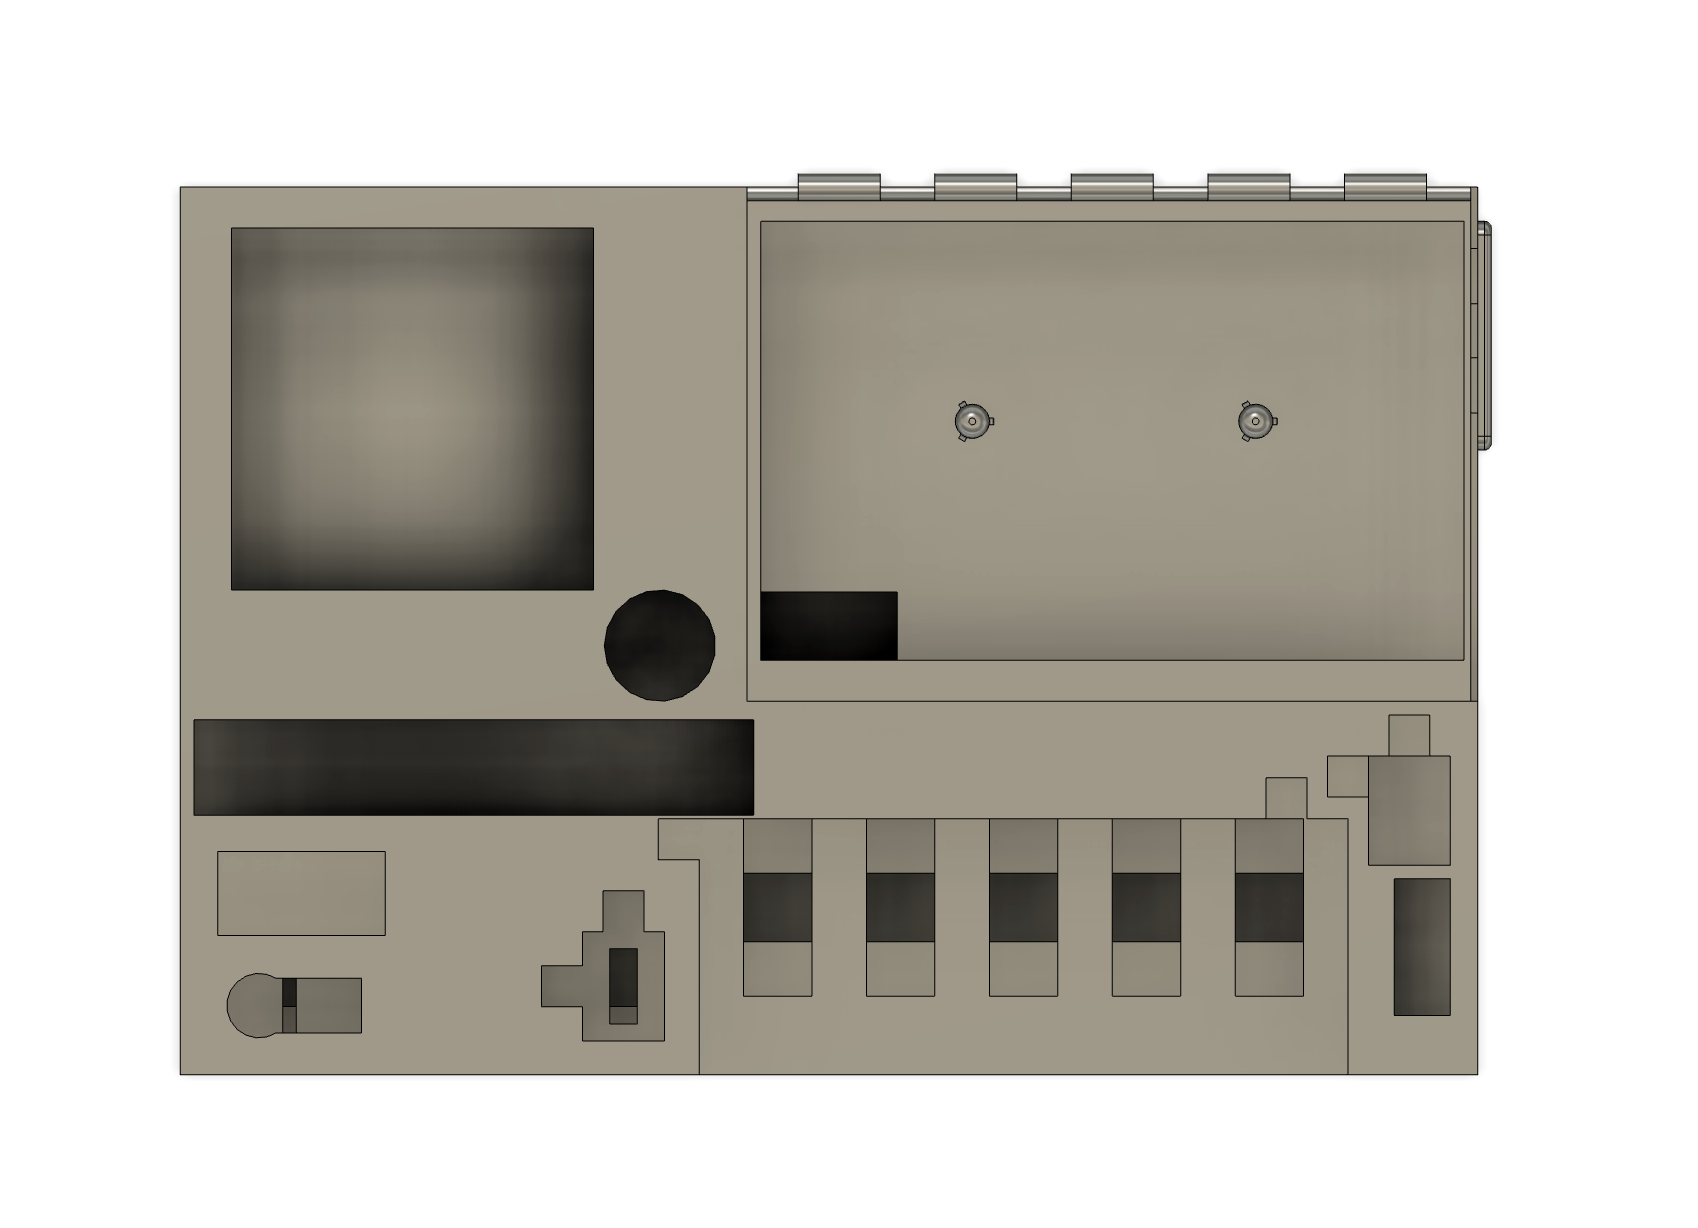
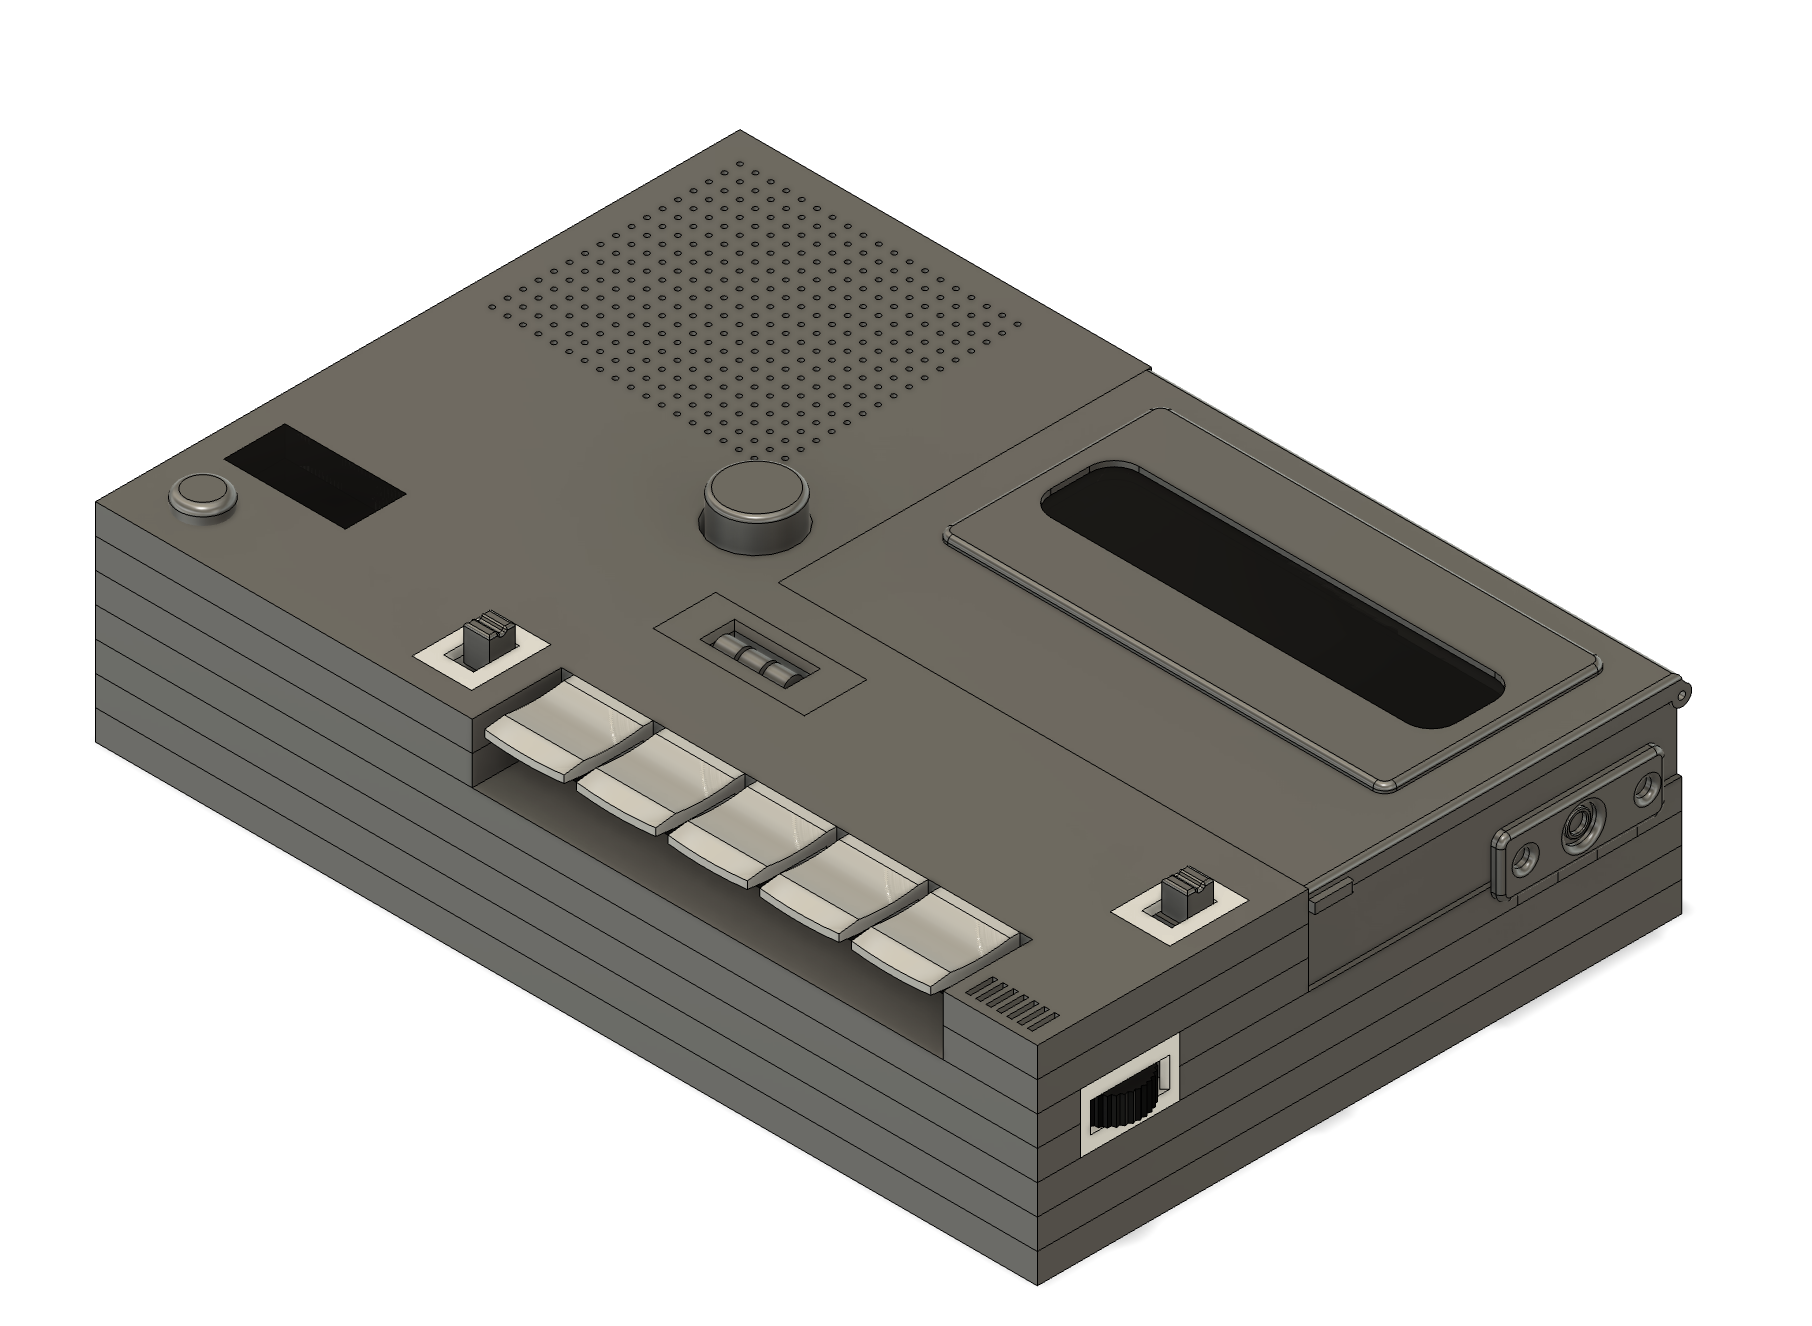
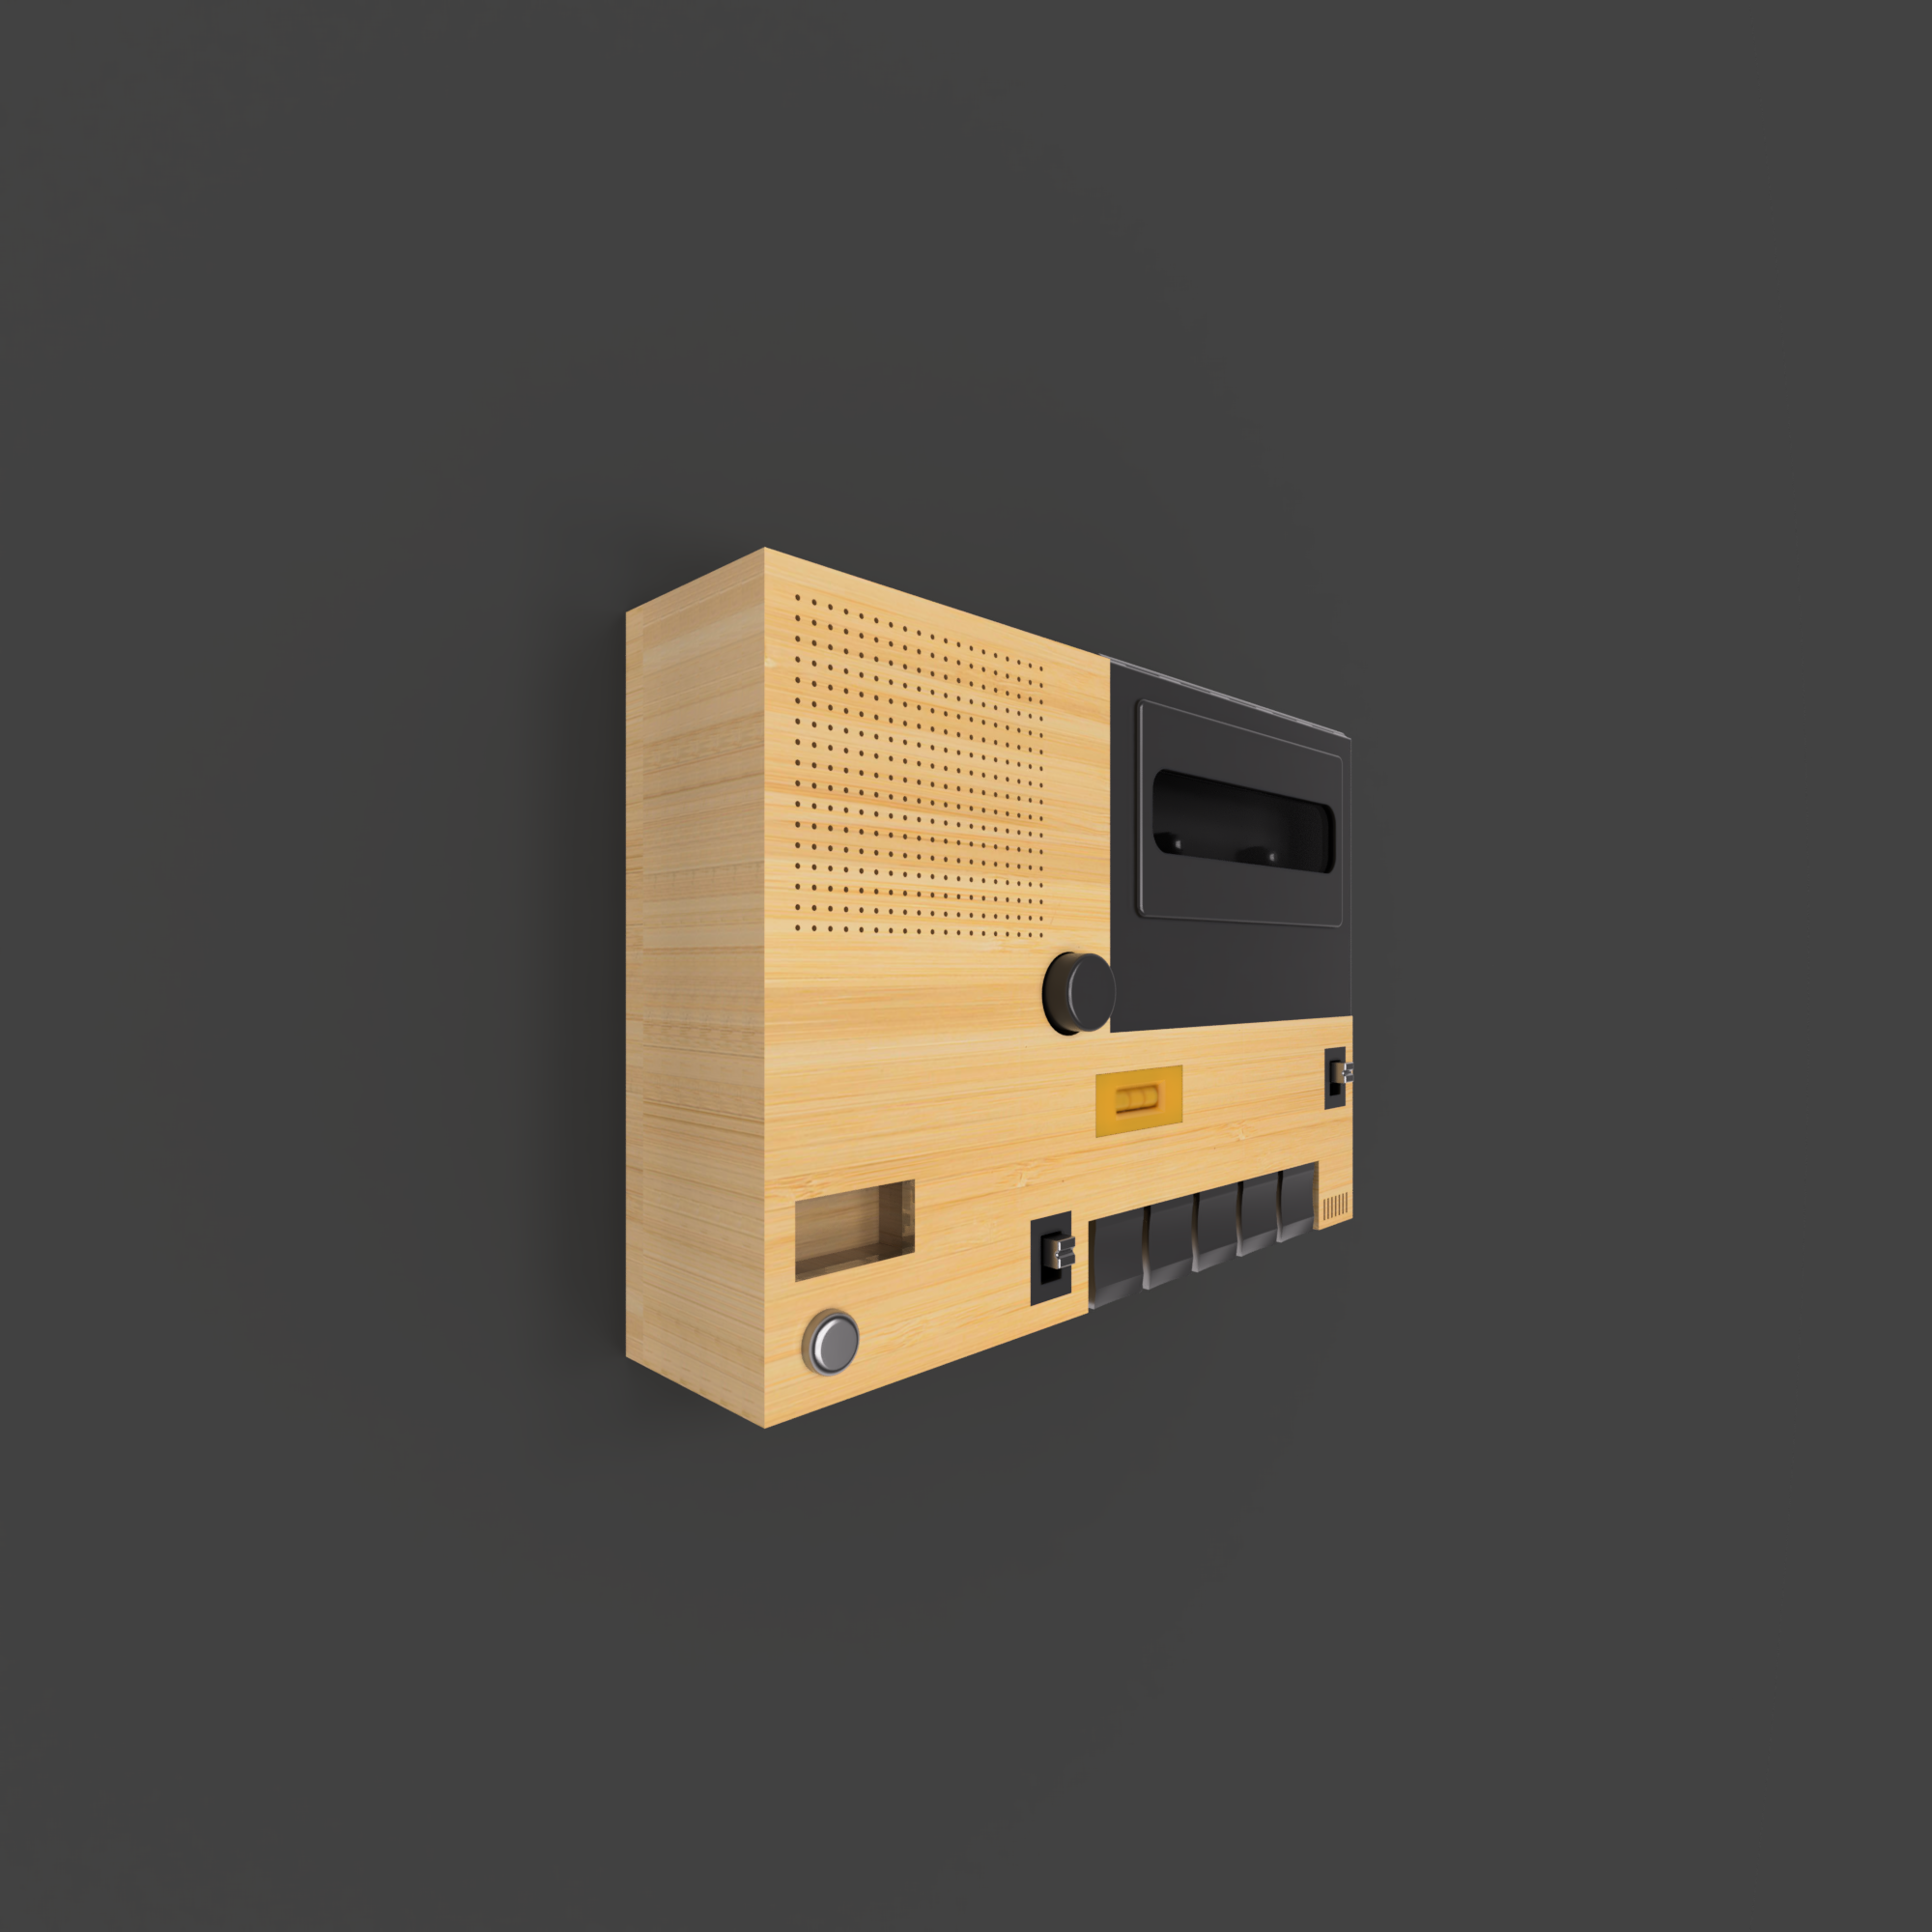
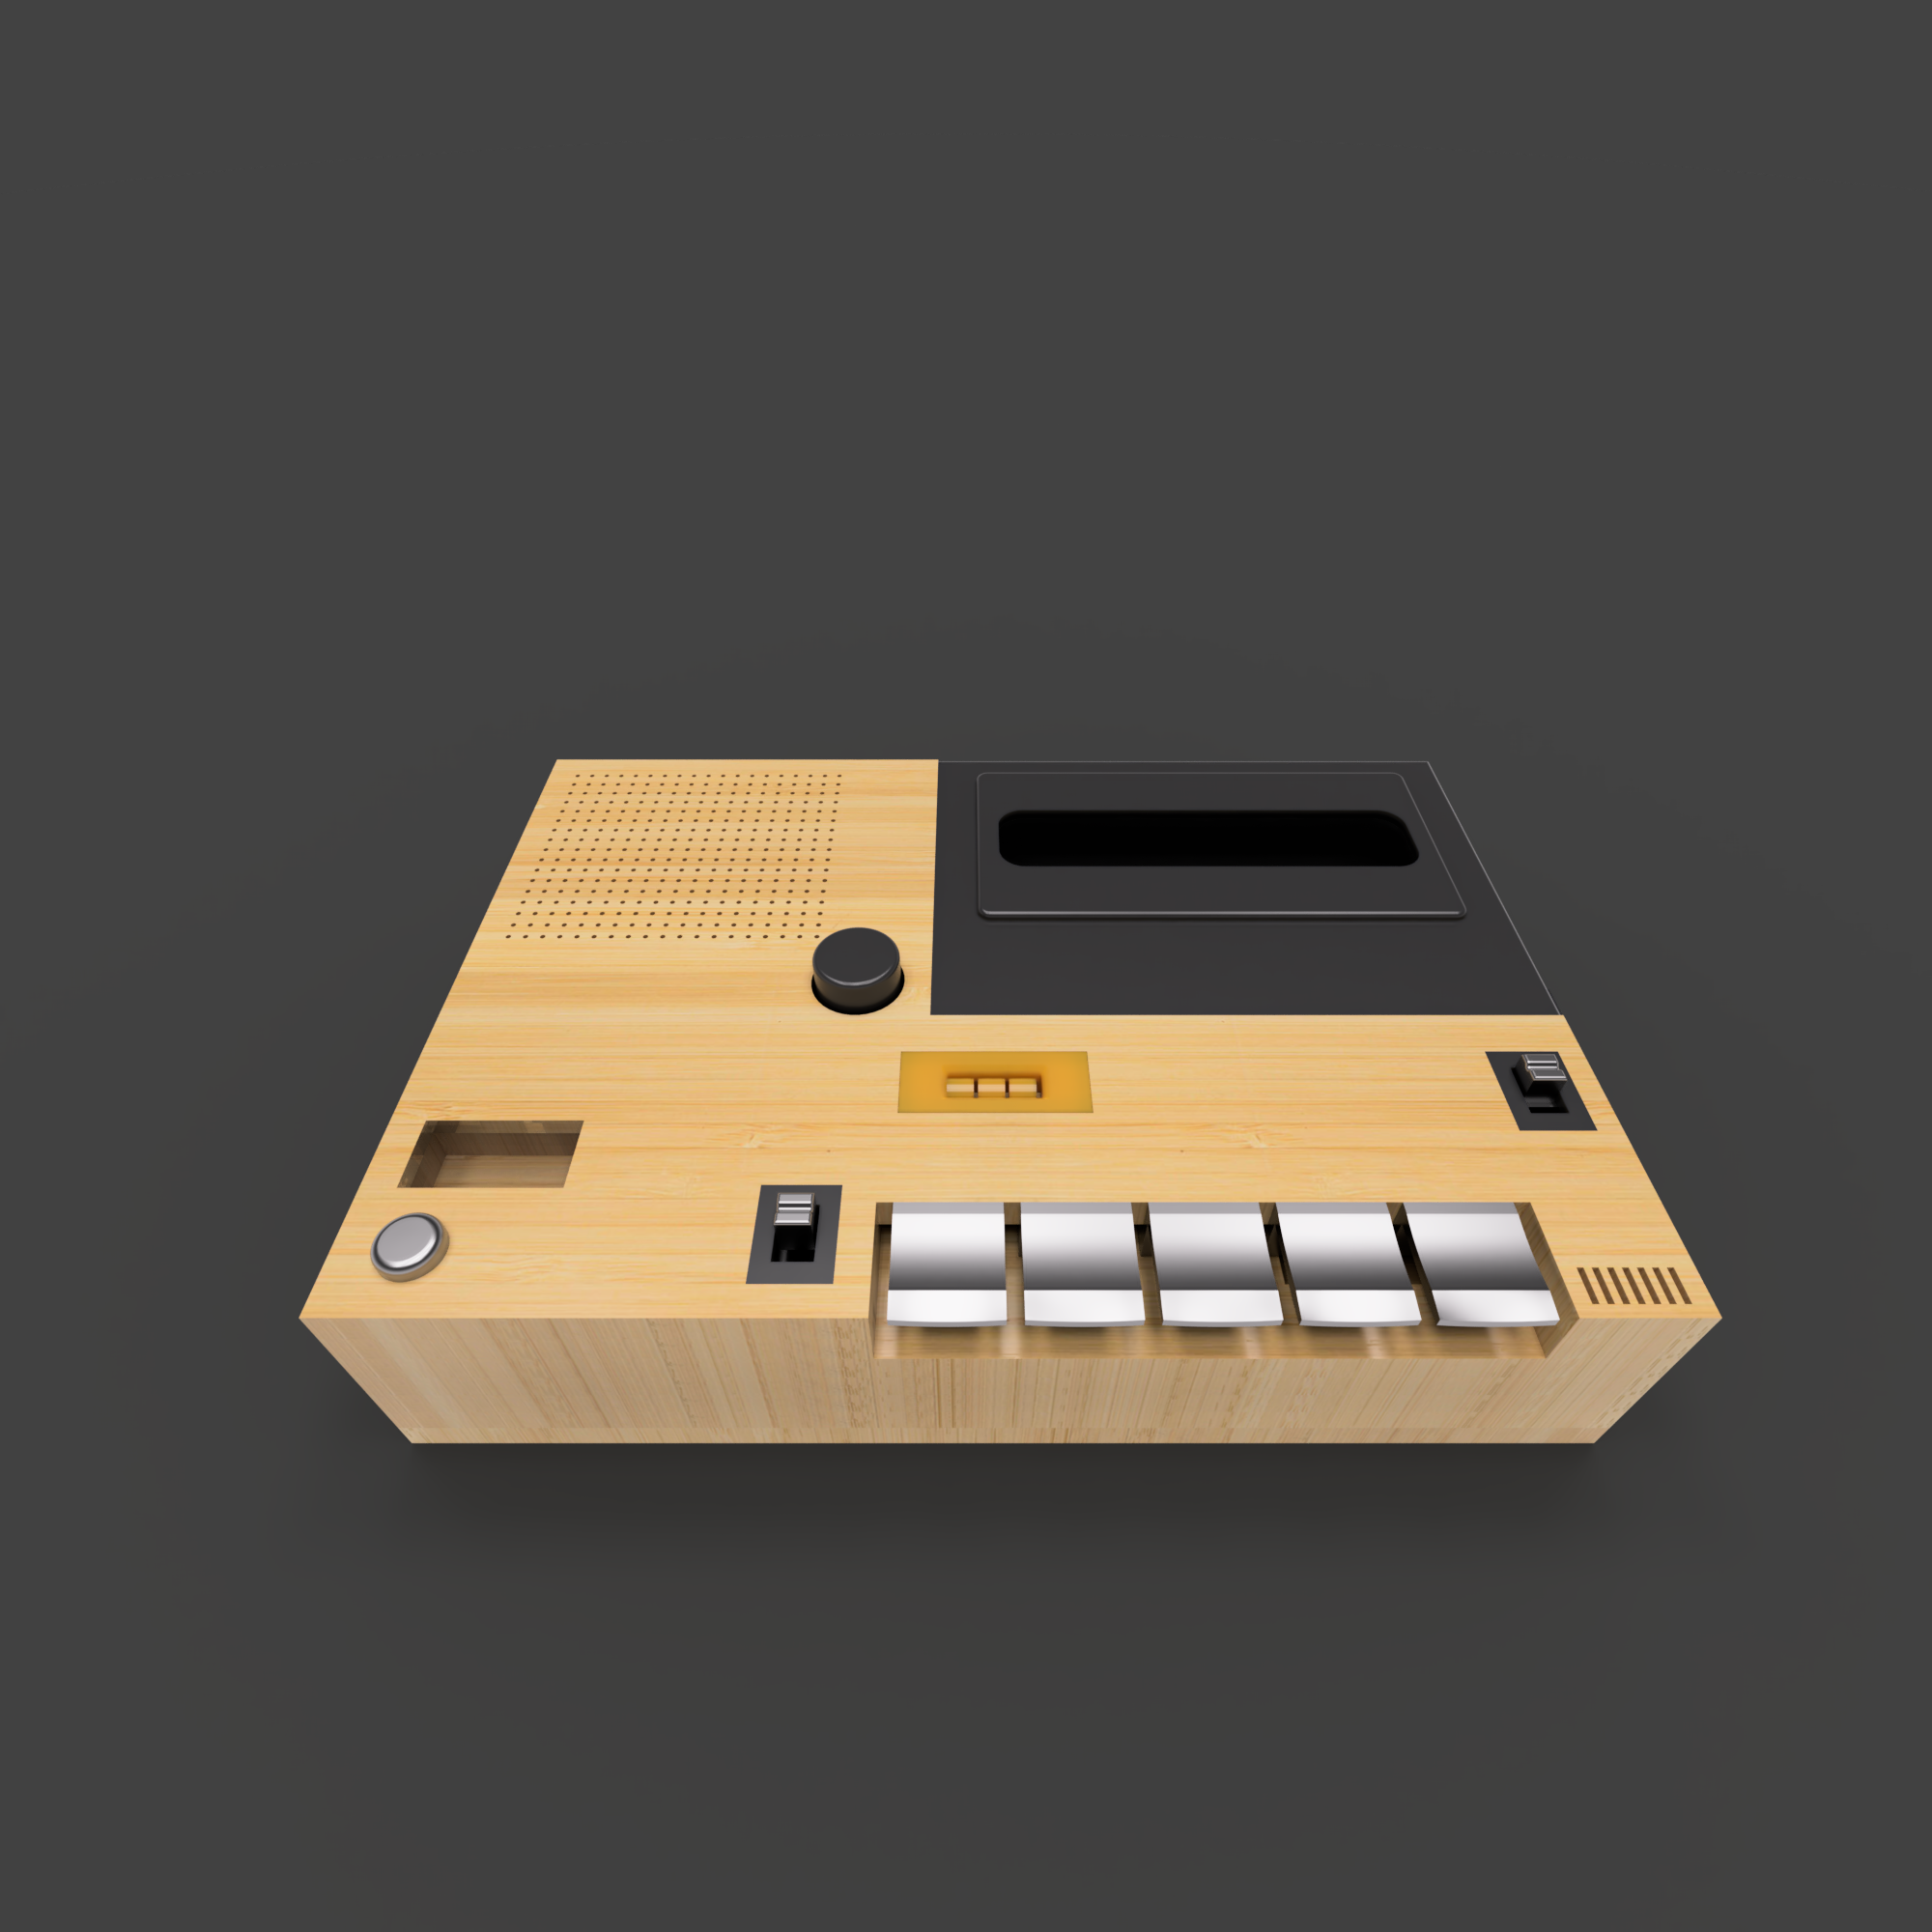
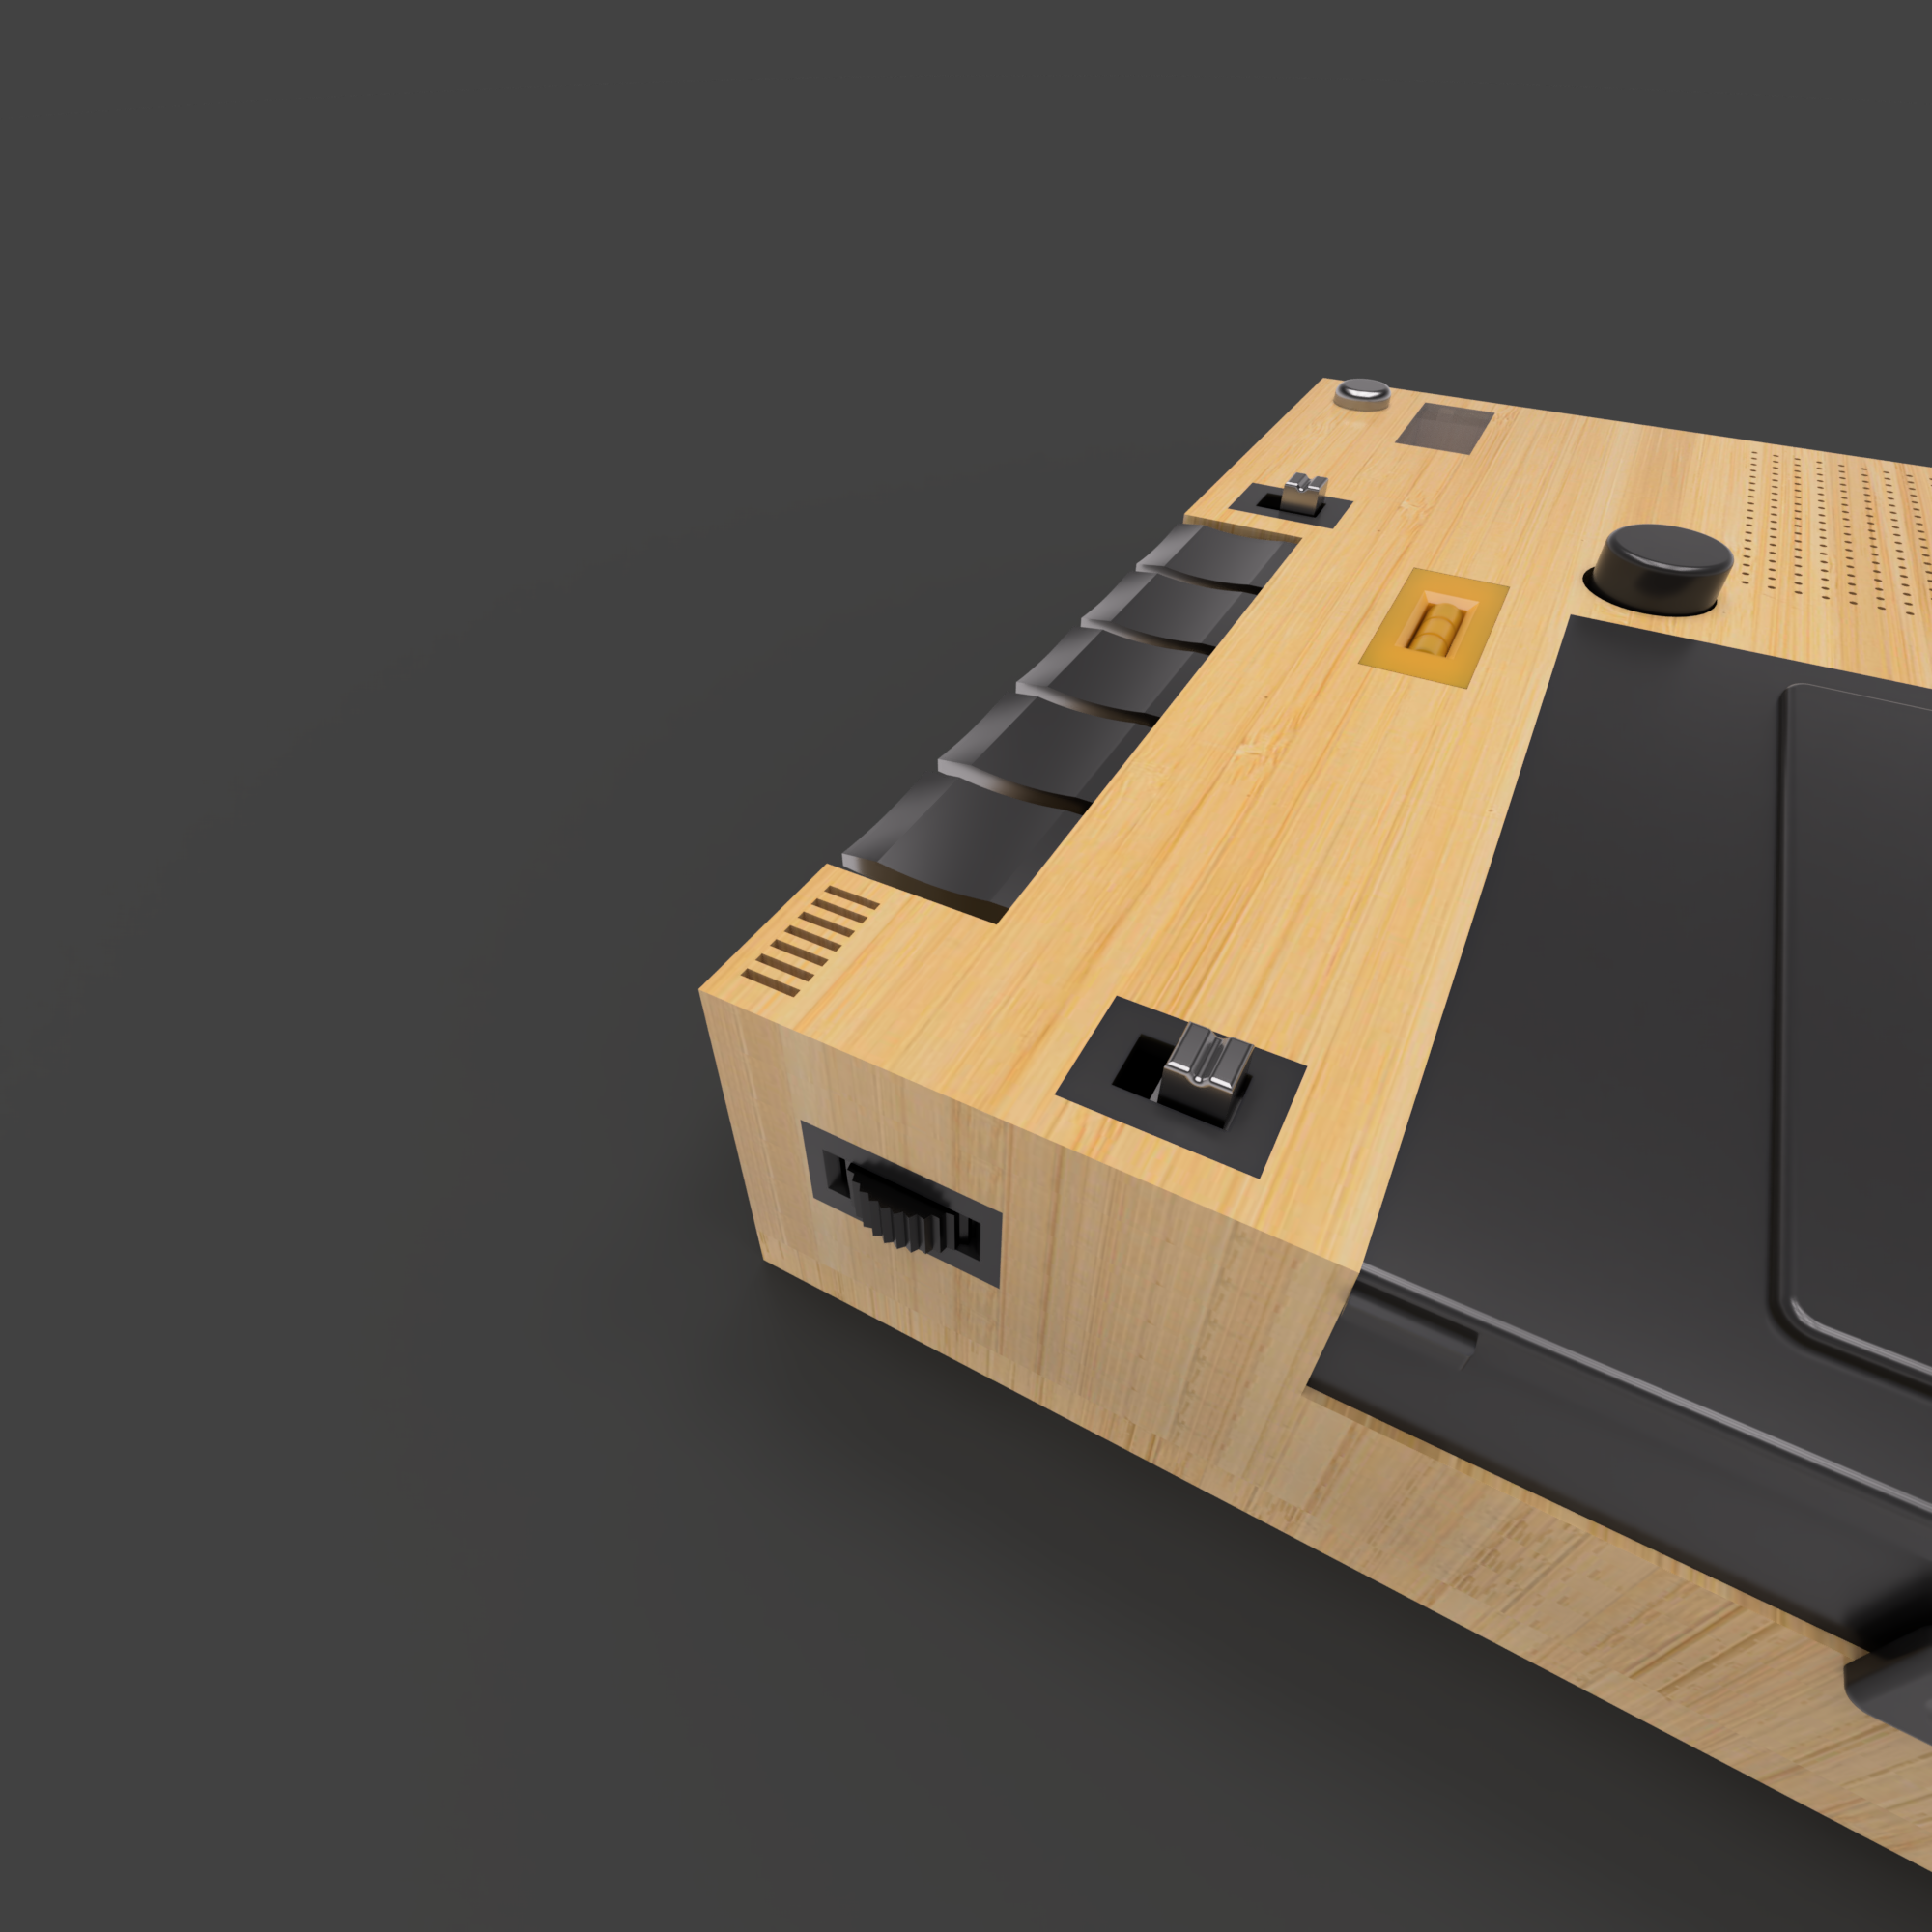
For this project, we blended vintage design with a modern sensibility, combining the aesthetics of a classic tape recorder with new technology. The exterior is made of natural wood and metal, combining minimalist lines and soft tones for a unique sense of craftsmanship. The front layout is intuitive and functional, including integrated speakers, operating buttons and knobs that allow users to play, record and maneuver with ease. The black tape compartment cover design gives the product an added sense of detail, and the vintage buttons and toggles further emphasize the joy of manual operation. This device is not only a tribute to the classic tape player, but also a piece of art and a practical tool in modern homes and creative spaces, suitable for music appreciation, recording creation and decorative furnishings to meet the multiple needs of vintage enthusiasts and design seekers.
User Journey
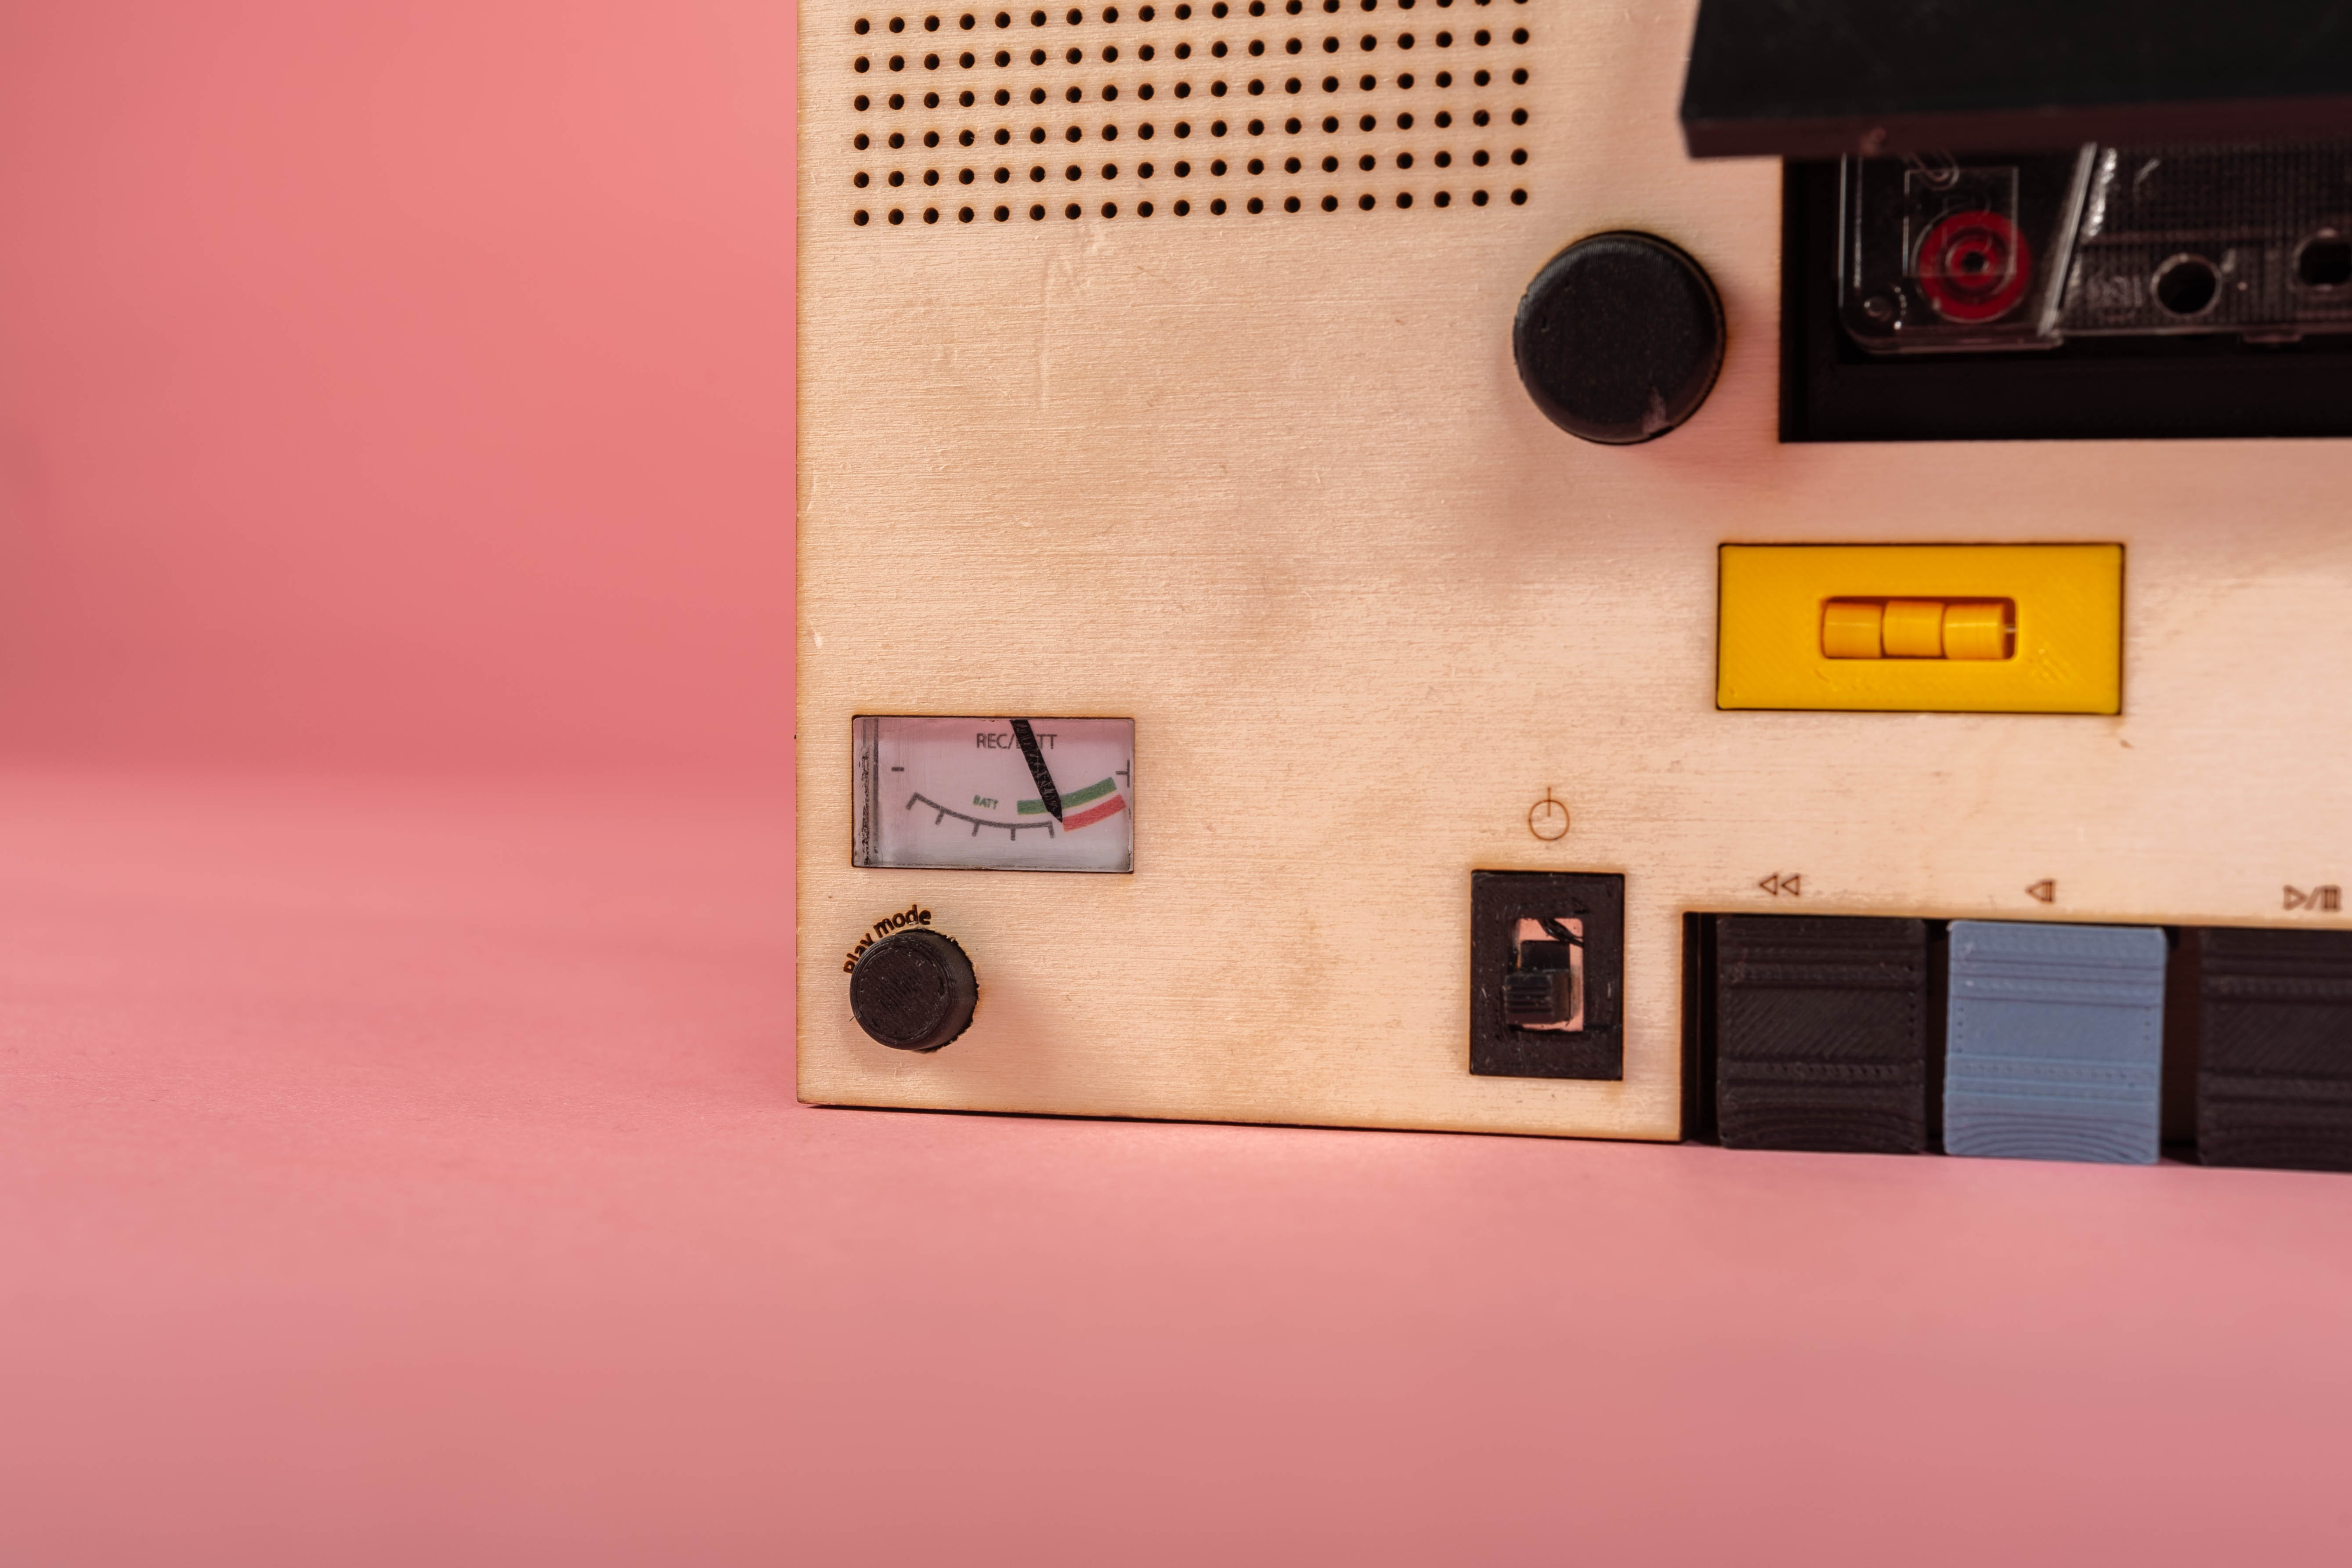
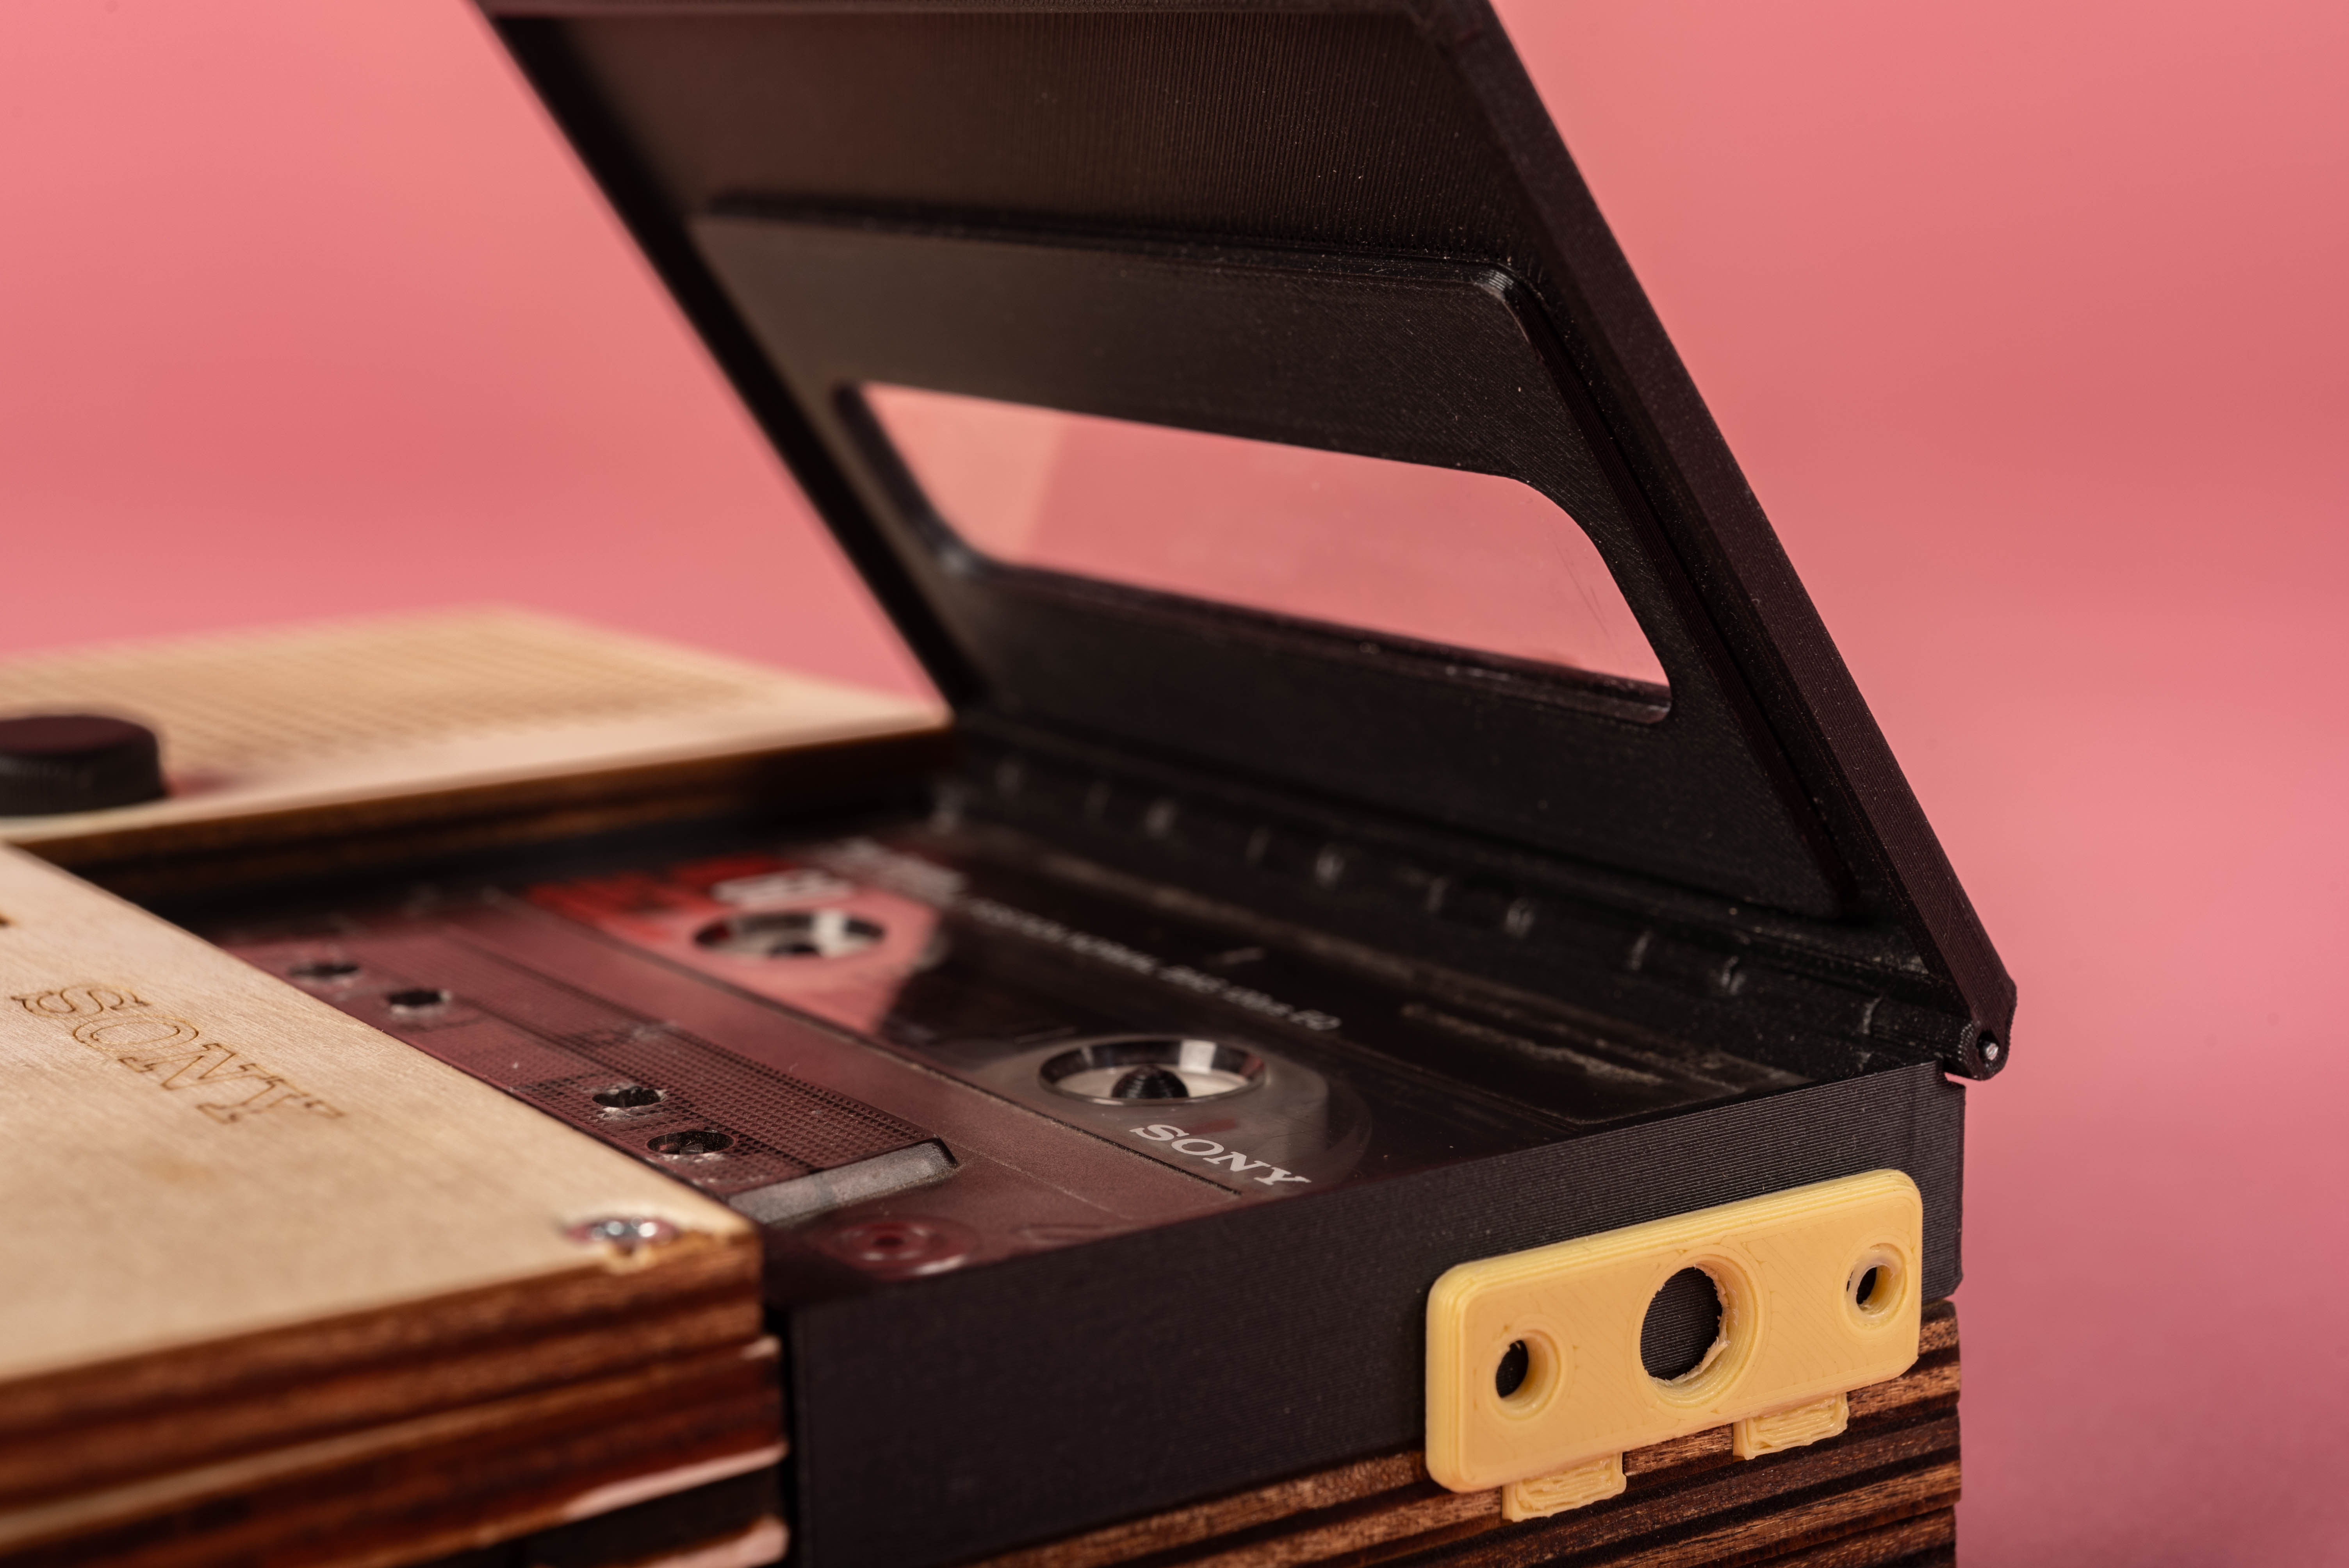
First, you can open the lid of the tape and put in your favorite tape and close the lid. The tape part doesn't serve any real purpose, it just optimizes the aesthetics and adds a vintage effect. Turn on the power switch and you will hear a power on tone. Then you can play the song.
Users can experience the following features:
- Replacement of music tapes
- Switch Play mode
- Switch On / Off
- Backward 10 seconds
- Forward 10 seconds
- Previous song
- Next song
- Play / Pause
- Volume control
Prototyping Phase
At the beginning of the project, we took a close look at the original products, and we were ready to keep the dimensions of the original items as much as possible and restore the corresponding functions. At the same time, we wanted to realize the function of the original design that you can open the lid to change the tape to increase the interaction with the user, so that the product we drew the top view according to the real size, which was used to simplify the subsequent construction.
Paper Sketching
Beginning with paper sketches was vital in identifying potential solutions, leading to key decisions like sacrificing the original object's ergonomics. This approach allowed for the relocation of two buttons to the opposite side, effectively saving space in thickness.

Component Paper Sketching


Cardboard Prototype
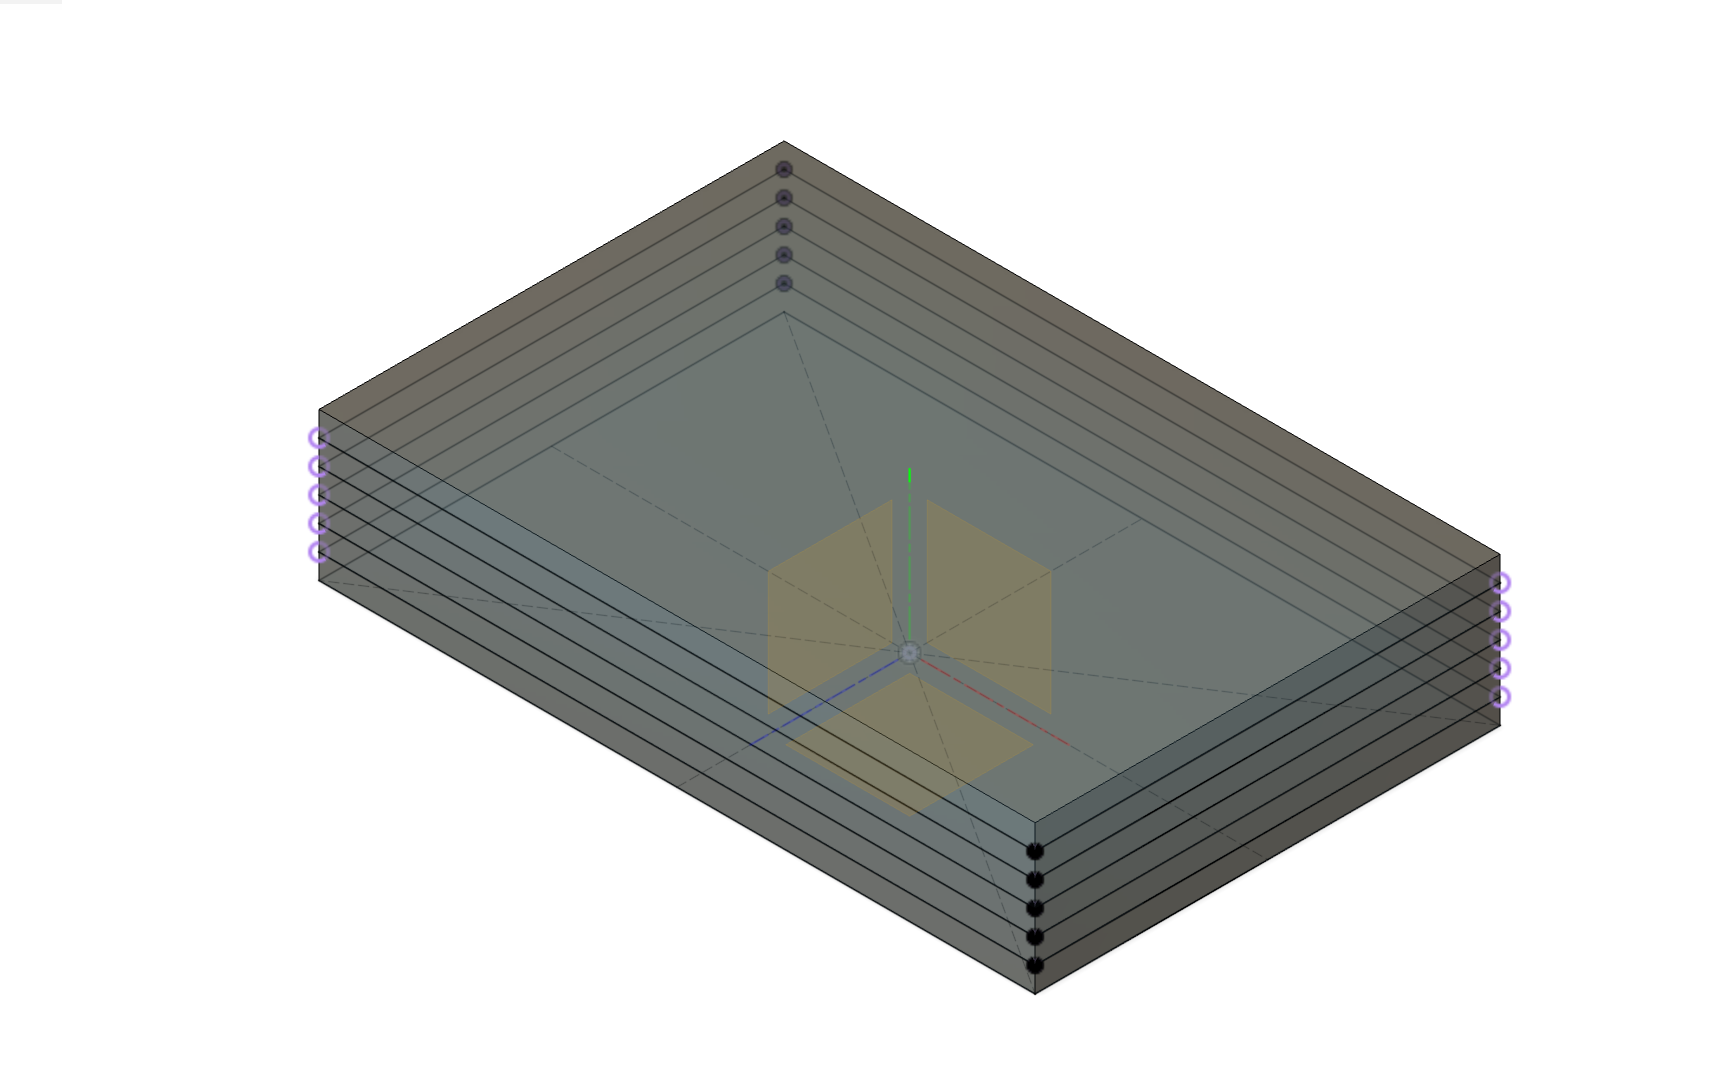
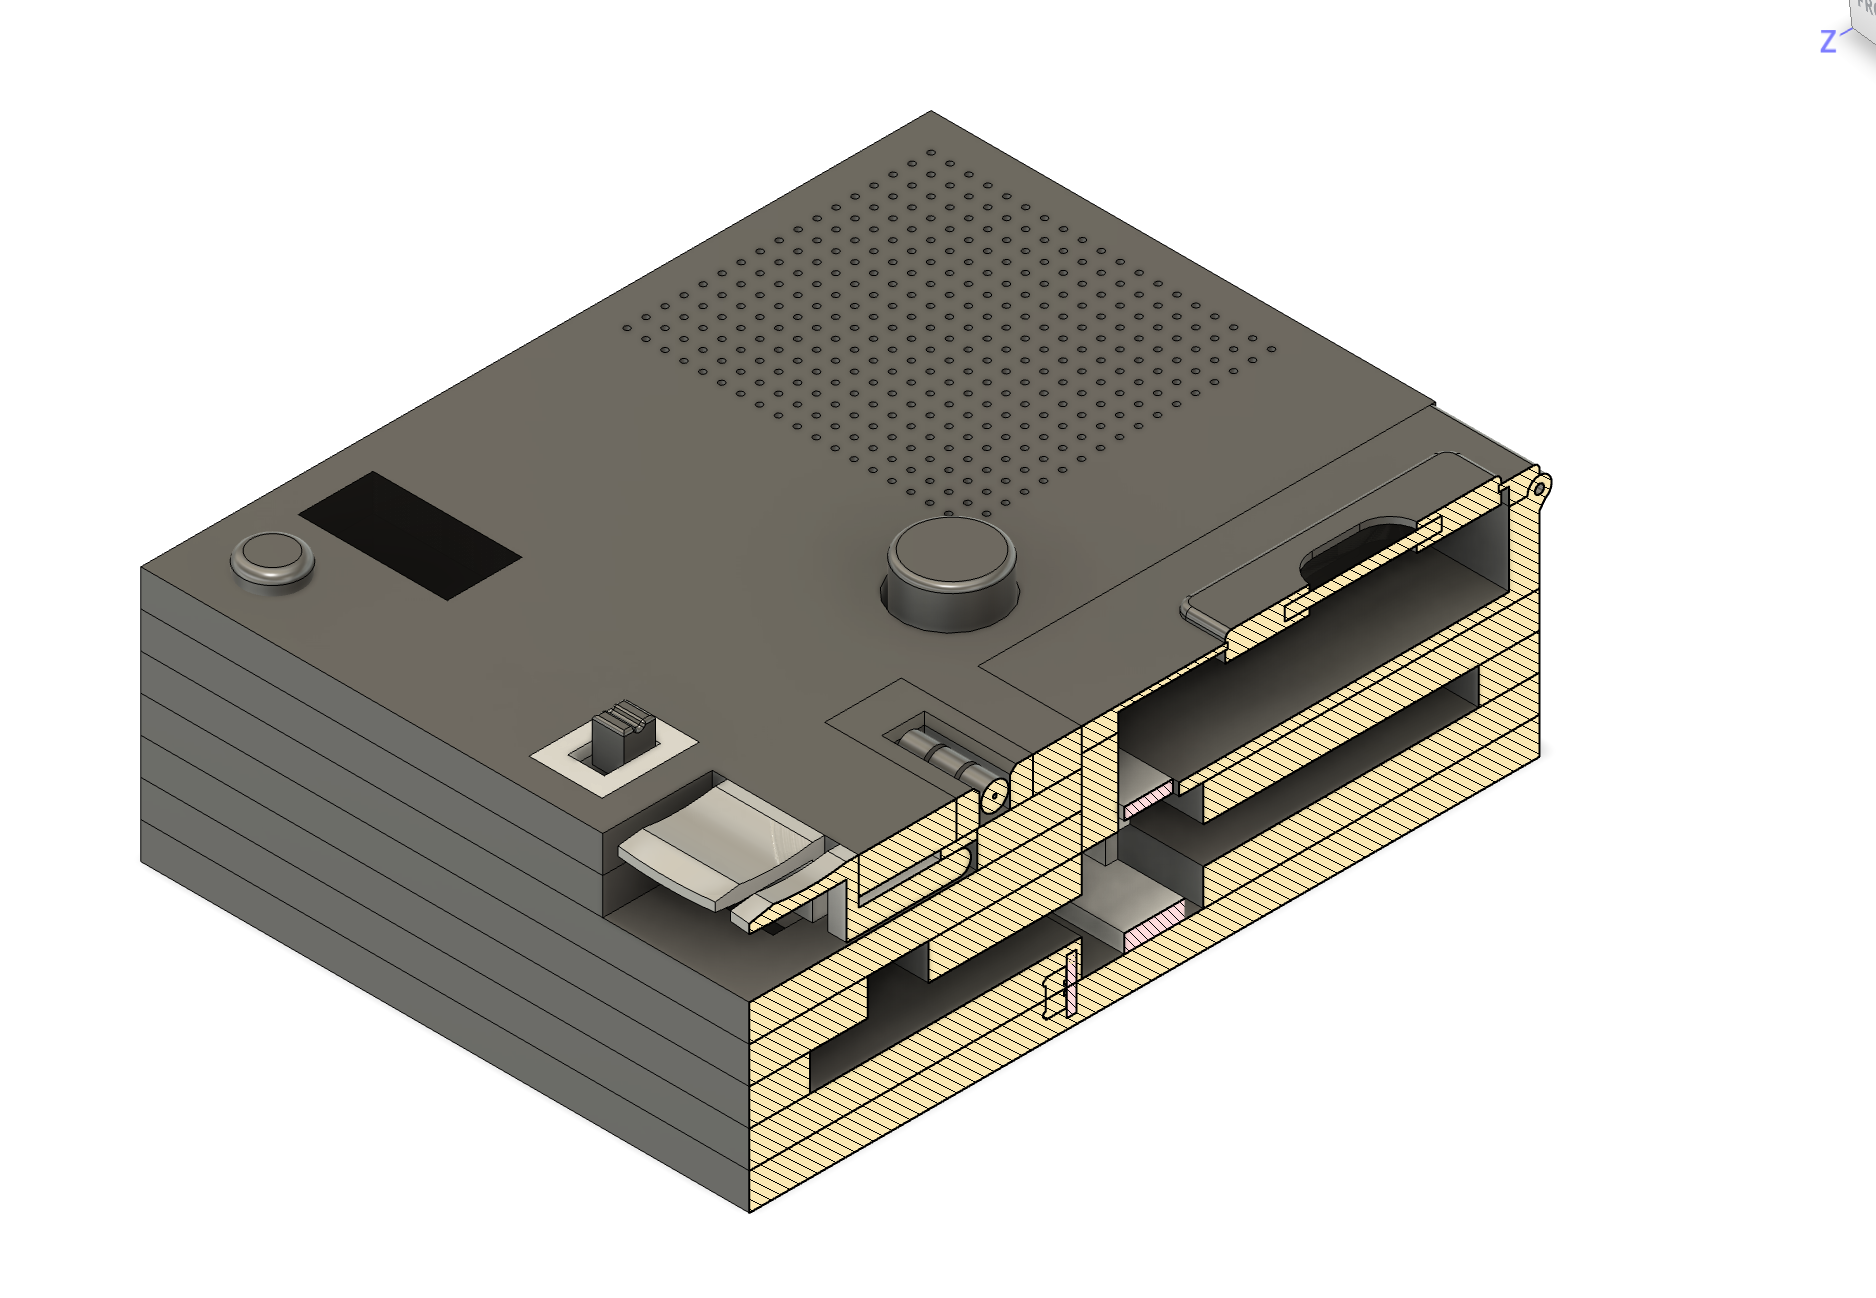
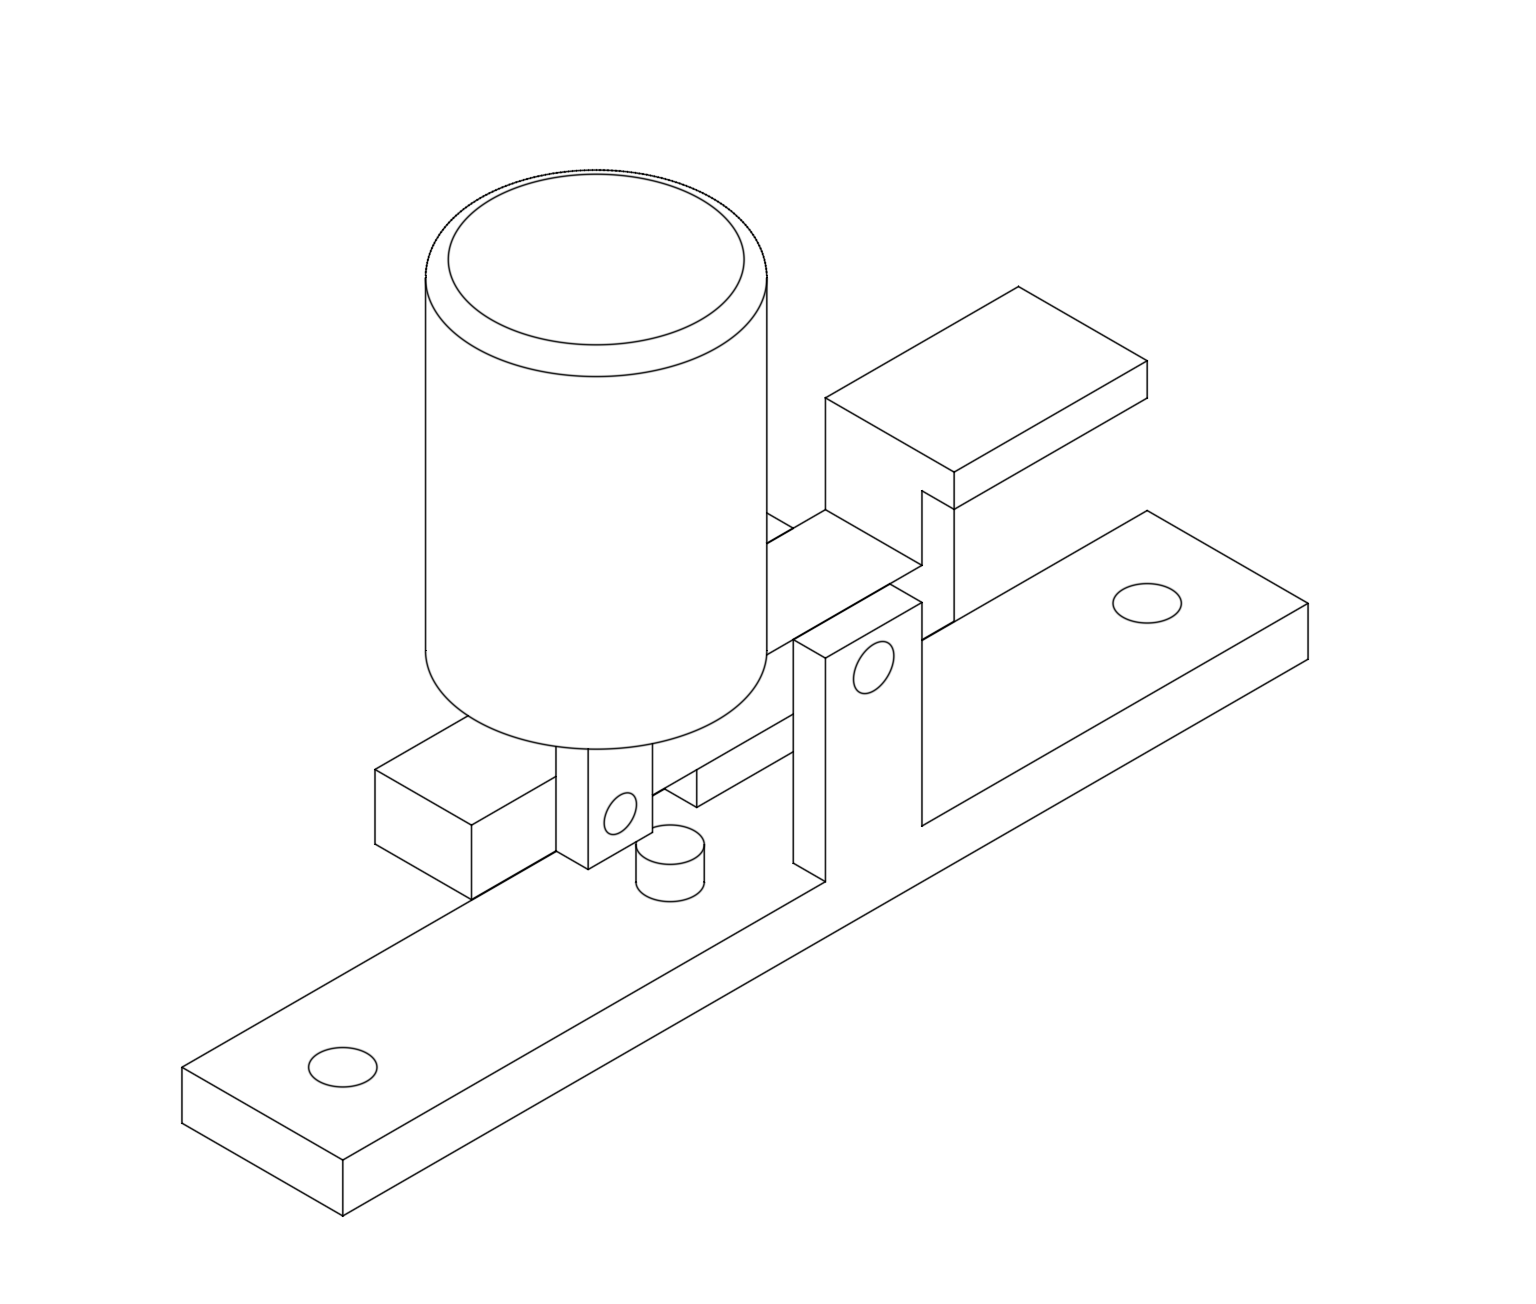
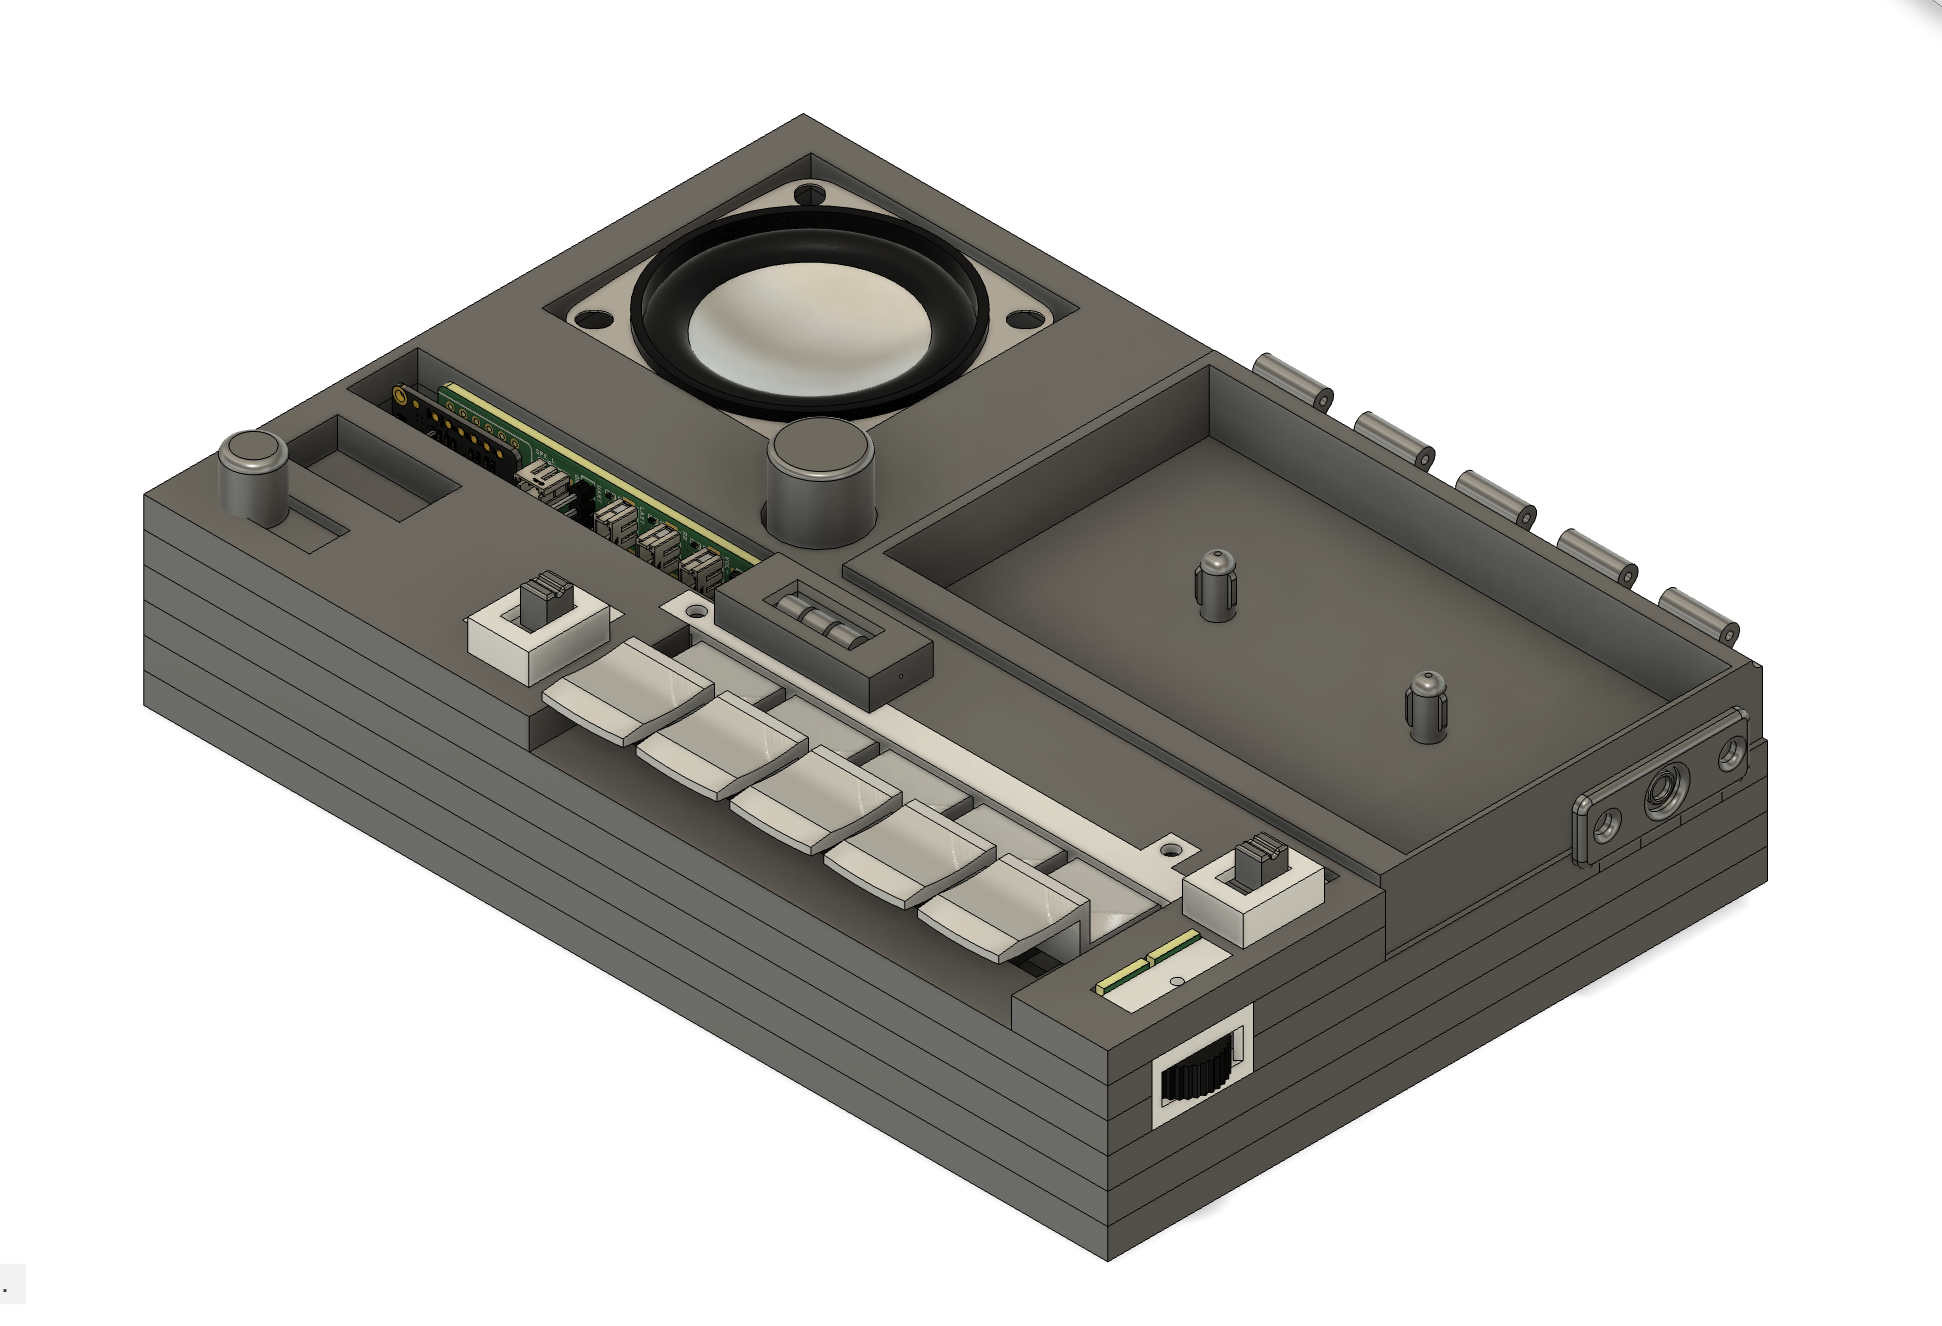
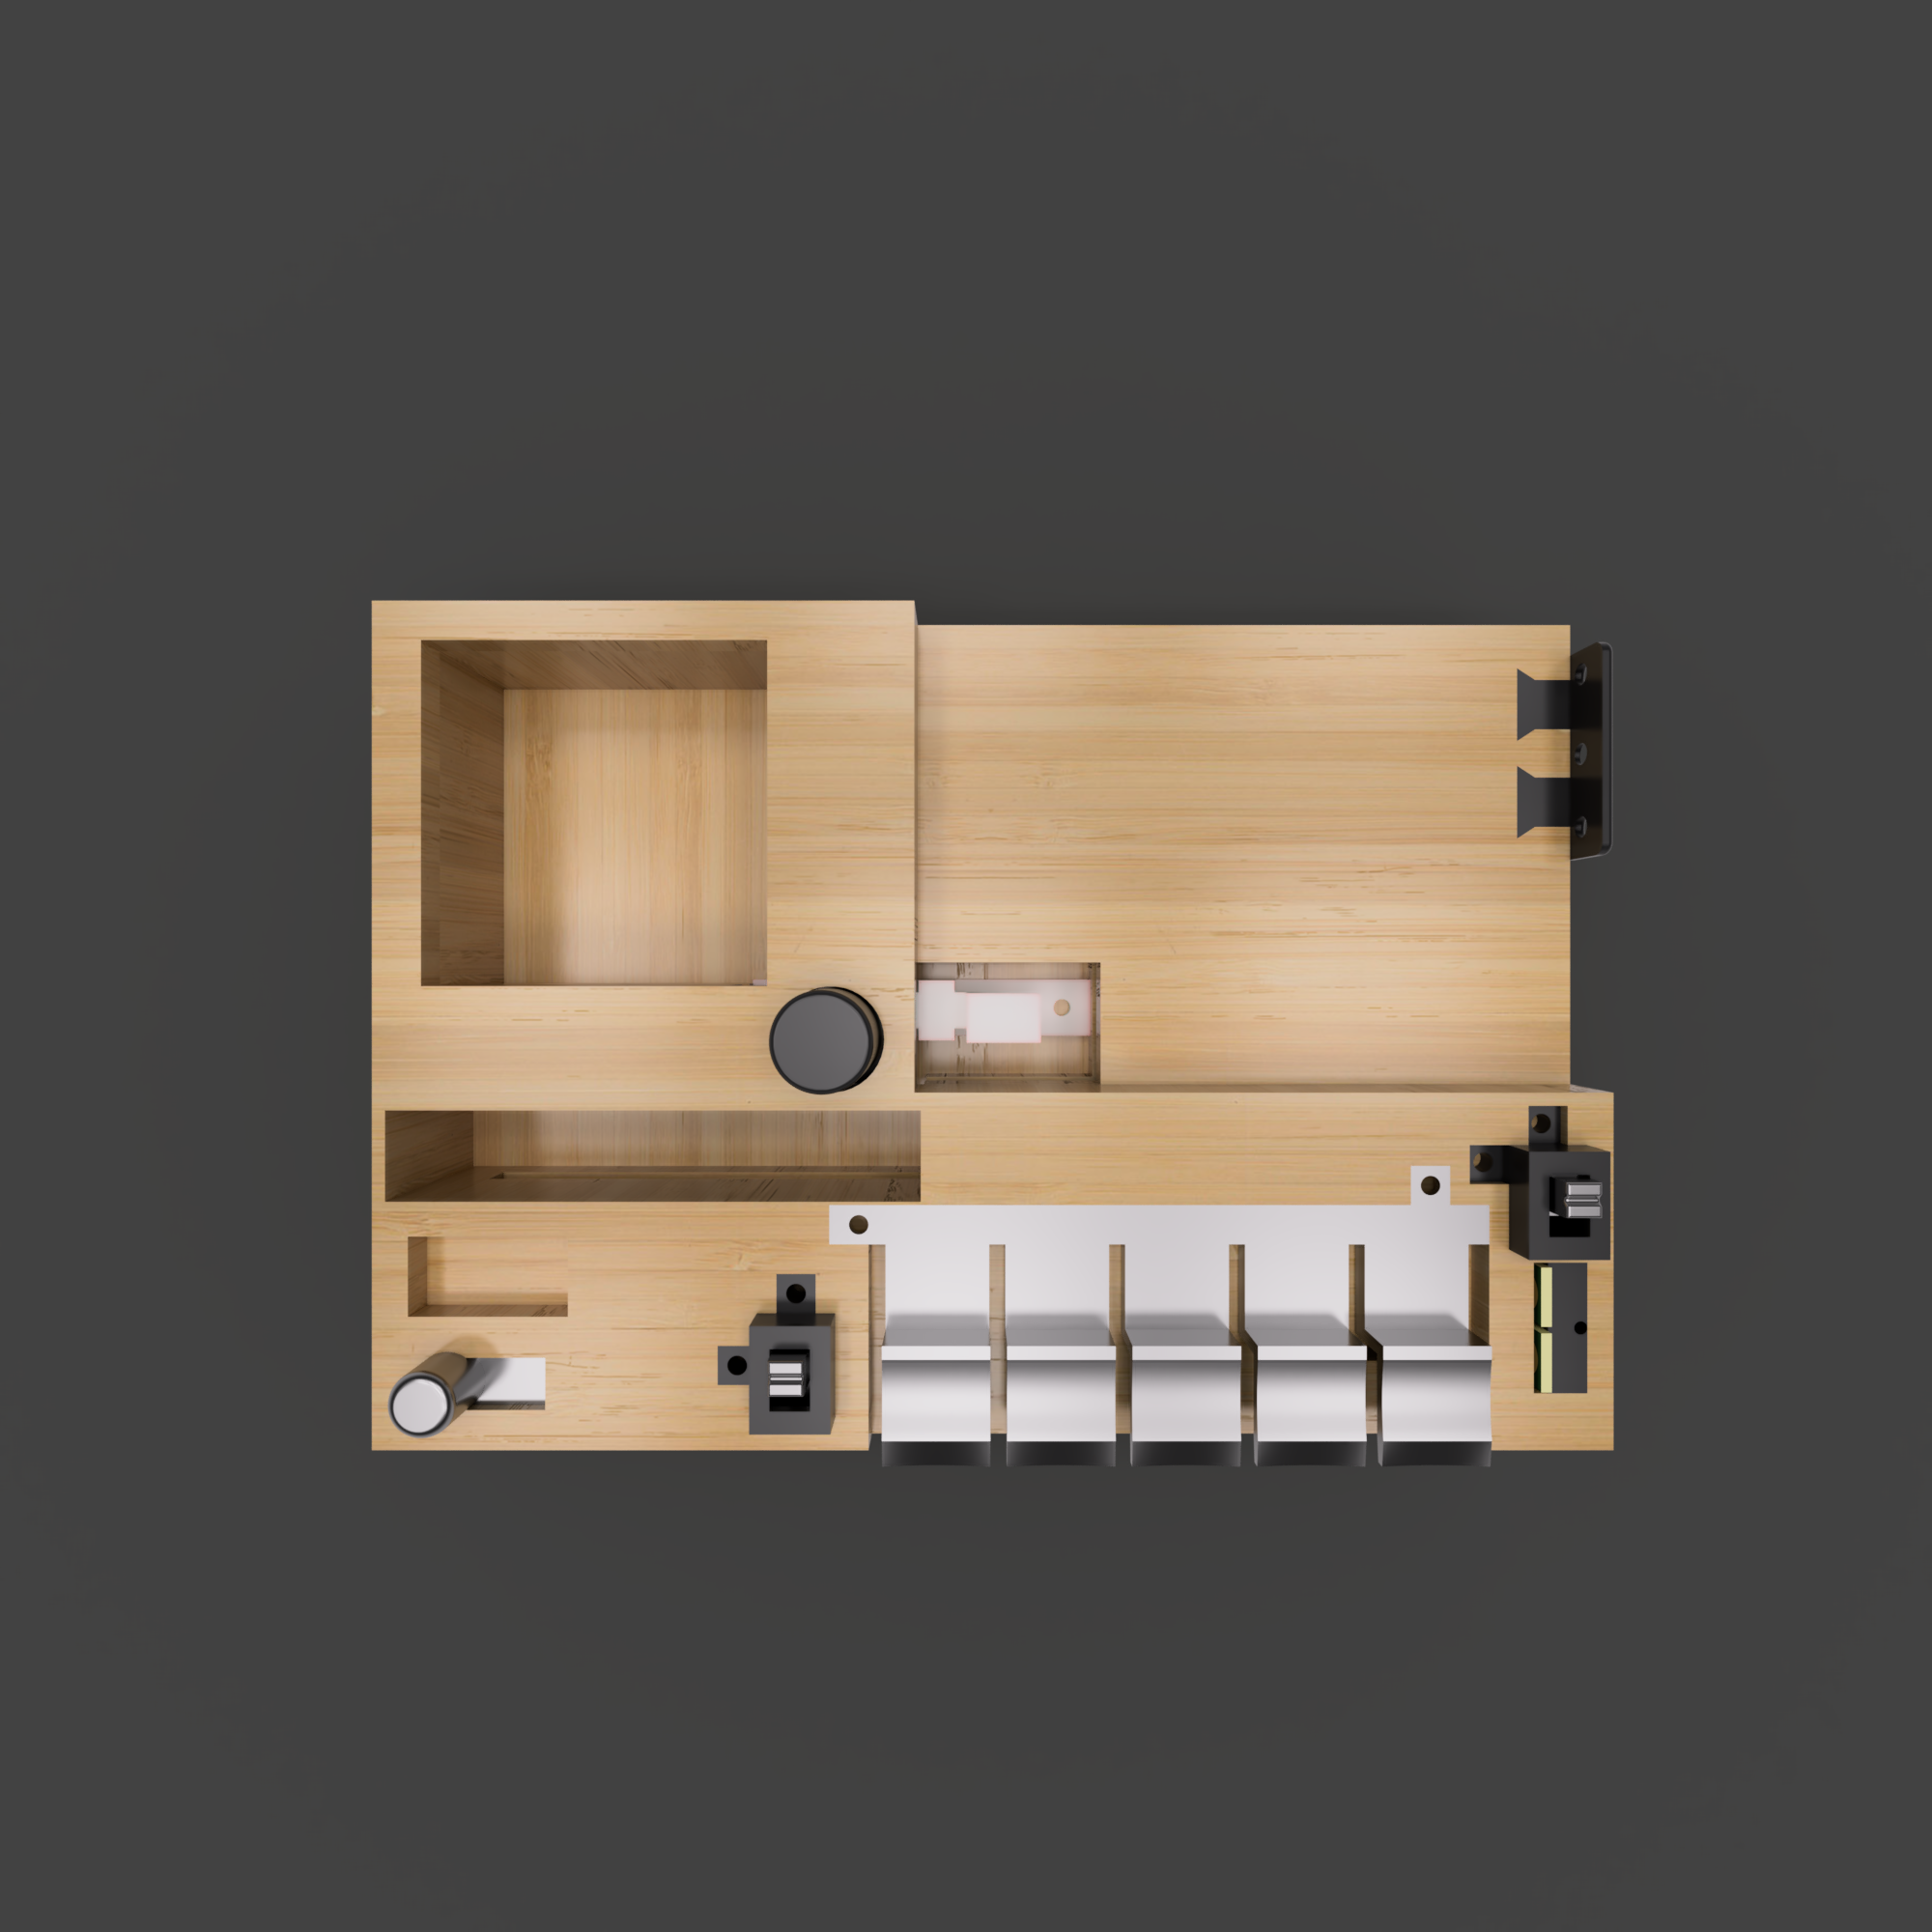
At the outset of the design, we decided to use multiple layers of laser cut wood panels stacked to form our main structure. This made it easier for us to subsequently insert and install the individual components. It also allowed us to cut each layer of wood more easily to reserve space for parts to be mounted.
We determined where and how to place the major components based on sketches during cardboard prototyping.
First Fusion Prototype
We created our fusion file from a sketch drawn on paper. We avoided adding details as early in the design as possible, and we reserved only the space necessary for the main functions.
We used a multi-layer structure, designed the components individually, and finally considered adjusting them to the assembly.
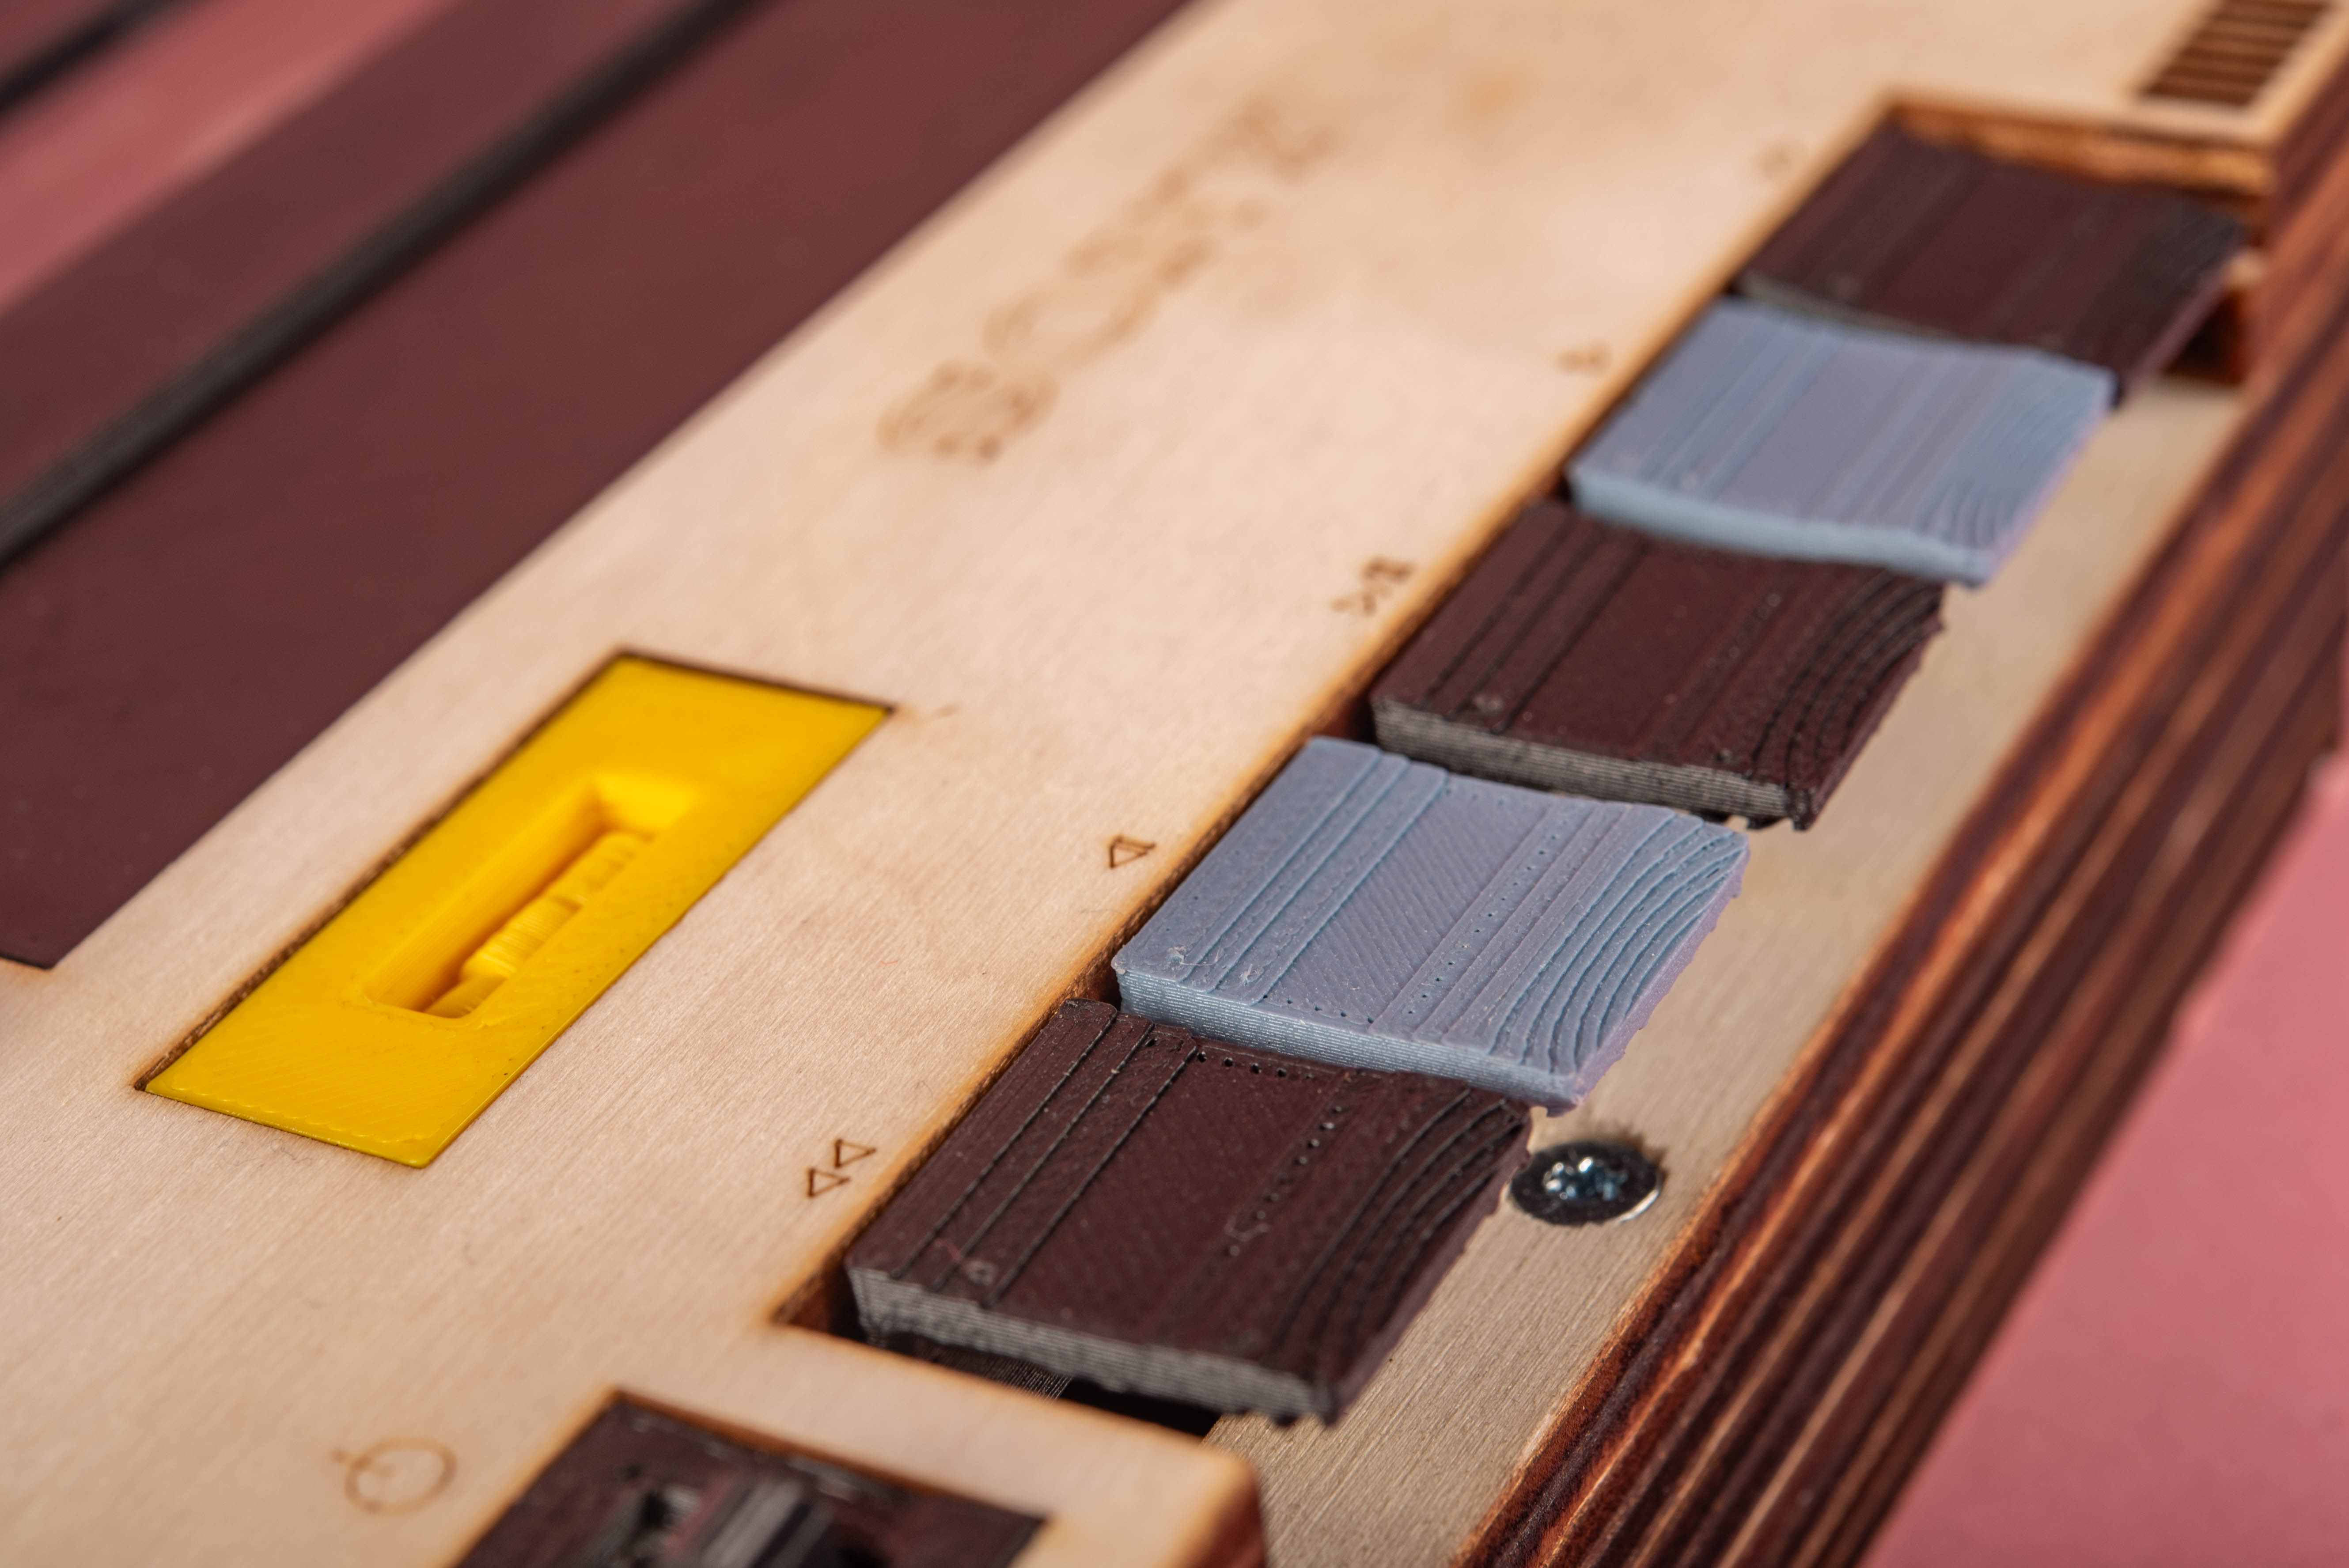
Designed Solutions
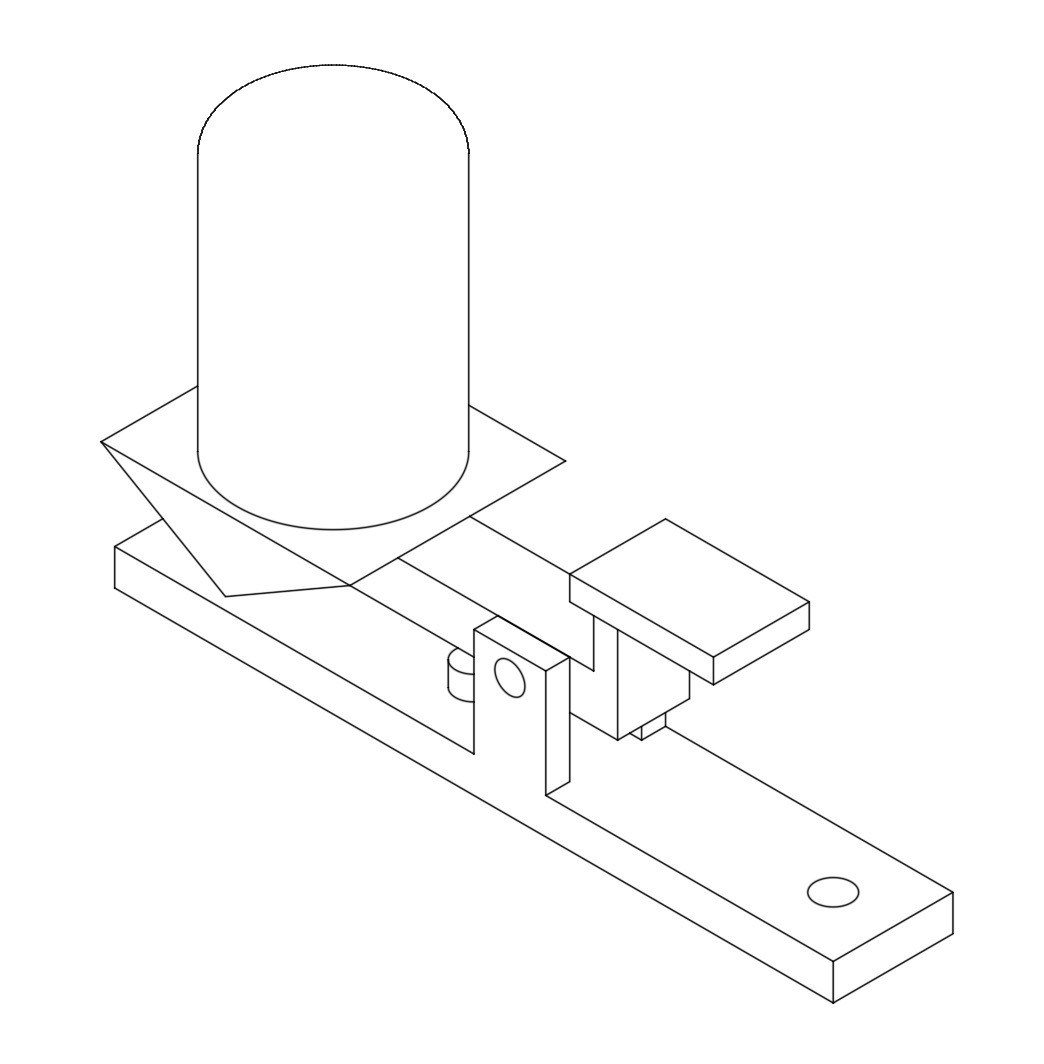
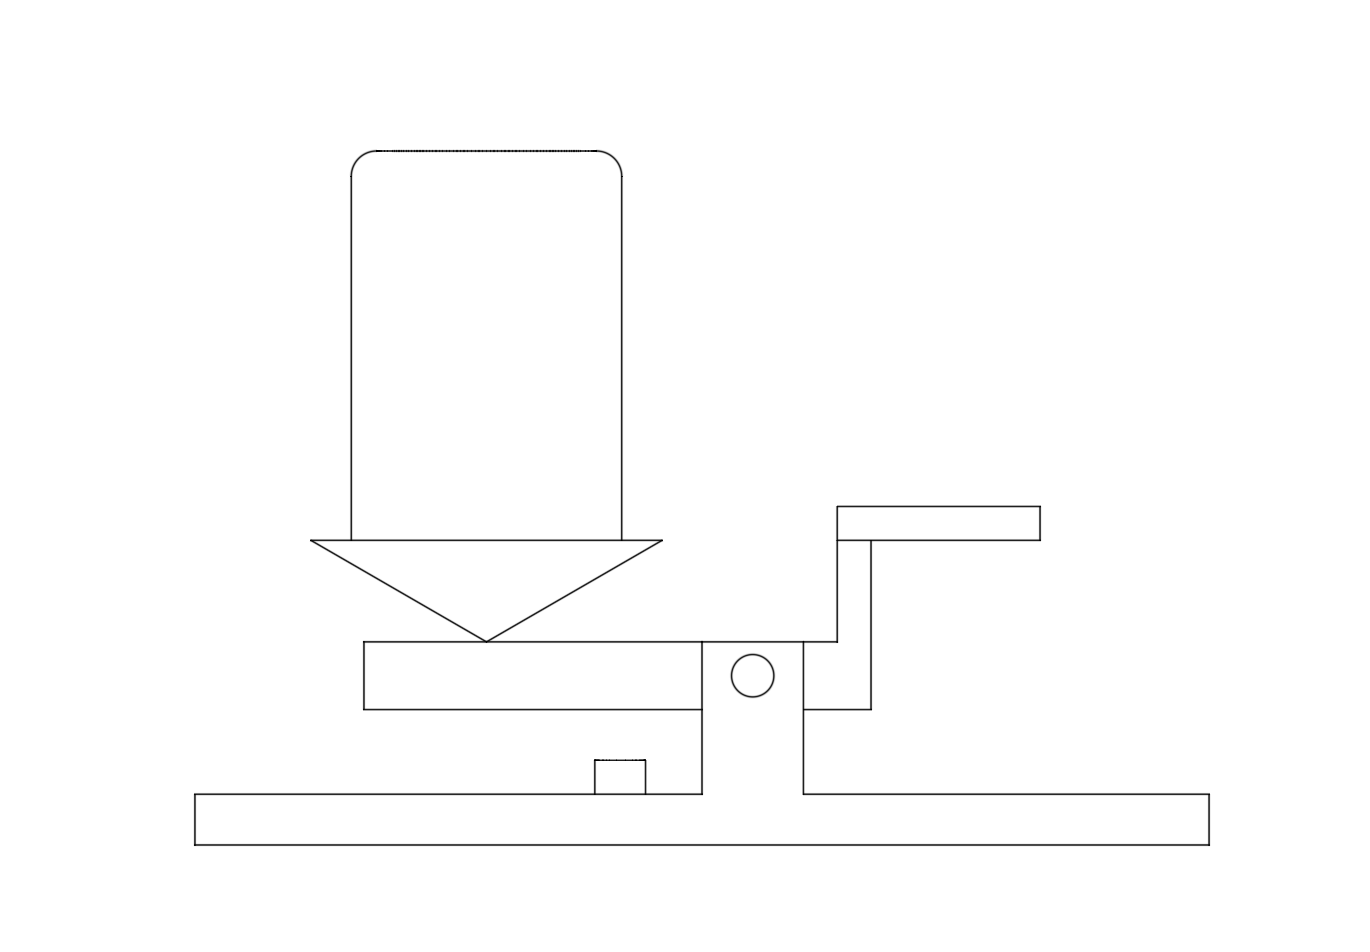
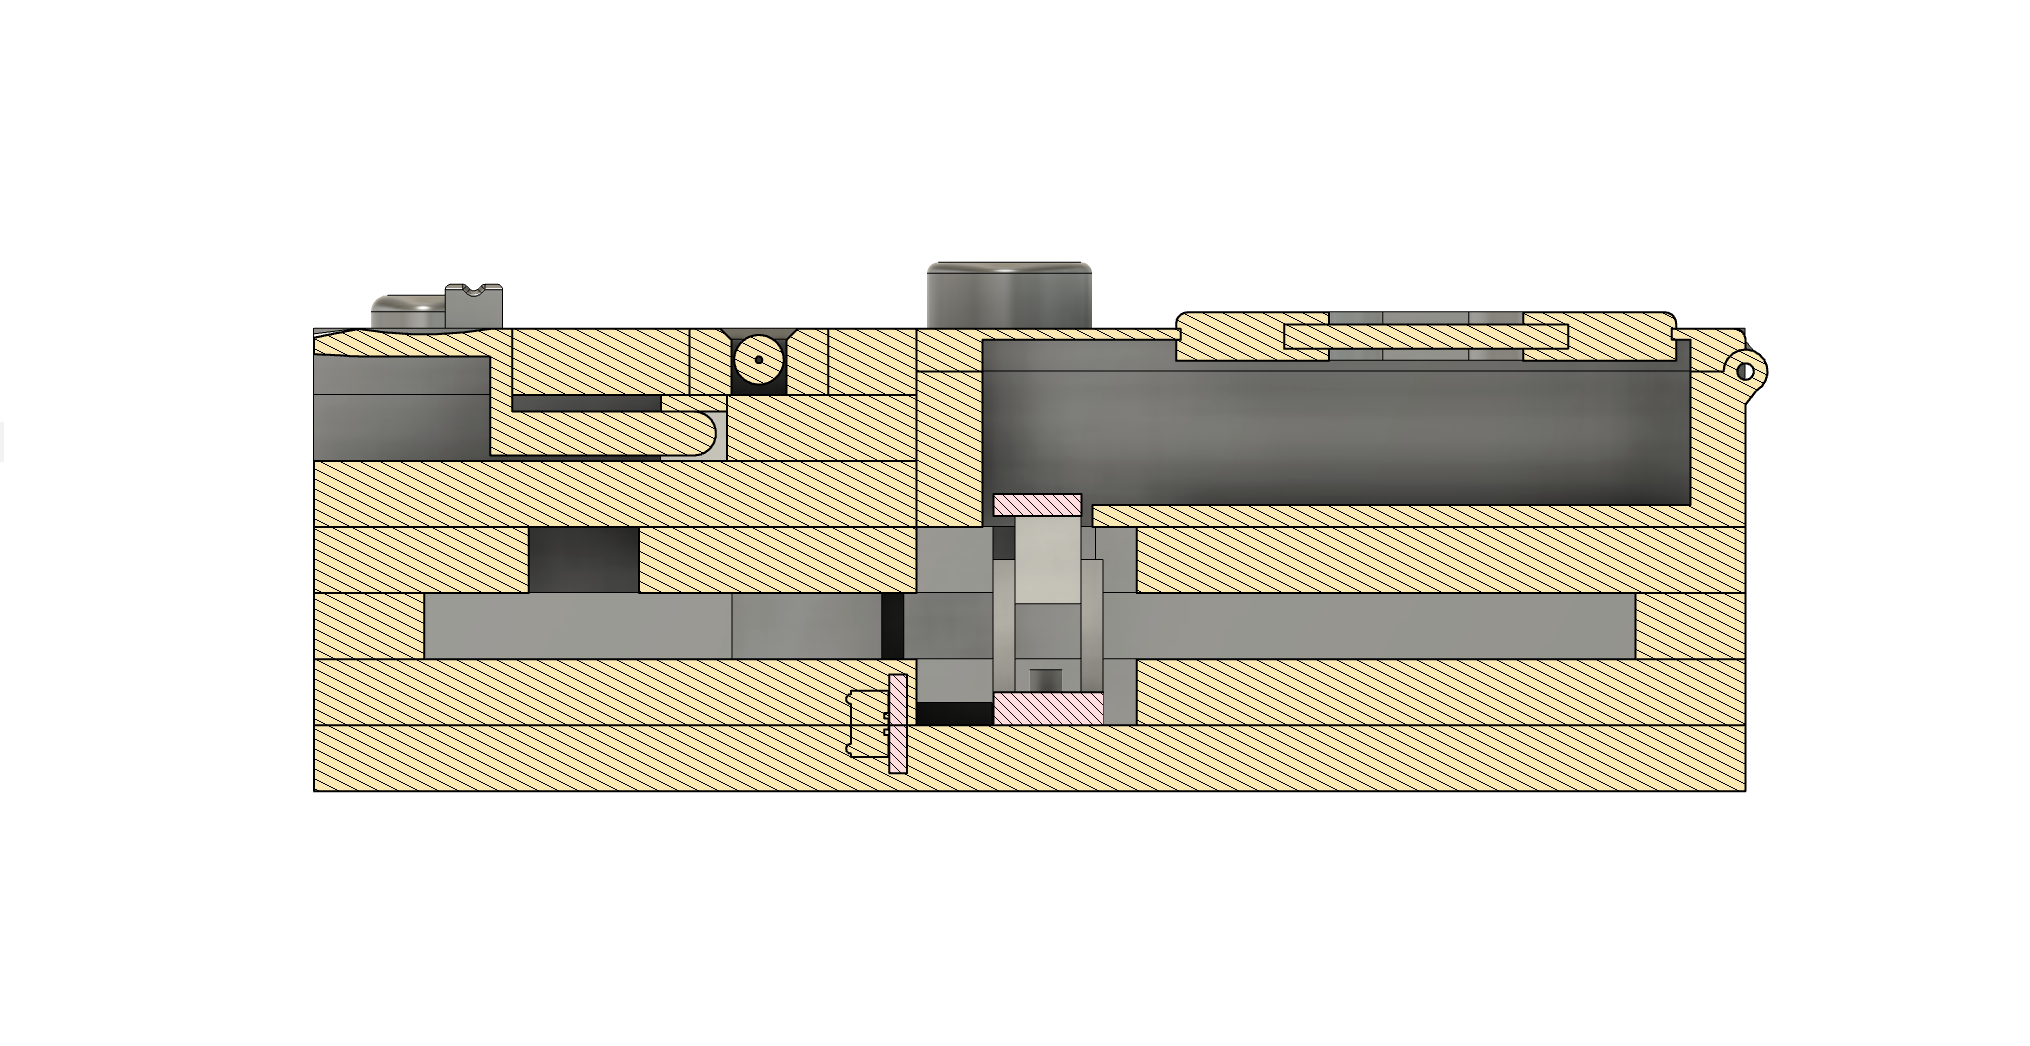
Lever
This button allows the user to easily remove the music tape, and it has a warping-like lever attached to its underside; we used a spring to reset the lever mechanism.
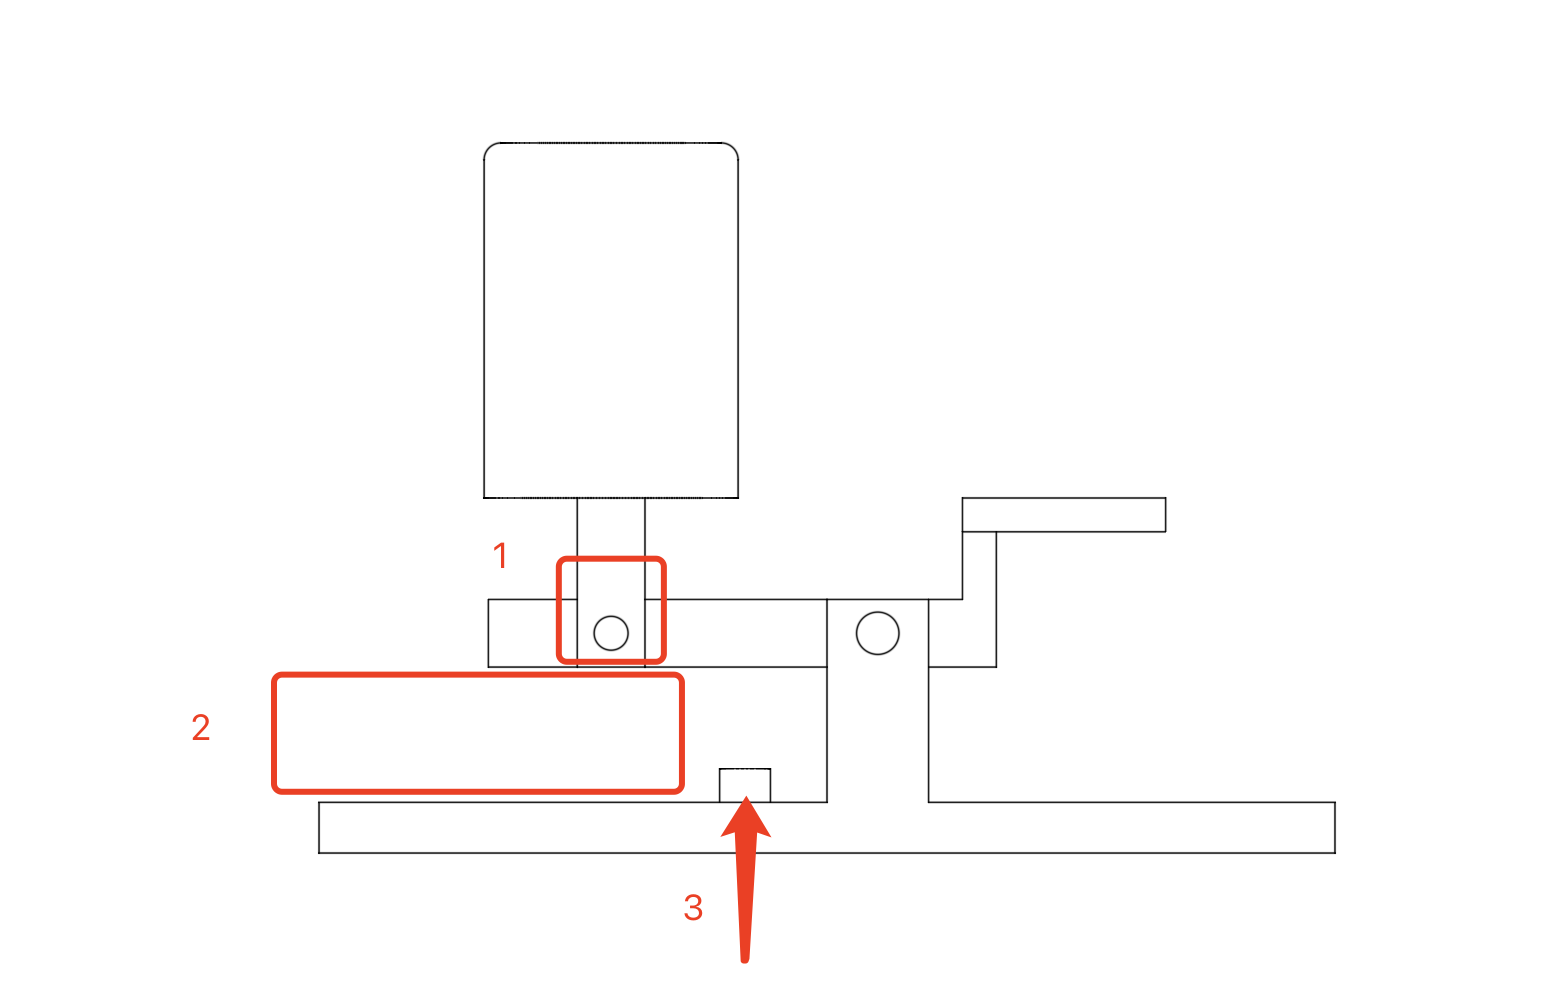
Lever Design Problems and Solutions
During the development of the lever mechanism, we encountered several challenges that required innovative solutions.
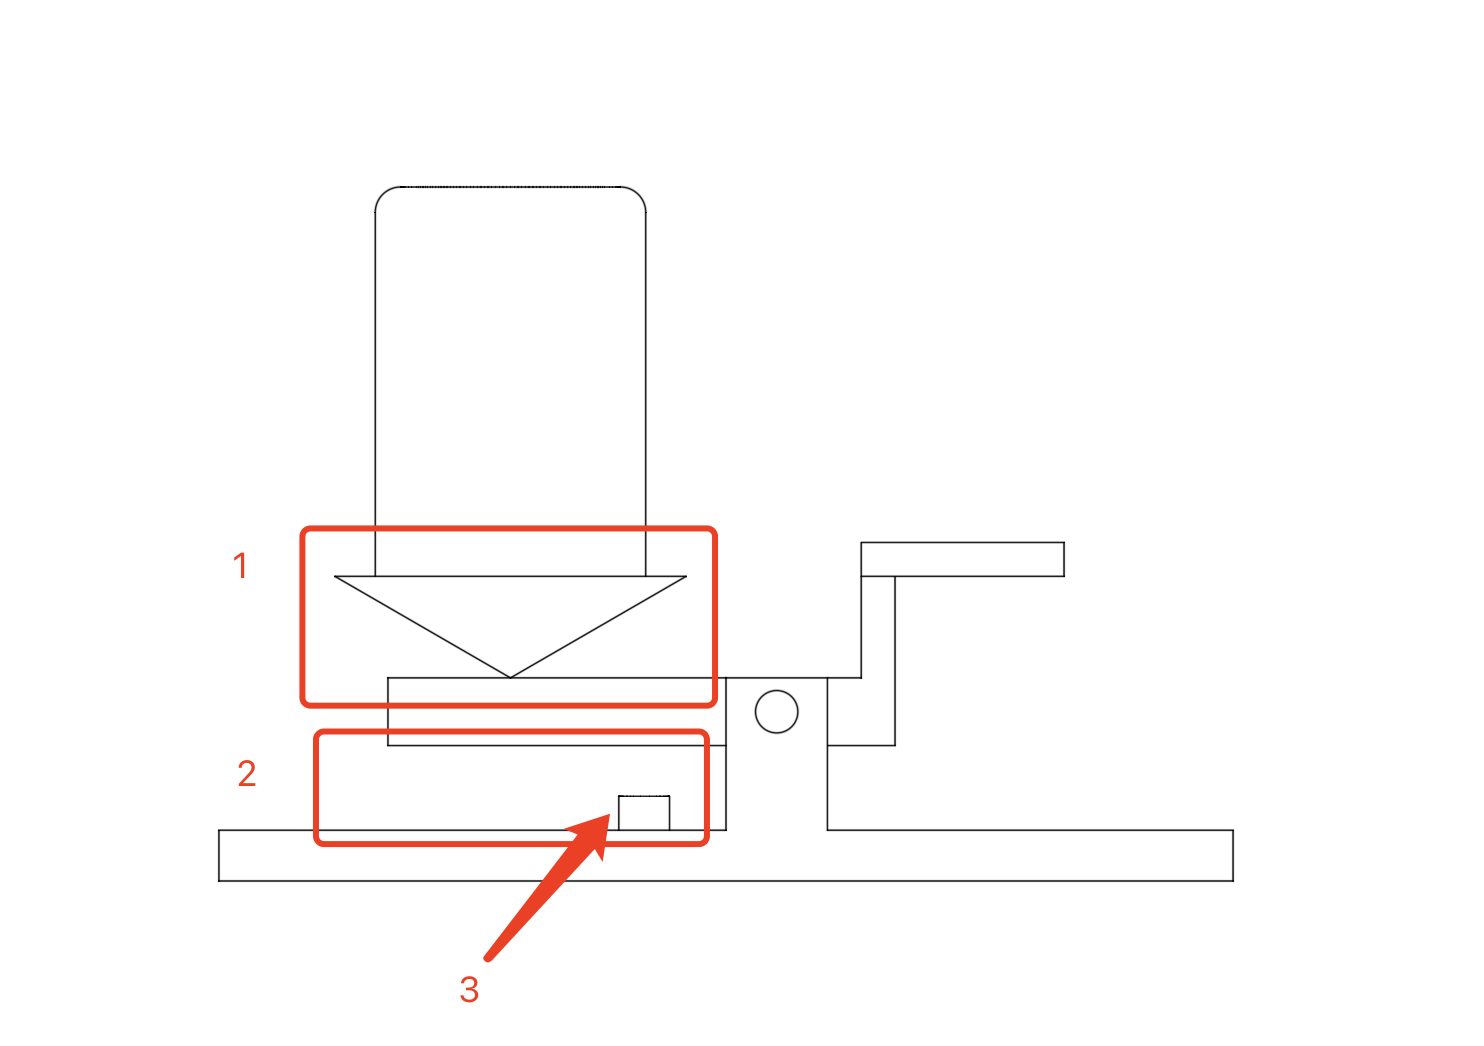
- When the button is rotated, or not placed in the correct position again, it will not be pressed and the whole mechanism will not work.
- There is not enough room for the warping board to move and the music tape cannot be fully lifted.
- No consideration was given to how the spring is held in place, and there is a good chance that the spring will fall out when it springs up.
Final Lever Solution
We added a hinge between button and lever, and also added lever supports to allow more room for movement. Finally, we will add hot melt adhesive to secure the spring.
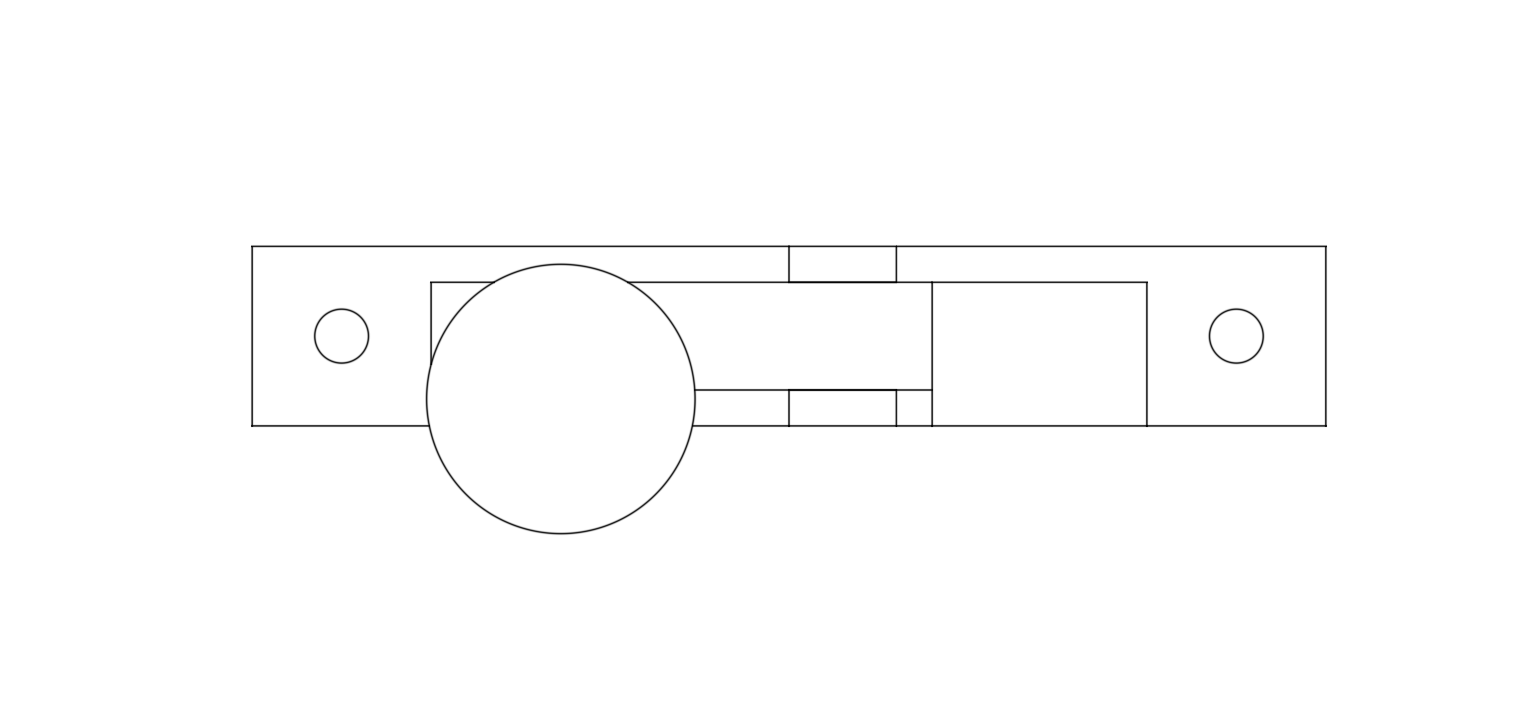
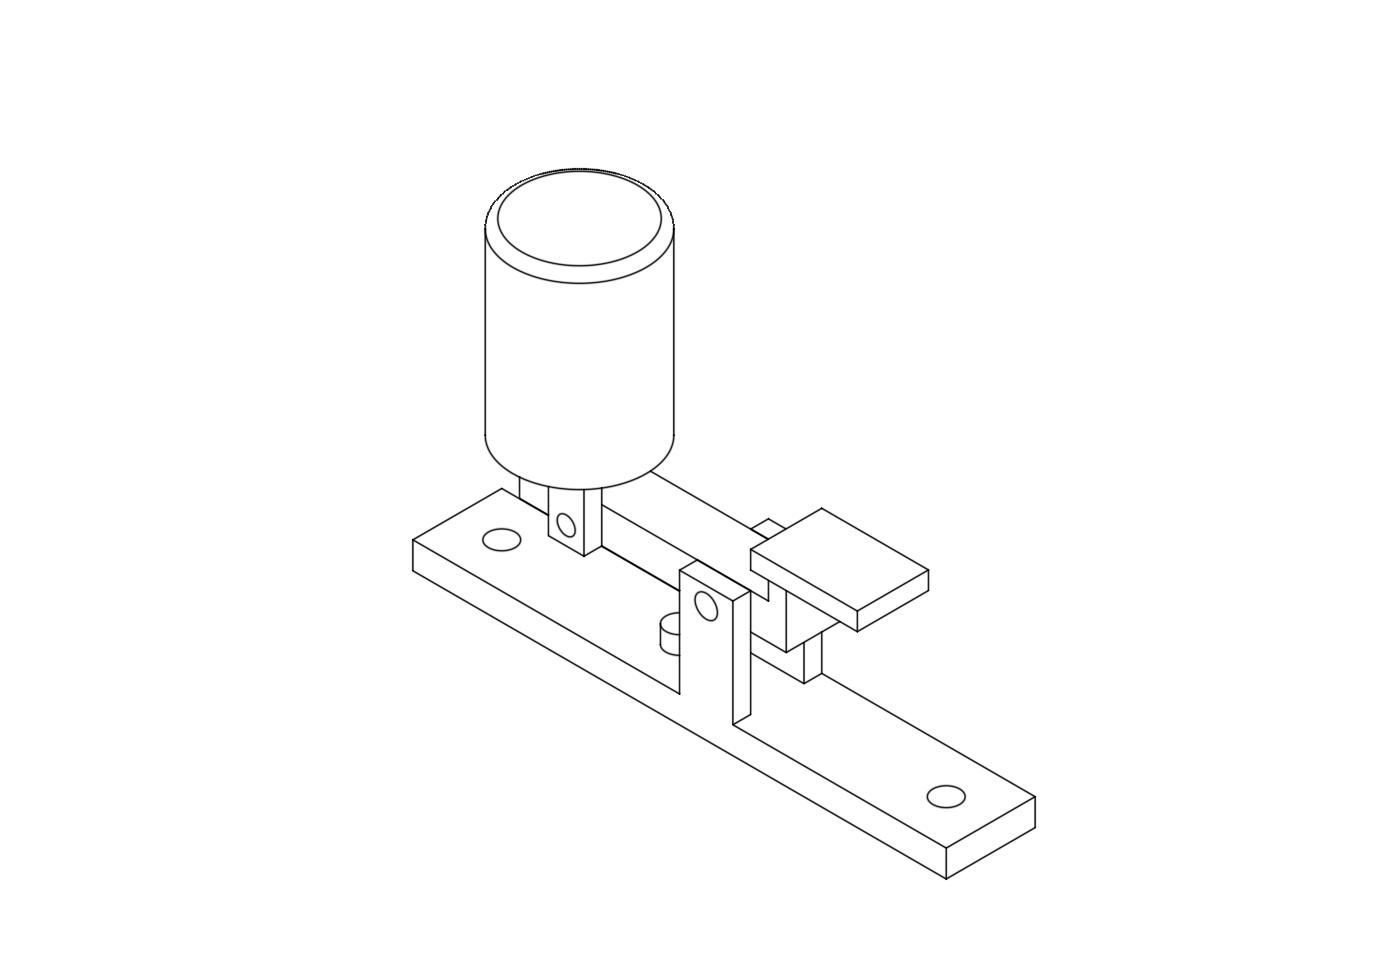
Volume Switch Holder
Since we had a volume adjustment knob on our piece, but we only had buttons and not a specific knob. We had to design this structure to convert the two buttons into a knob control.
We have cleverly designed this structure, which allows us to align the two buttons in parallel, maintaining the look of the original product knobs.
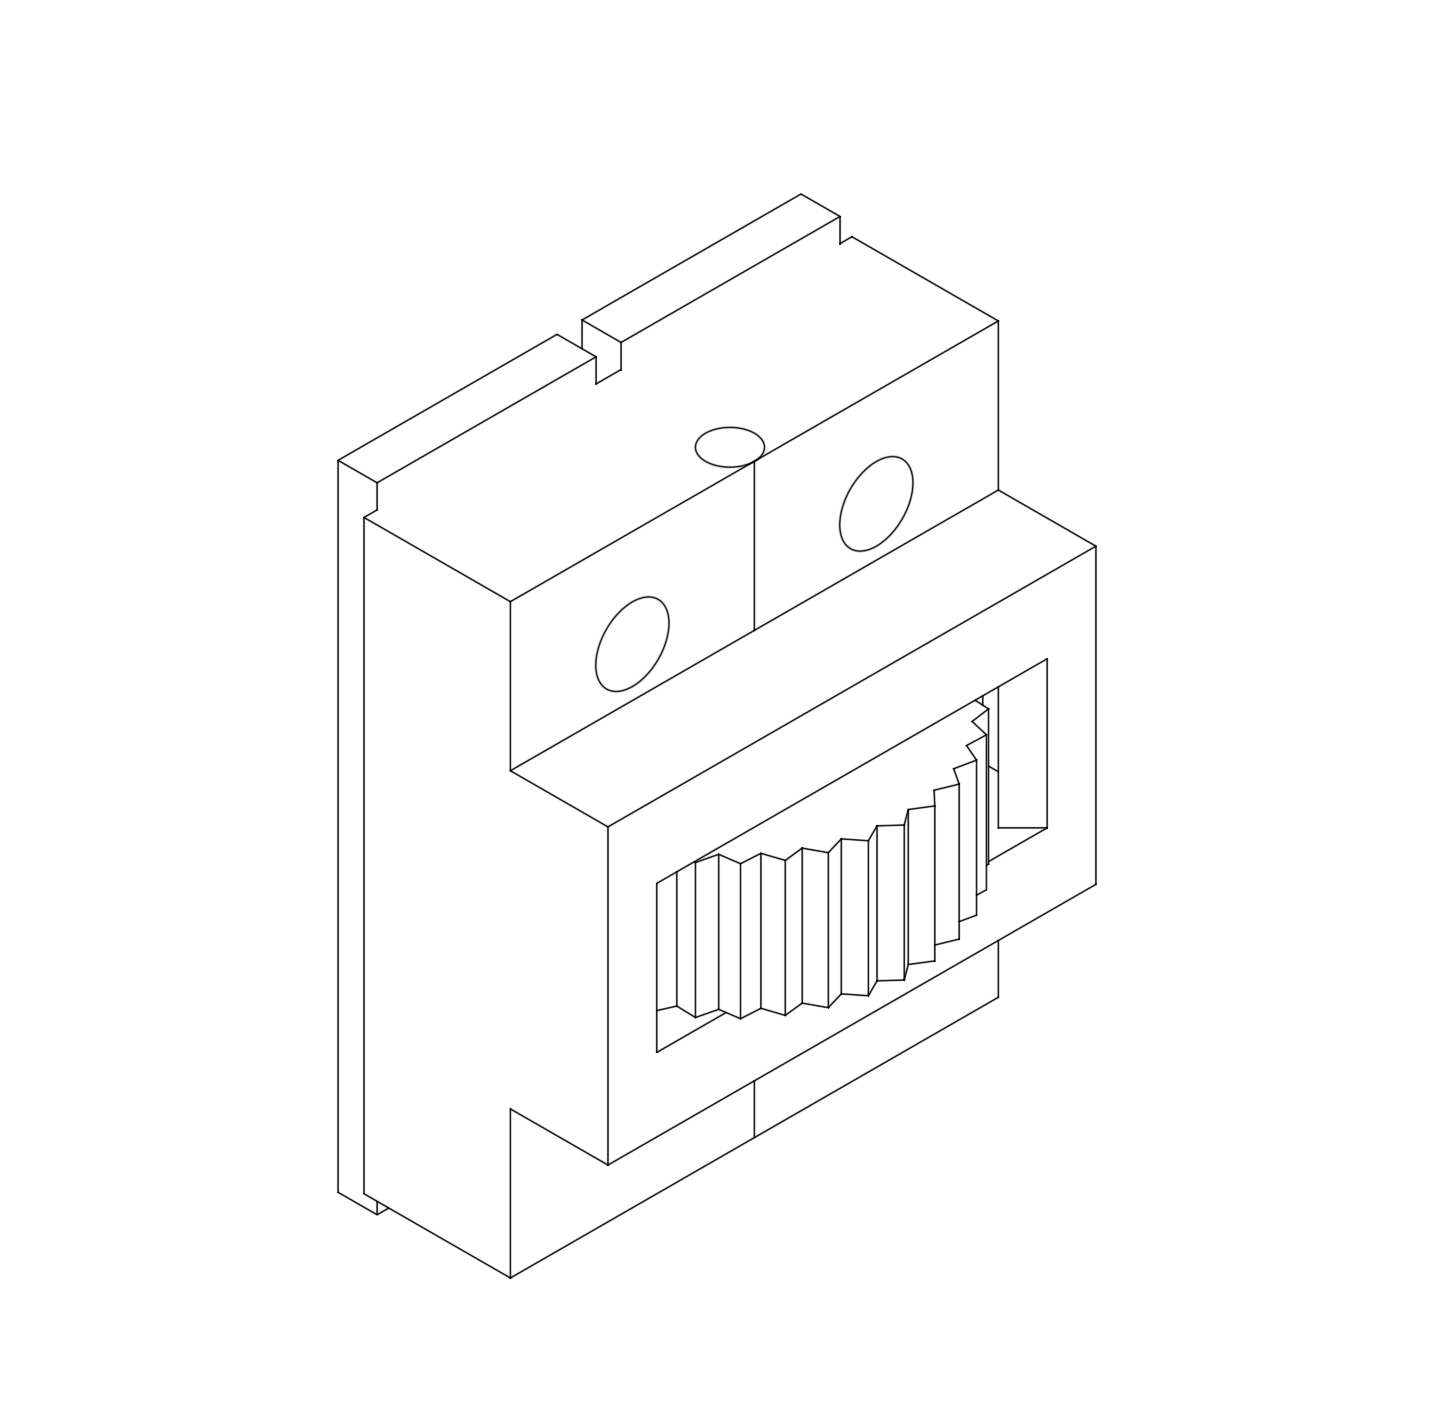
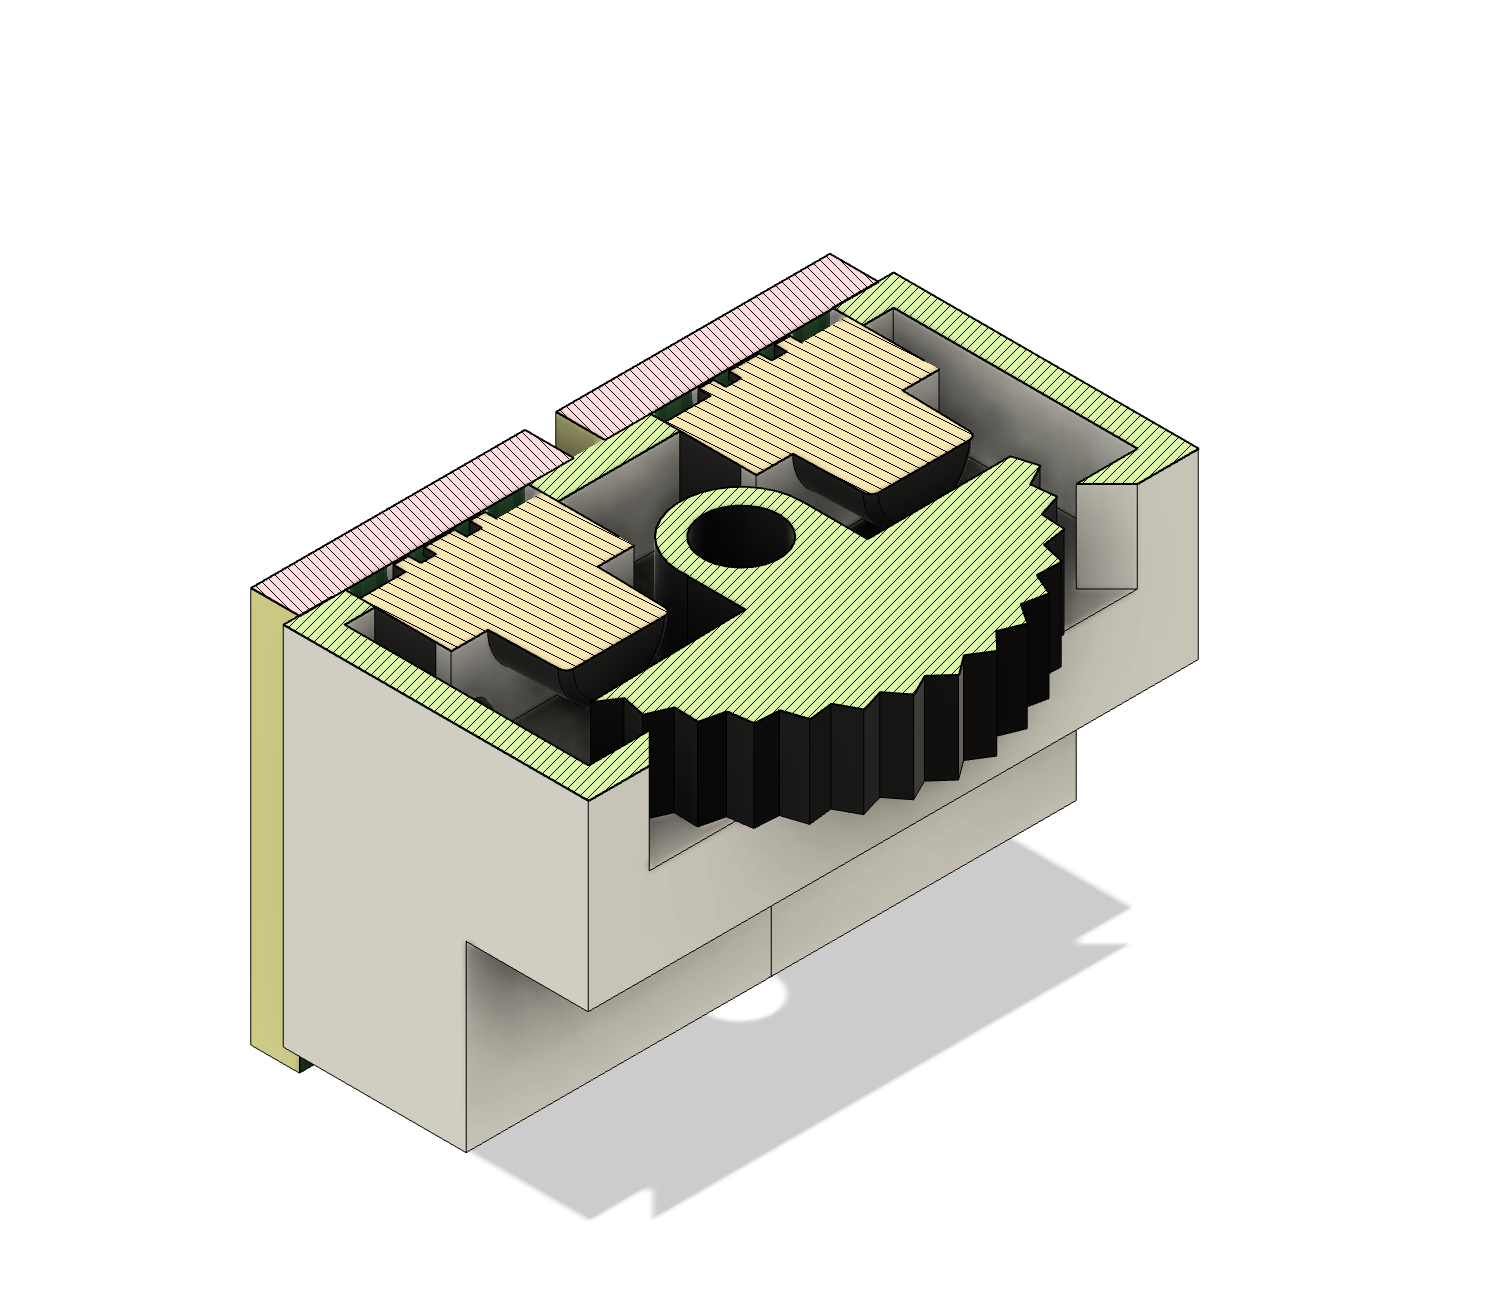
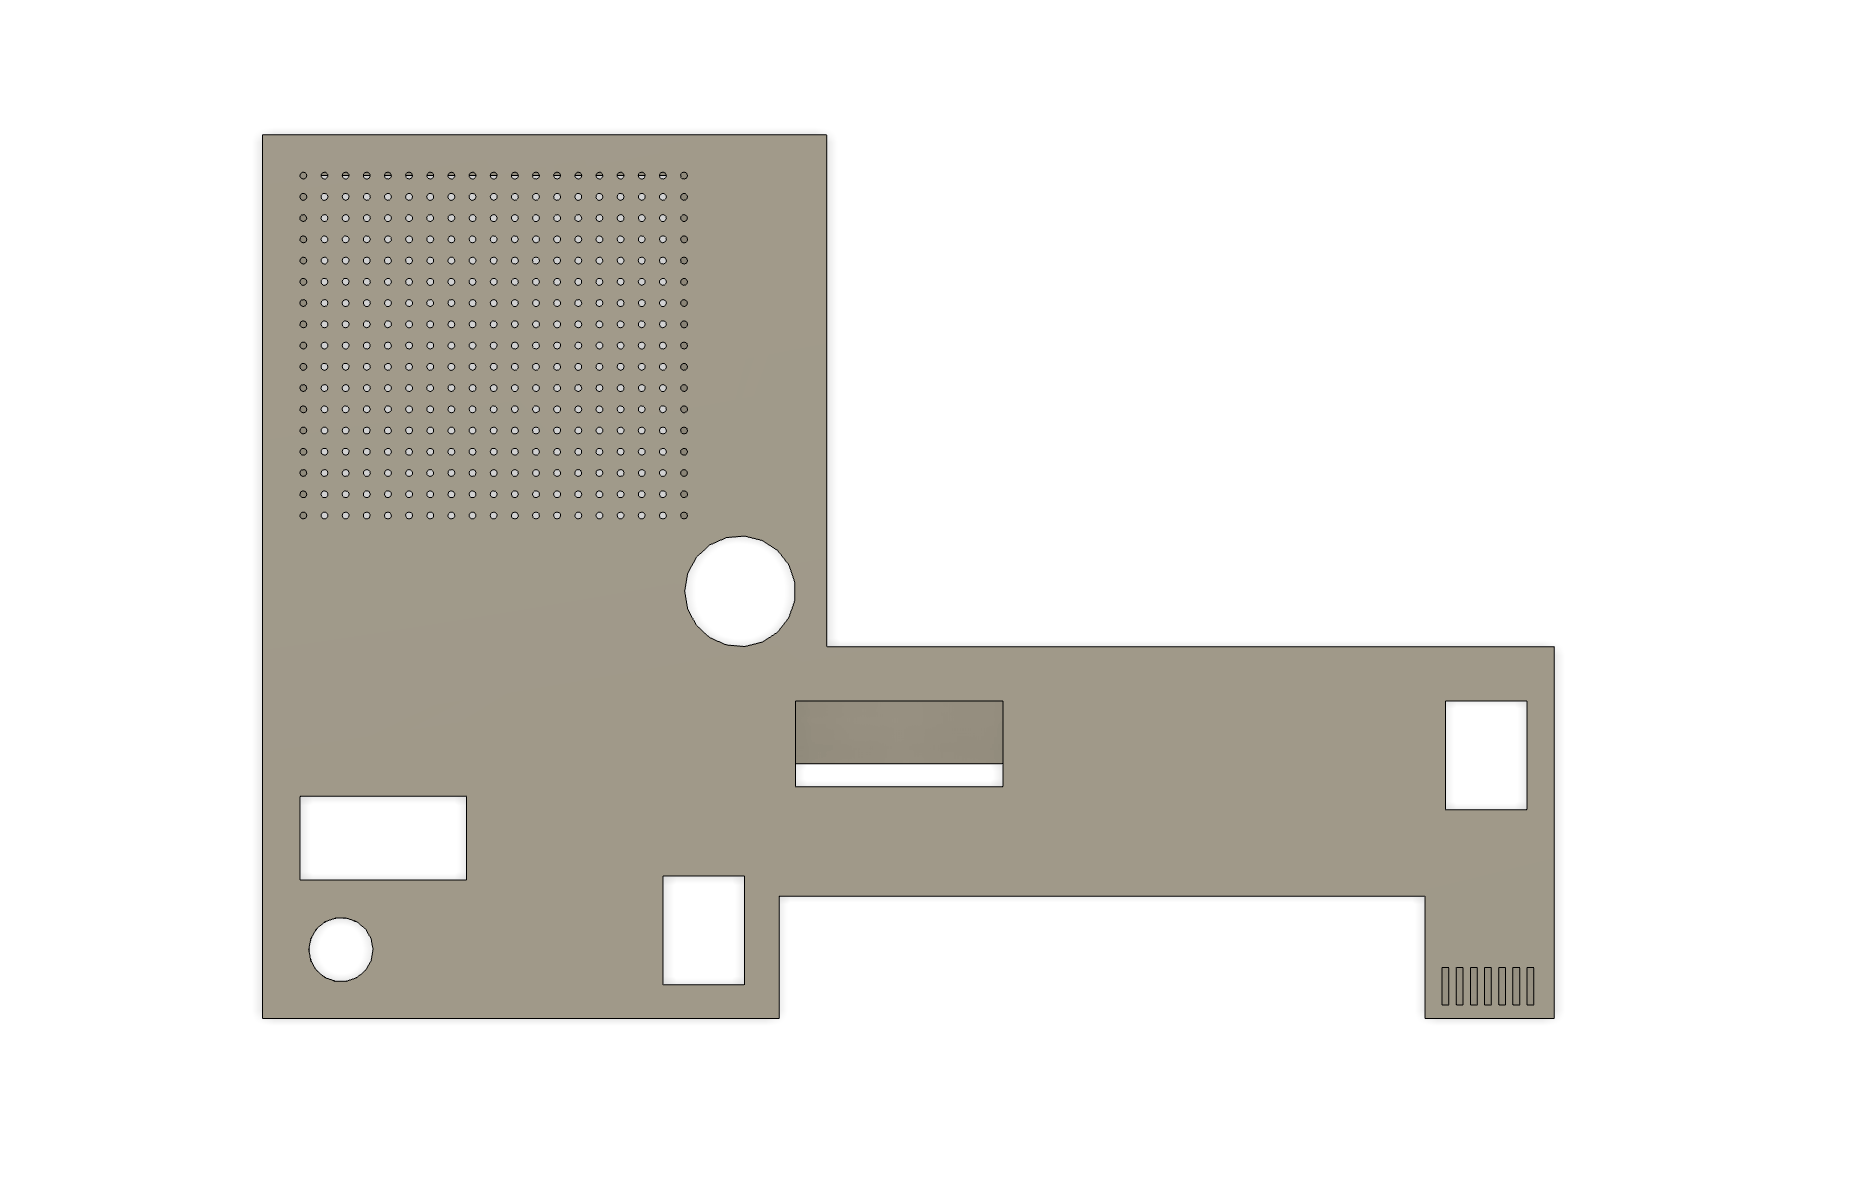
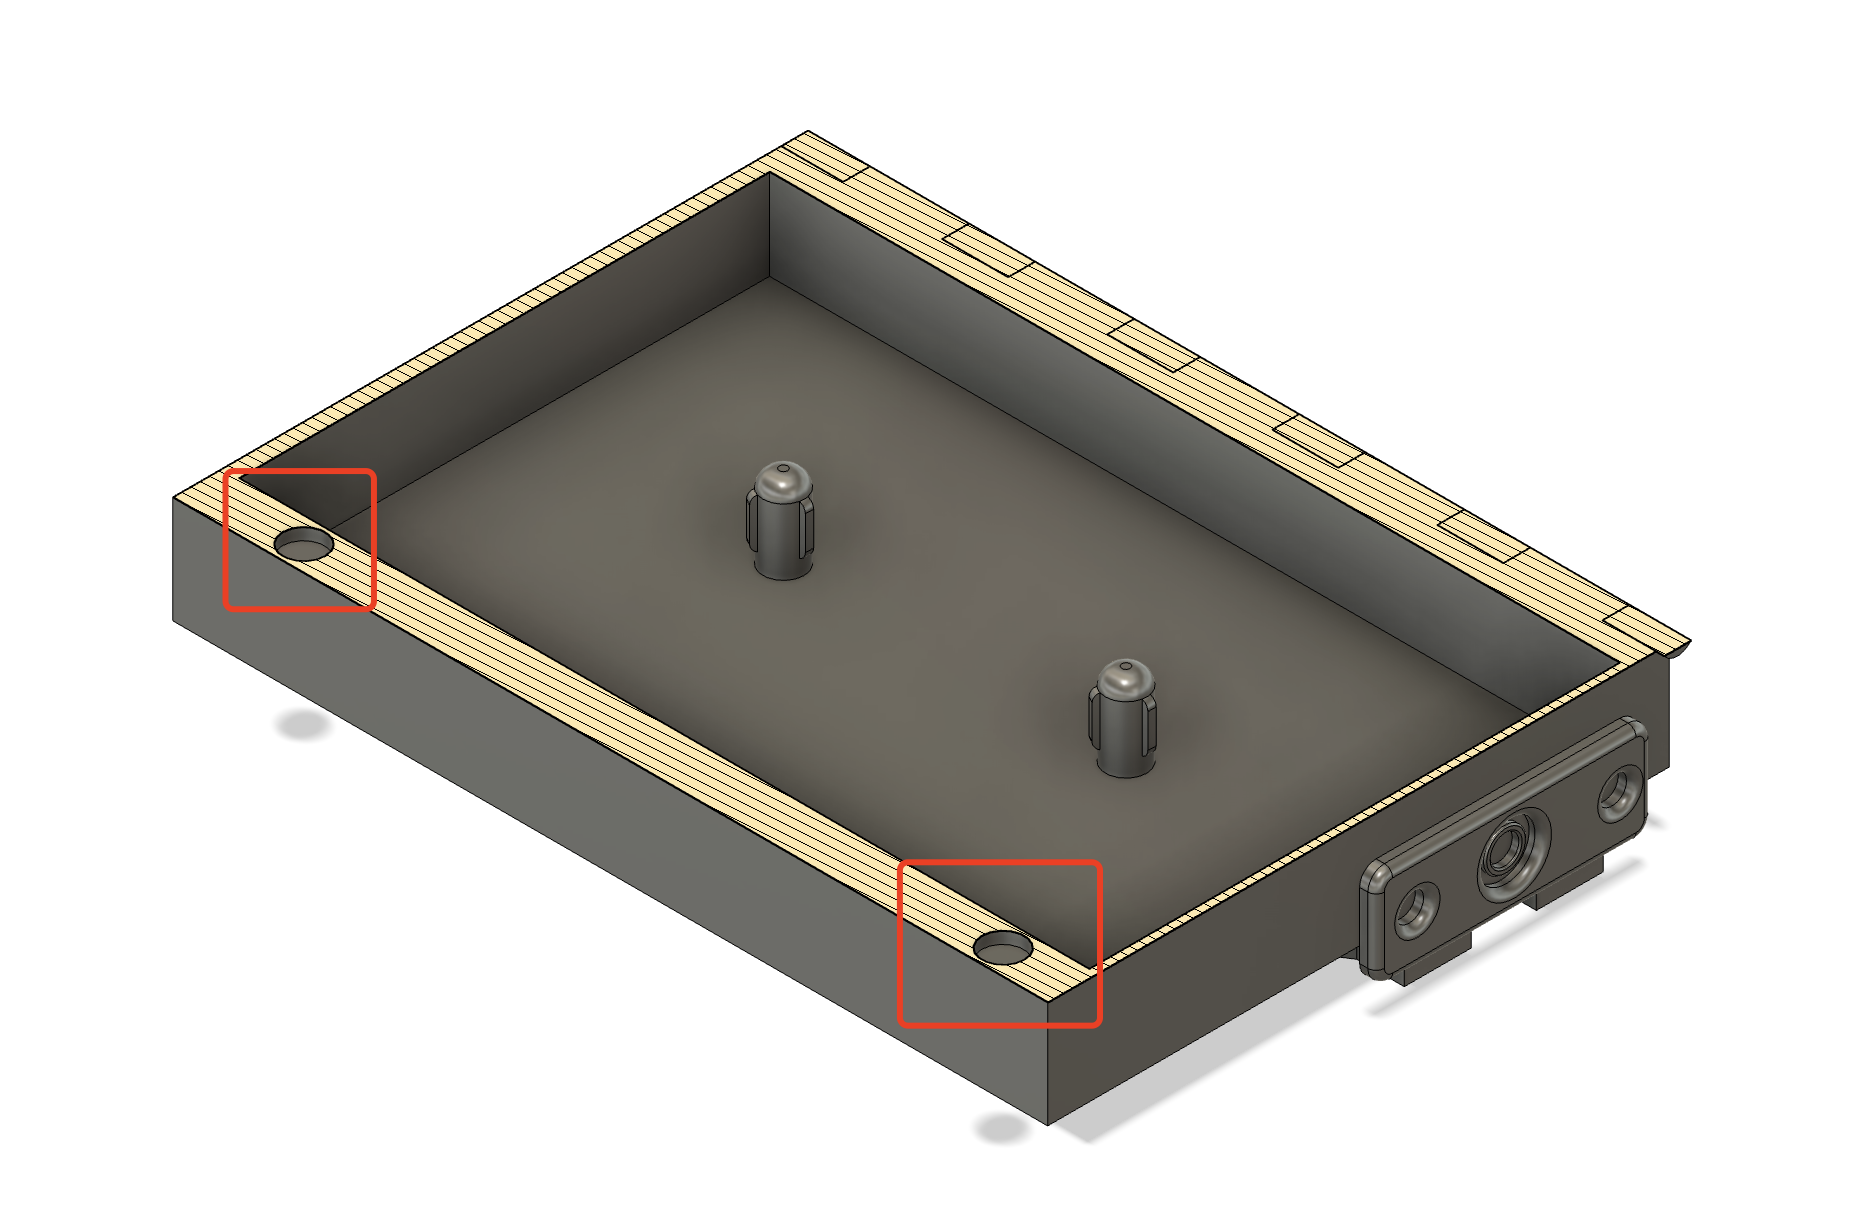
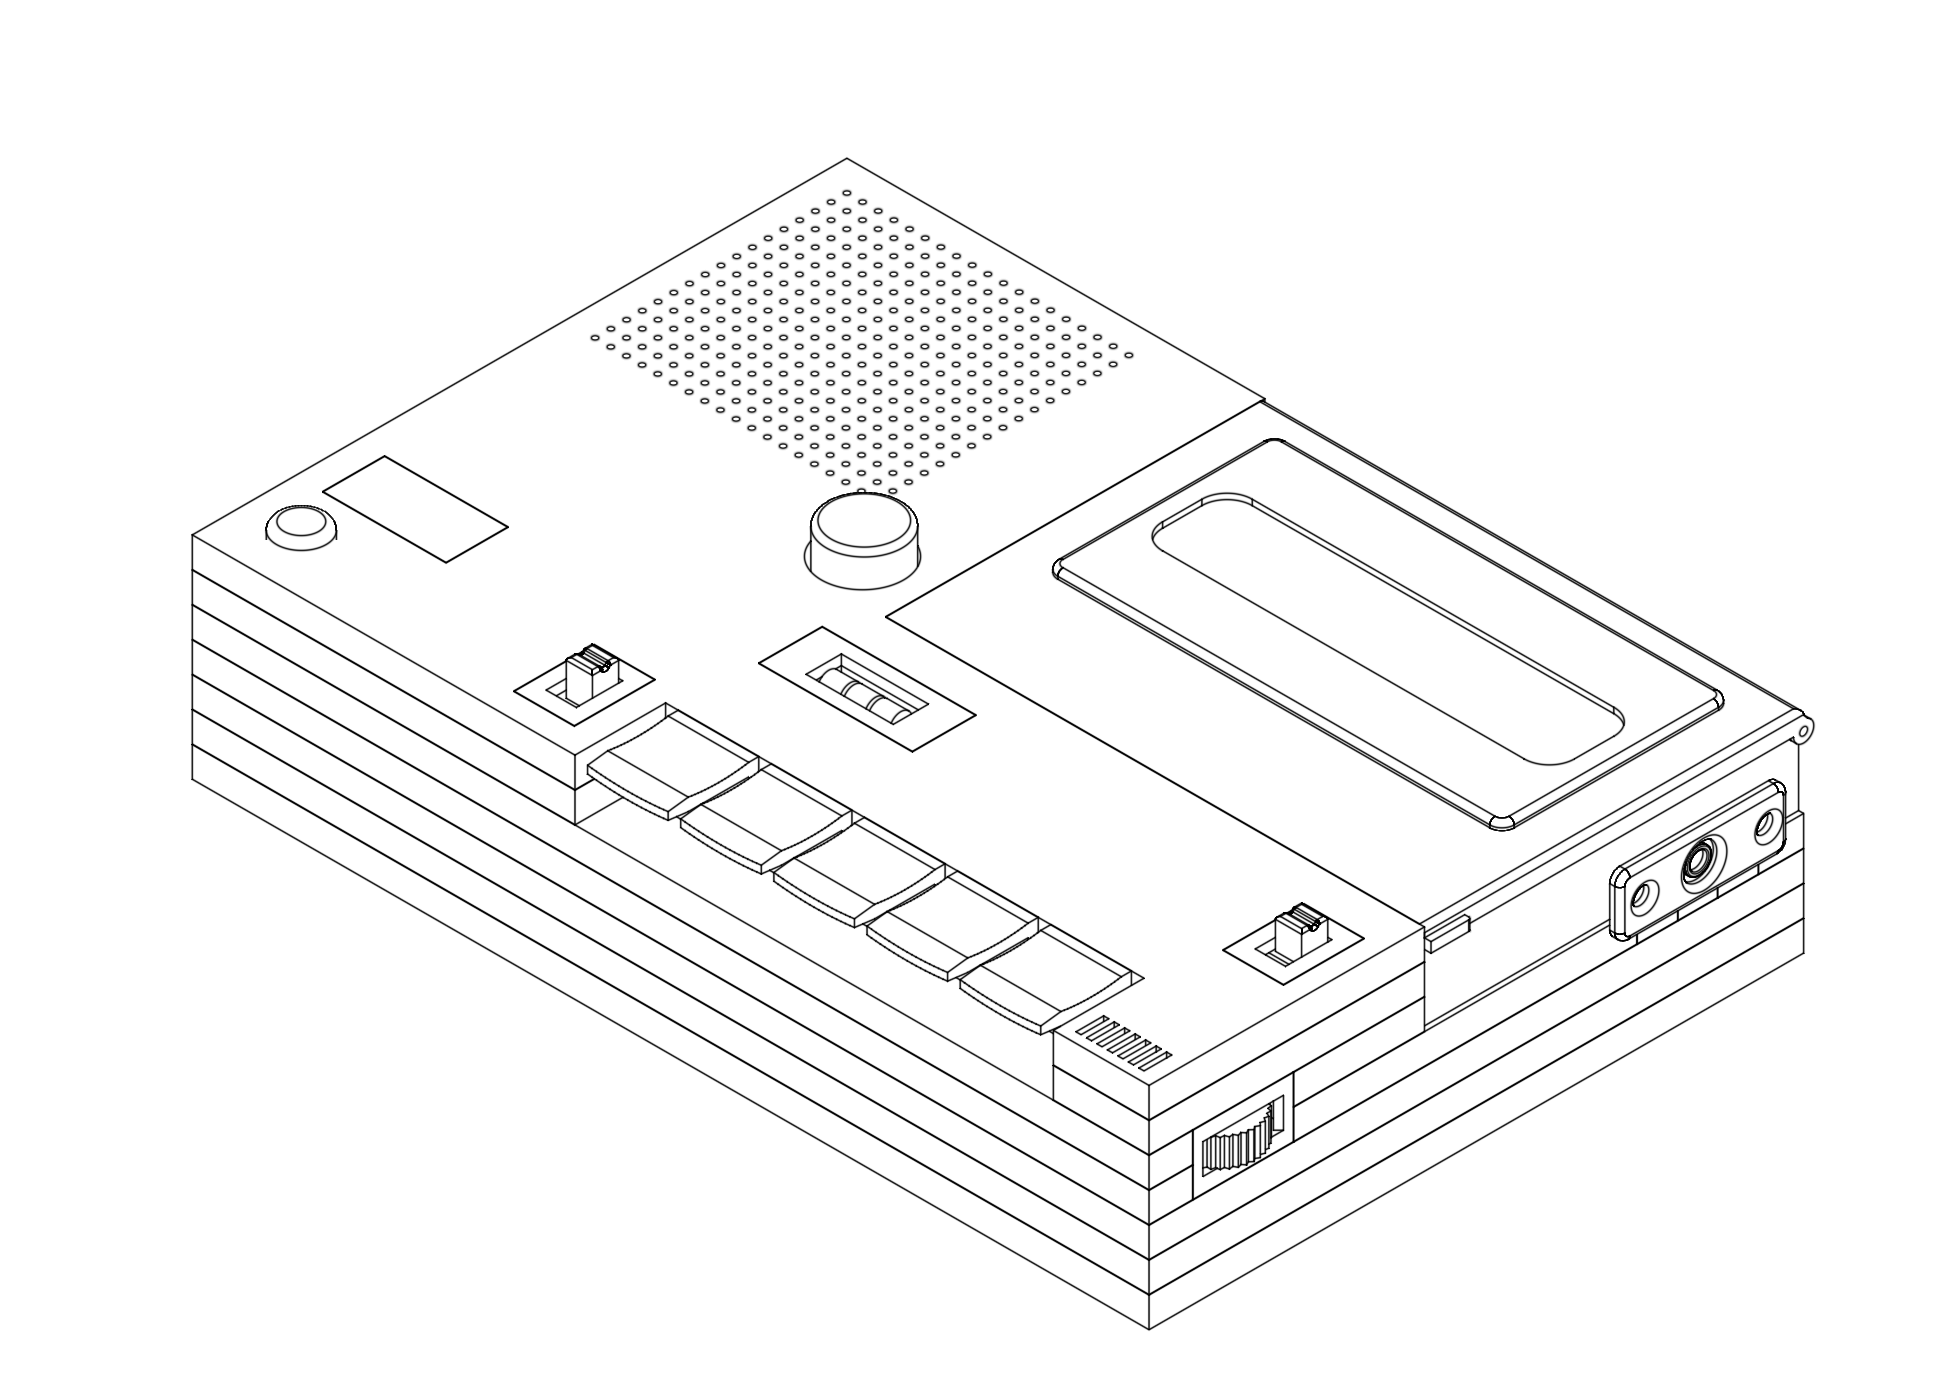
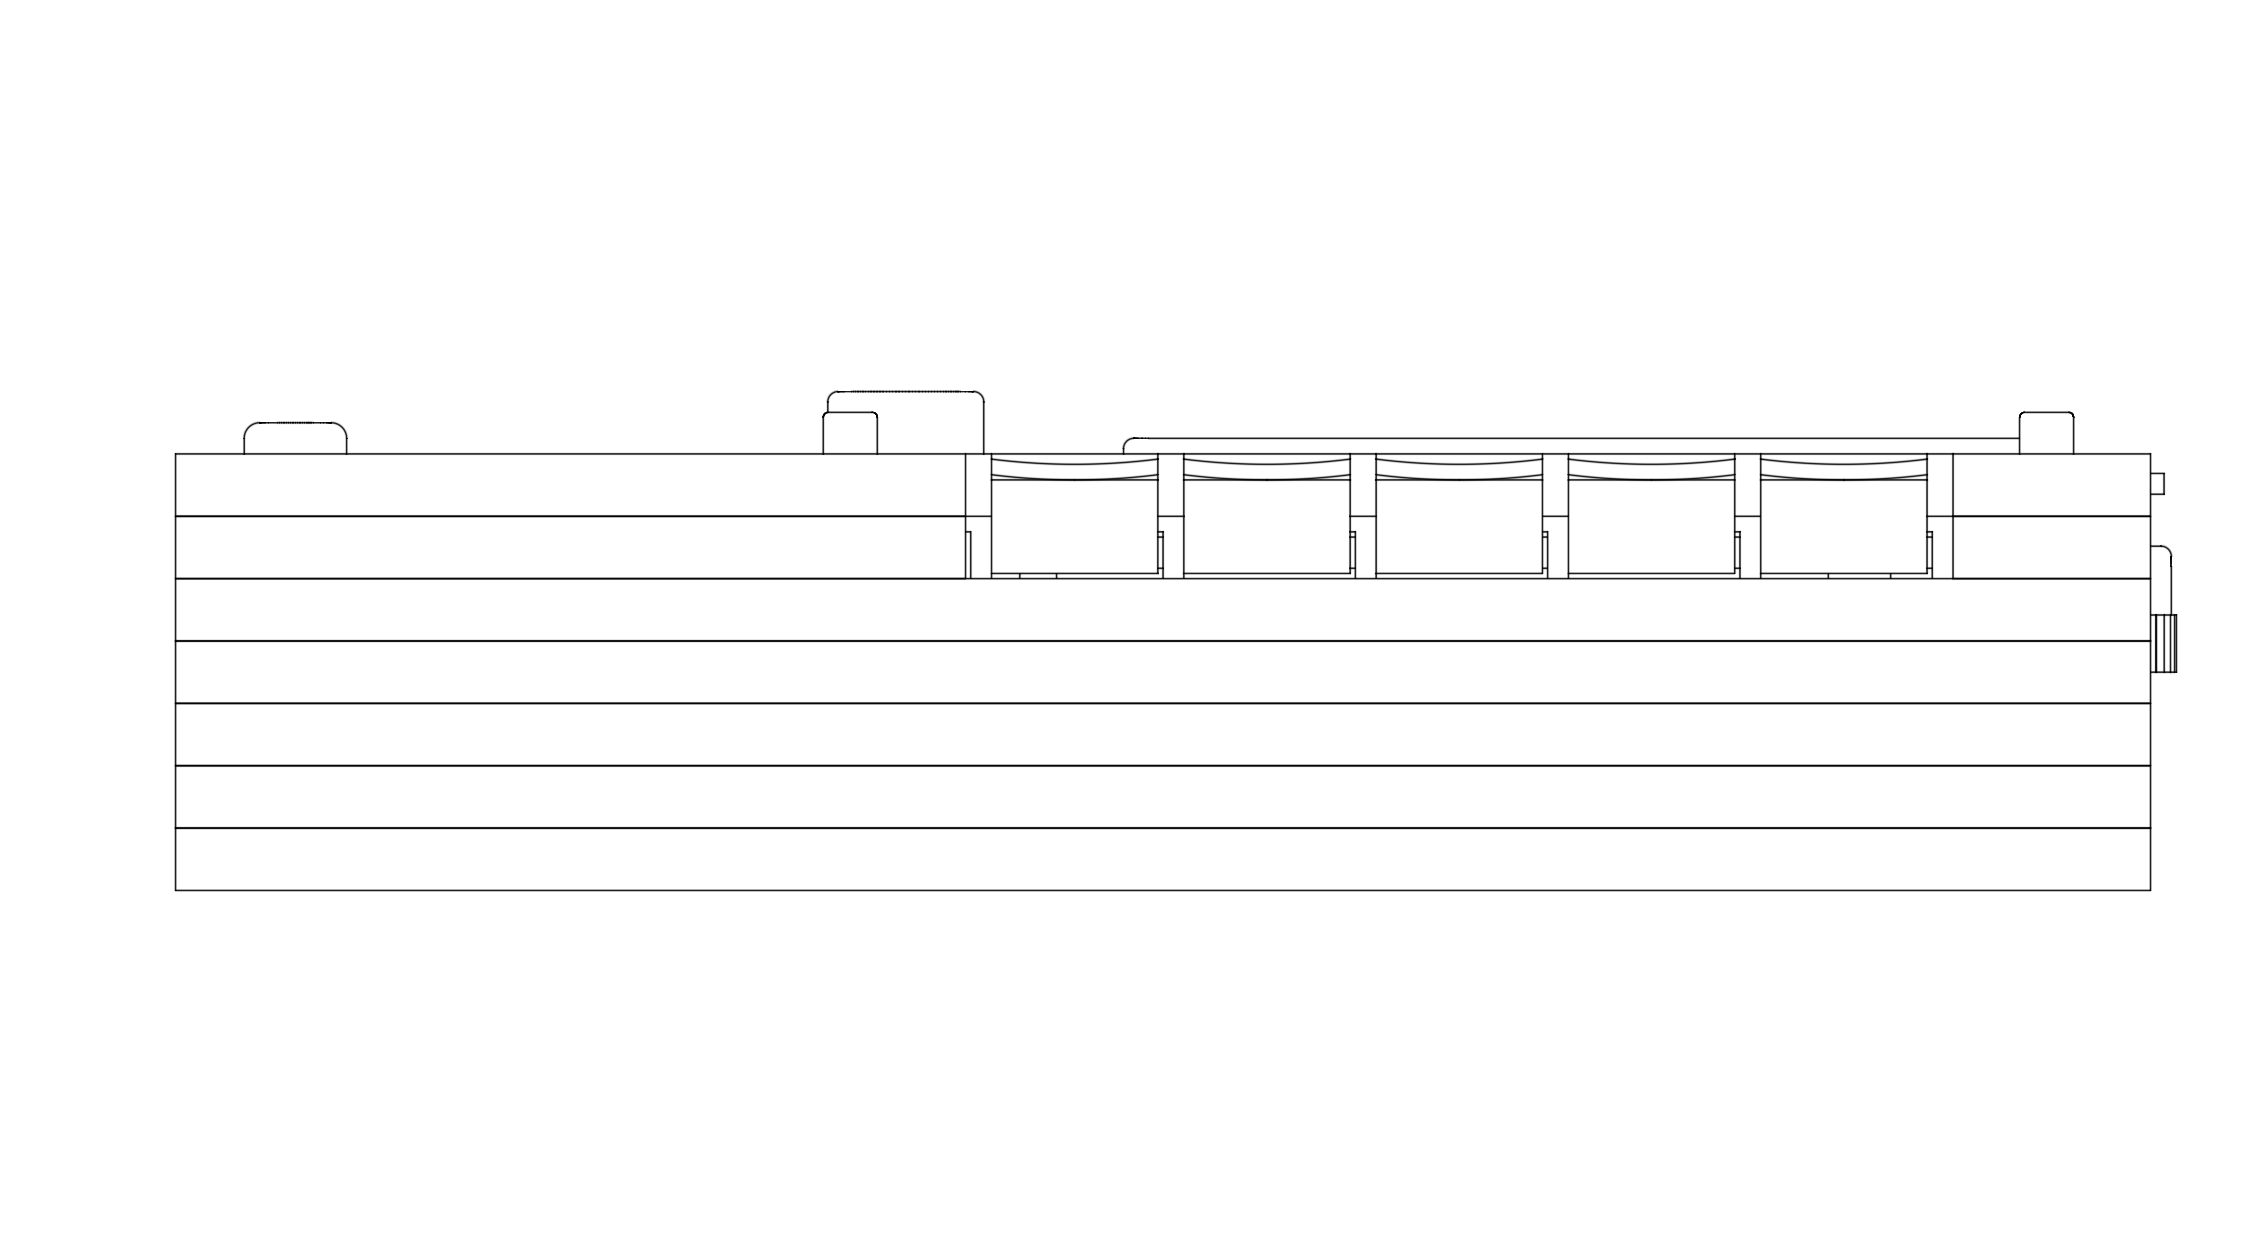
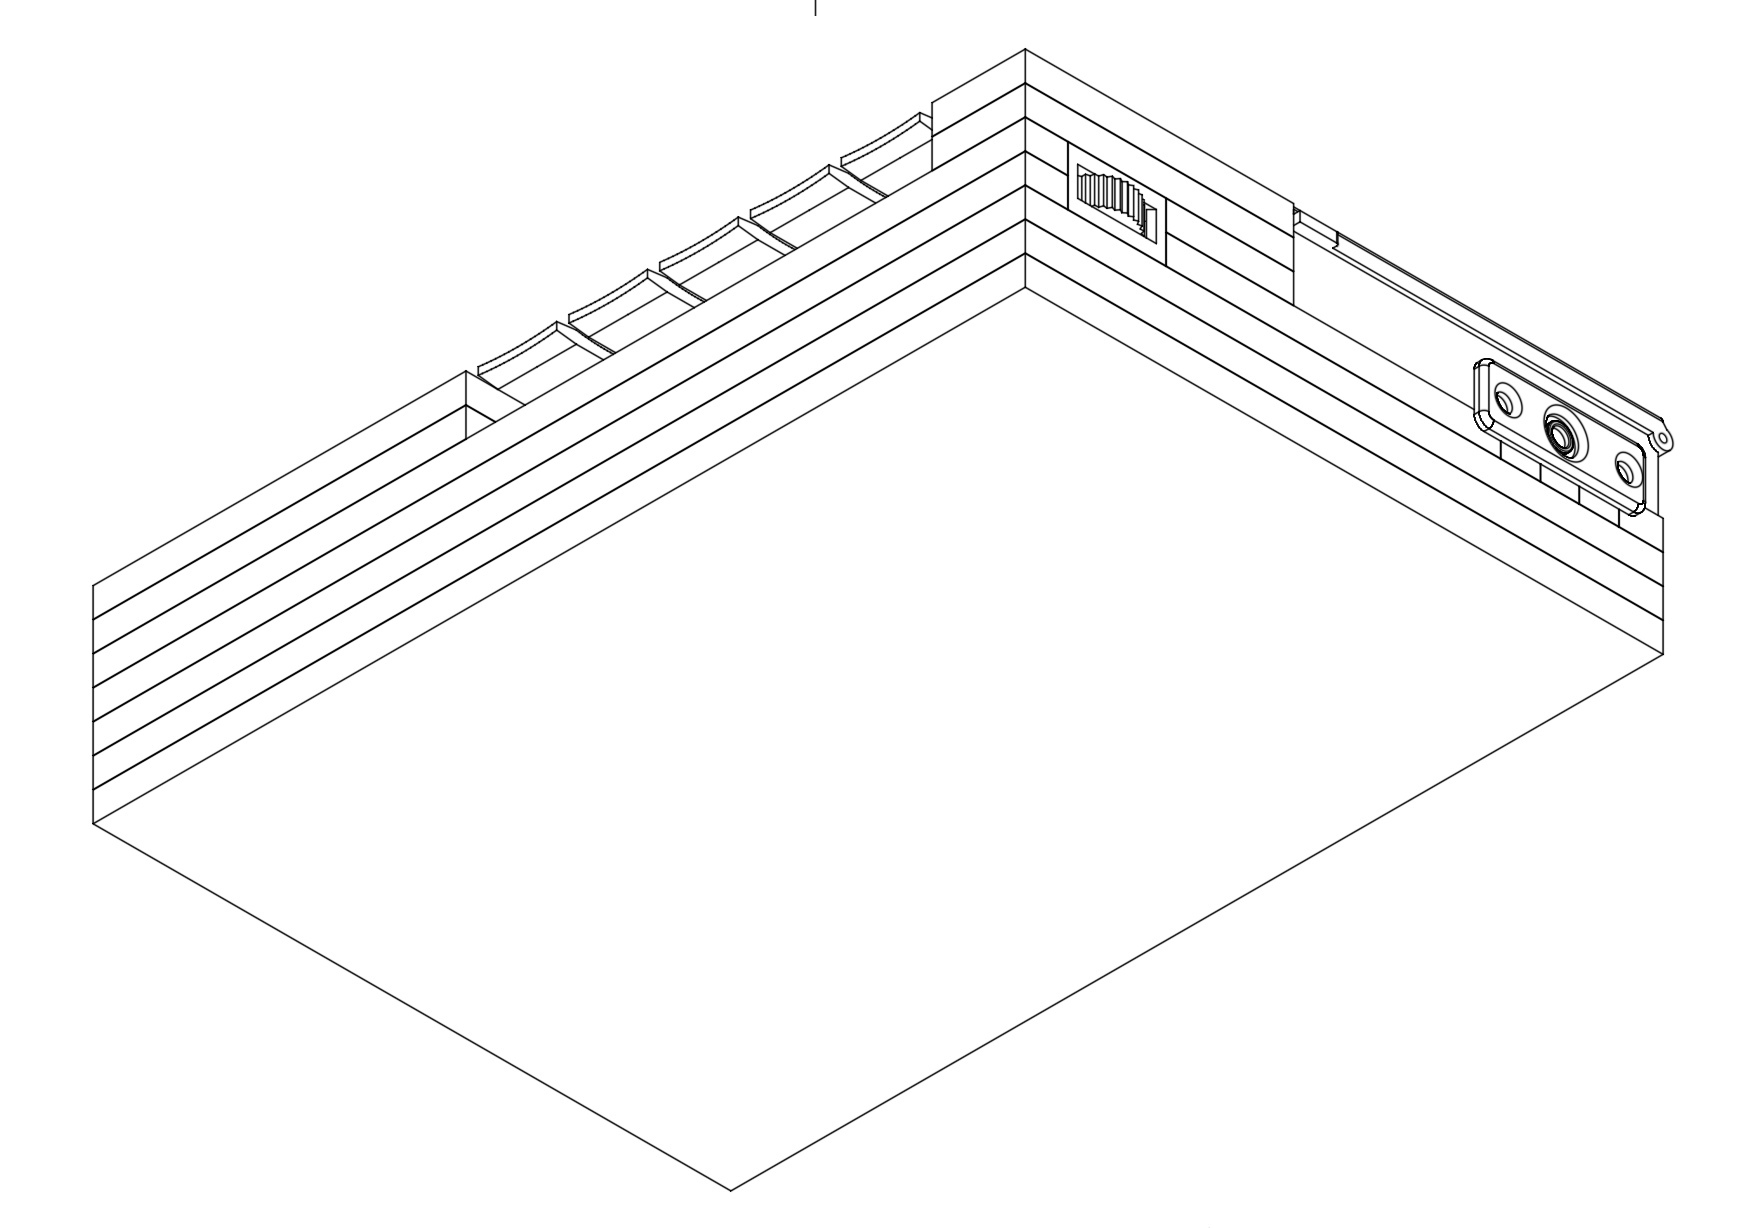
Laser Cut Layers
By accurately digging holes in each layer of wood, we reduce the use of screws and hold the pieces more securely.

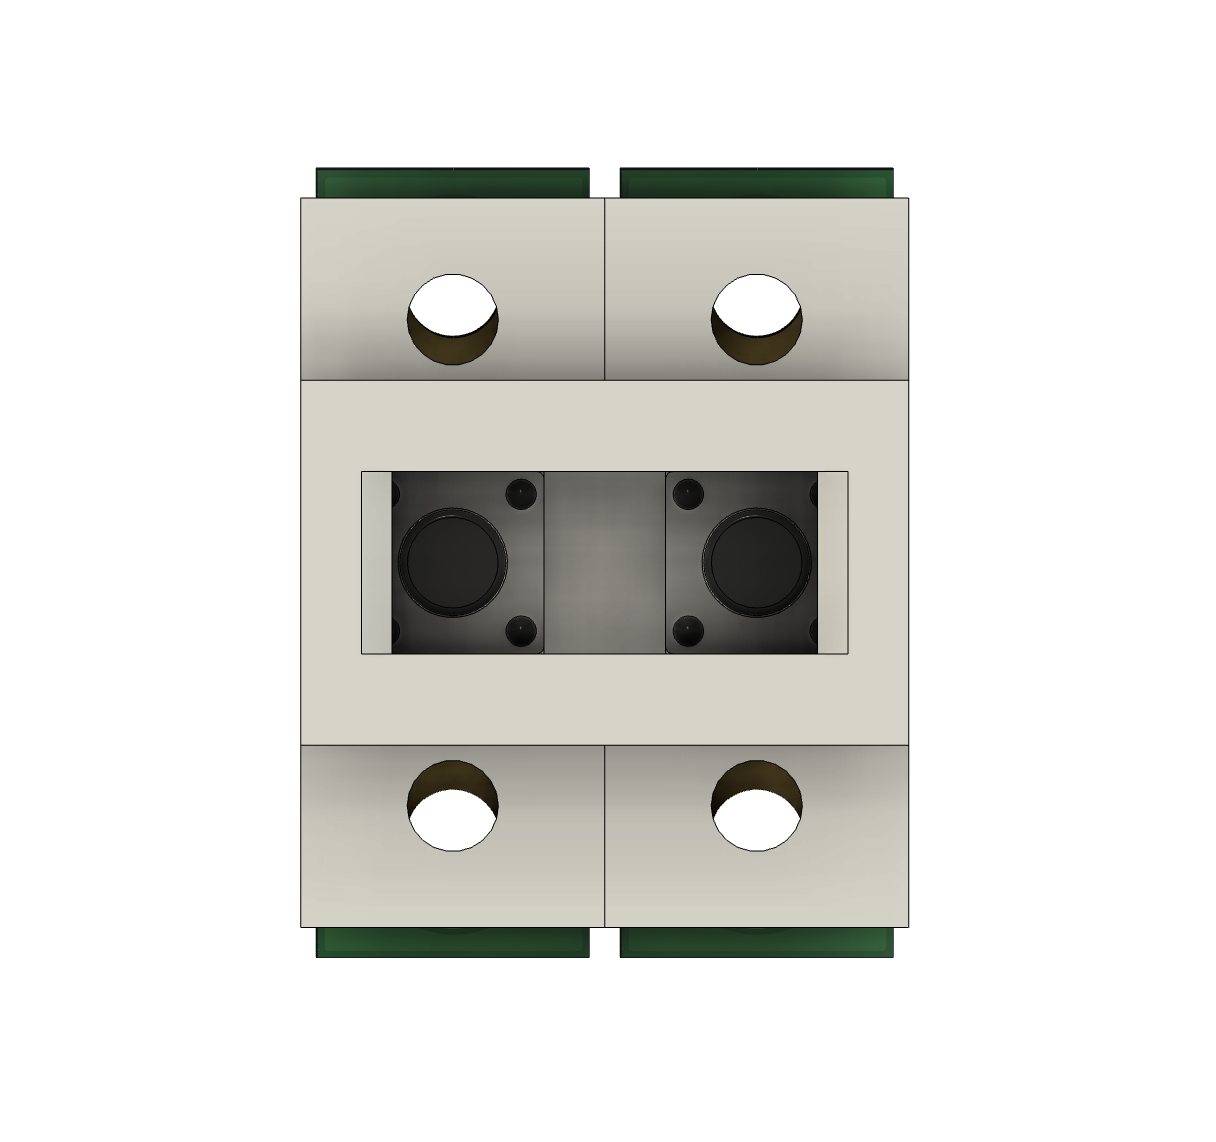
Additional Views
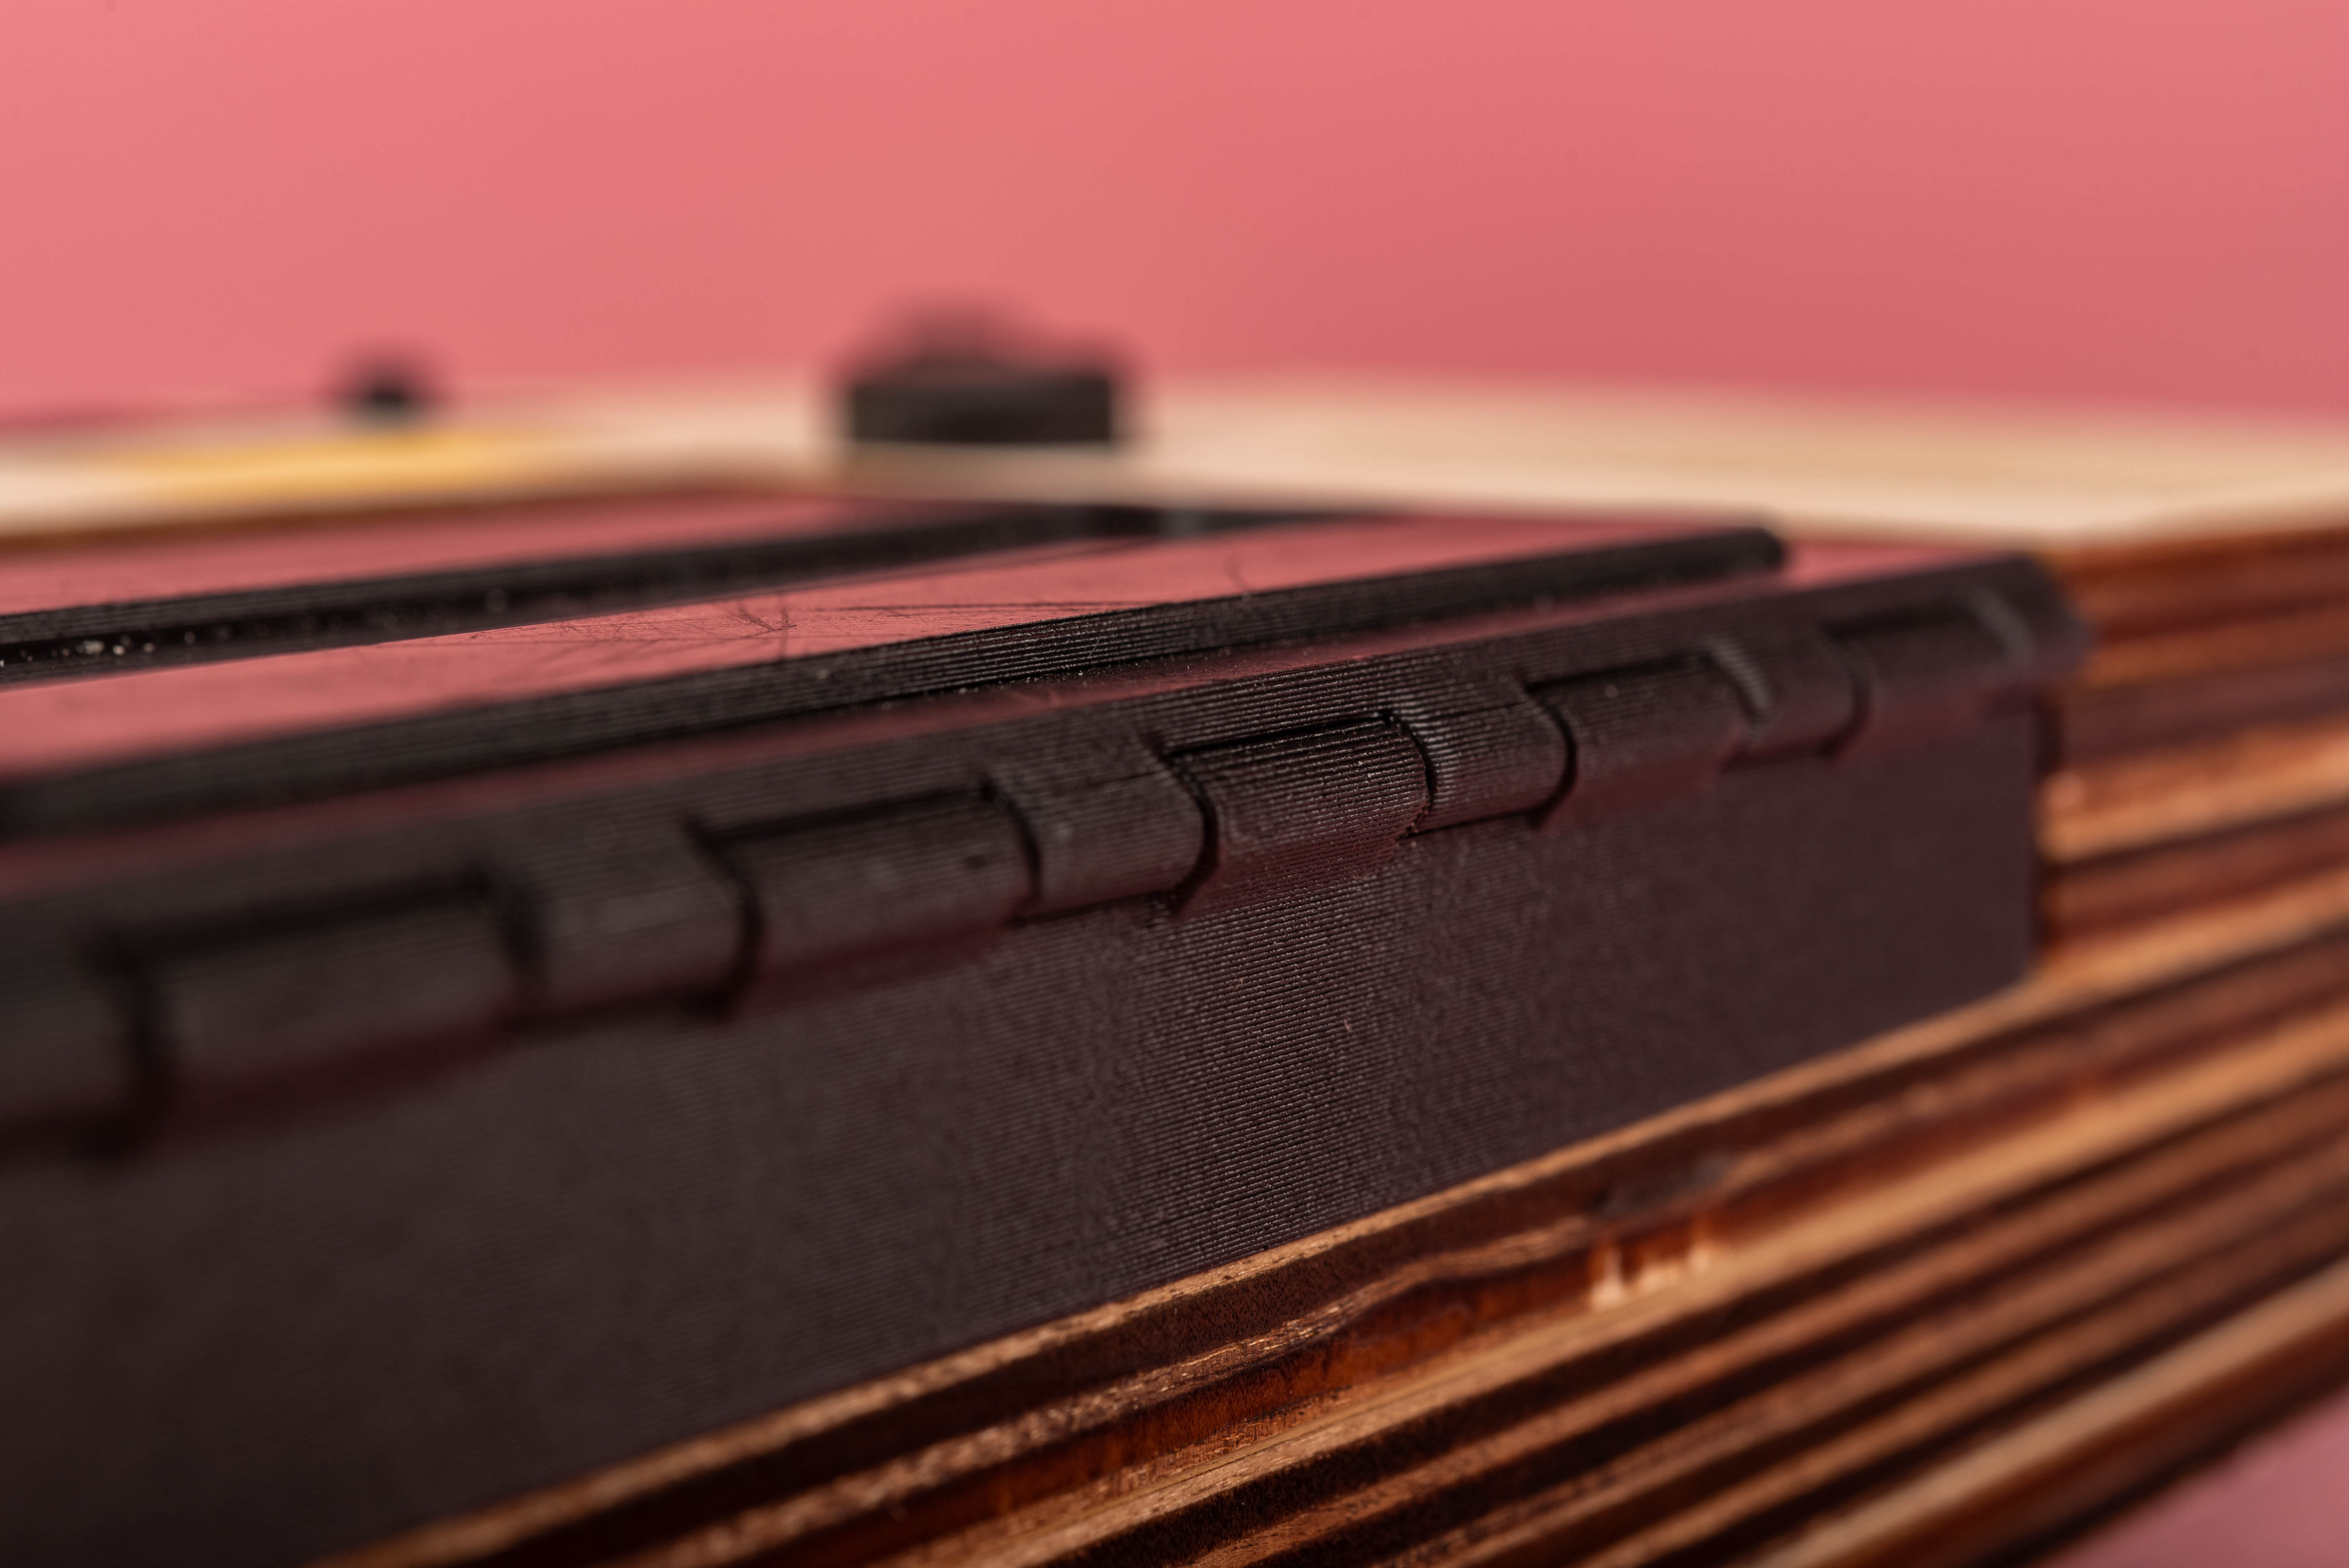
Closing Magnets System
Technical Specifications
Dimensions
- Width: 240mm
- Height: 180mm
- Depth: 80mm
Materials
- Wood: Natural oak for the main body
- Metal: Aluminum for structural components
- Plastic: ABS for buttons and controls
- Electronics: Custom PCB with Arduino Nano
Assembly Instructions
- Start with the base layer and secure it to the main body
- Install the magnetic components and tape mechanism
- Mount the lever system and volume control
- Attach the front panel with buttons and controls
- Connect the electronics and test all functions
Troubleshooting Guide
- Lever not returning: Check spring tension and alignment
- Volume control issues: Verify button connections and potentiometer
- Tape mechanism problems: Inspect magnetic components and alignment
- Power issues: Check battery connections and power supply
Final Fusion Prototype
Renderings
Resources
Technical Drawings
tc150_drawings.pdf3D Files
Sony_tc150.f3zReferences
Project Timeline
Phase 1: Research and Planning (Week 1-2)
- Study of original Sony TC-150 design
- Material selection and sourcing
- Initial sketches and measurements
Phase 2: Prototyping (Week 3-4)
- Cardboard prototype construction
- Testing of mechanical components
- Initial electronics integration
Phase 3: Development (Week 5-6)
- CAD modeling and refinement
- Laser cutting and assembly
- Component testing and adjustment
Phase 4: Final Assembly (Week 7-8)
- Final assembly and testing
- Quality control and adjustments
- Documentation and presentation preparation
Future Improvements
Technical Improvements
- Implement a more robust power management system
- Add Bluetooth connectivity for modern audio streaming
- Improve the tape mechanism's durability
- Enhance the speaker system quality
Design Improvements
- Refine the lever mechanism for smoother operation
- Add more customization options for the exterior finish
- Implement a modular design for easier maintenance
- Create additional accessory options
User Experience Improvements
- Add LED indicators for better status feedback
- Implement a digital display for track information
- Create a companion app for enhanced control
- Add recording quality presets